Go to.. Classroom...
Cloth Dollmaking for Everyone
© 1998, © 2012 Judi Dolls/Judi Ward
Taught by Judi Ward of Judi's Dolls
http://JudisDolls.com
…CHAPTER 2 …
Preparing your patterns for use;
both the patterns for this class, and other patterns too.
Techniques for using the patterns for ease in cutting and sewing.
All of the patterns will be included with this chapter too.
When you get a
pattern it is always so exciting, looking at the parts, “seeing” the doll in
your mind and deciding how you are going to make it. You want to cut that paper
and get started!!
The first thing you need to do is to RESIST the temptation to cut the pattern out. Don’t ever cut your original pattern for a doll or bear or actually any kind of craft pattern.
Why, you ask?
Because pattern parts for dolls and crafts are small. They get lost easily and because they are paper, they get damaged easily.
Many designers, myself included, make their patterns un-cutable for that very reason. We would spend a lot of time retracing lost and damaged parts for pattern customers. It happened to me right off the bat, when I started my pattern business about 35 years ago. I had a little doll and craft shop, and customers were always coming in asking if they could trace a part that they had lost. A few mail order customers also wrote, wanting the same thing. The handwriting was on the wall! Make the patterns so they have to be re-traced, by printing on both sides of the paper.
Even if you have a pattern that can be cut directly out, don’t cut it!
Get yourself a big envelope to keep the original and the re-traced and cut pieces together. (With the online patterns you can easily print one copy to keep and one copy to cut). Most patterns have additional information on the pages too. If you cut the parts out, they are separated from that additional information and you may miss an important aspect of making the doll.
If you don’t want to re-trace all of the pattern pieces, just print 2 copies of each sheet. Make 5 copies of the Multi Use sheets. Then you don’t have to re-trace anything, just add seam allowances and cut out.
Making photocopies is a good thing to do with printed patterns, so you don’t have to re-trace (once again if you download the pattern for this class you can easily print multiple copies). Remember though, don’t copy/print other designer’s patterns to sell, give away, or share with a class. That is copyright infringement, and deprives designers of their income, for the hours of hard work put in, to design and bring patterns to market for other dollmakers.
O.K. now you have the patterns printed out. You have many pages with the various patterns on them. It looks confusing and scary. All of the parts for Angelique have an A on them. Maria’s have an M. Susannah’s have an S. Jennifer’s have a J, and the Multi Use patterns are all marked MULTI.
The Angel gown is also used for the blouse slip for Maria. Maria’s skirt is used for petticoats for Susannah and Jennifer. Those parts and some others are marked Multi Use.
All of the clothes are actually interchangeable, but as we progress through the lessons, new skills will be added, and the clothes on each doll in the picture are based on teaching new skills and clothing types in a step by step manner.
Get 5 big envelopes. Put one doll’s name on each of them. Put Multi Use on 1 of them. The multi use envelope will have only the master multi use pattern in it when you are through.
Next, you need to add the seam allowances to all of the places that need them added.
If you have made/printed 2 copies of every page, (5 of the Multi Use pages) you can put one copy of each away in the correct envelopes.
Don’t panic at this huge pile. Simply follow along, one doll at a time. I wanted to give you plenty of time to prepare all of these patterns, before we did the actual dollmaking, that is why you are getting them all at once.
To add seam allowances, mark dots all around the lines, 1/4" away from the lines. If you make the dots about 1” apart you can connect them easily. Just like “connect the dots”. If you are good at eyeballing, simply draw all around the pieces where needed, about 1/4" away from the line.

Mark dots and then connect
them to add the 1/4" seam allowances.
***Angelique’s Pattern***
|
Angelique’s body pattern needs to be retraced, or simply cut out of the extra sheet you copied/printed. You don’t need to add seam allowances to her body pattern. Tape the A-B edges and the C-D edges together. Angelique’s pattern will be used as a draw around and sew, or will use the freezer paper method. Both will be taught in chapter 5. You don’t need to add seam allowances to the SANDAL SOLE pattern either. Simply re-trace it and/or cut it out. You do need to add 1/4" seam allowances to the GOWN pattern, (Multi Use) except at the edge marked “Place on fold”, and at the neck opening. Now add seam allowances to all edges
of the PANTALOONS, (Multi Use) except where marked “Place on fold”. |
Drawing of Angelique for the pattern envelope. . |
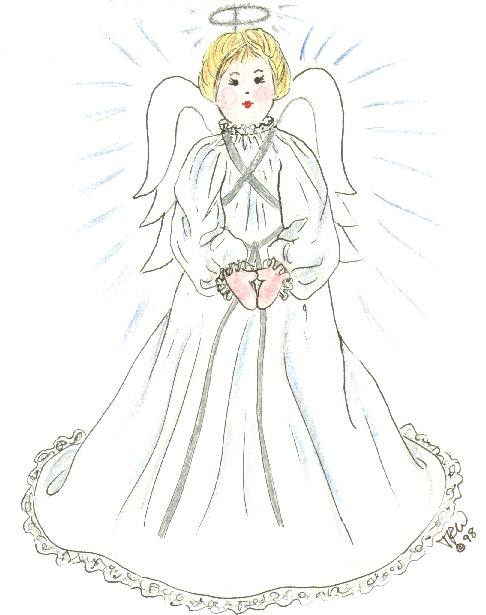
Add 1/4" to the WING pattern too, except where marked “Place on Fold”.
Cut out the GOWN, WINGS AND PANTALOONS patterns. Tape the A-B edges and the C-D edges of the GOWN together.
Put all of these pieces into Angelique’s envelope.
***Maria’s Pattern***
|
You don’t need to add seam allowances to the body, head, arms and legs for Maria either. She is also a draw around and sew, or freezer paper type doll. You do need to add seam allowances to her SHOES AND SKIRT WAISTBAND. The SKIRT is a dimensional measurement, on the Multi Page. It doesn’t need any extra added. Make a SKIRT pattern from a large piece of paper, like freezer paper or waxed paper, or from lightweight Pellon. To save paper make 1/2 of the pattern and place it on the fold of your fabric when you use it. 1/2 of the pattern will be 18” X 11”. Mark one of the 11” sides “Place On Fold”. Add seam allowances to the POCKET pattern. |
|
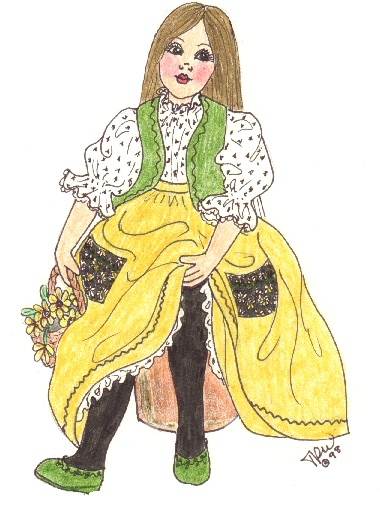
Maria’s VEST is designed to be made from felt. You don’t need to add seam allowances to it either.
Maria also uses the GOWN AND PANTALOONS pattern. You can just draw around the ones you made for Angelique…or… if you made the extra copies, add the seam allowances and cut them out. Note….The sleeves and lower edge of the gown are shorter for Maria. The GOWN is Maria’s slip/blouse, so be sure to make the pattern the shorter version.
Tape the A-B edges and the C-D edges of this shorter GOWN pattern together.
Maria also wears STOCKINGS, so she needs the STOCKING pattern too. If you are going to make the STOCKINGS from very stretchy fabric, like swimsuit fabric, you don’t need to add seam allowances. If you plan to use something like cotton knit T-shirt type fabric, add the 1/4" seam allowance, except where marked “Place on Fold”.
Put all of these pattern pieces into Maria’s envelope.
***Susannah’s Pattern***
|
Susannah’s ARM, LEG AND EAR patterns are draw around and sew or freezer paper type patterns. You don’t need to add seam allowances to them. Simply retrace them and cut out, or cut them from the extra sheet. Her BODY AND HEAD patterns need to have seam allowances added. Susannah needs the PANTALOONS, SHOES AND STOCKING patterns too. You can draw around the ones you have already made for the other dolls, or add the seam allowances to the parts on an extra Multi Page. She also needs the DRESS BODICE from
a Multi Page. Add seam allowances to the DRESS BODICE, everywhere except
where marked “Place on Fold”. |
|
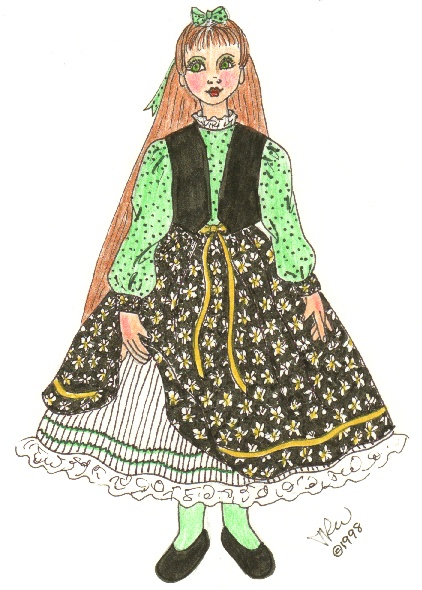
Susannah’s DRESS SLEEVE and SLEEVE CUFF are marked S, and need to have the seam allowances added too. Also cut another SKIRT pattern for Susannah. You will use the SKIRT pattern twice for Susannah’s outfit. Once as the SKIRT for the dress, and once as the PETTICOAT under the dress. Mark the SKIRT pattern SKIRT and PETTICOAT. Cut 1 on the fold for the SKIRT and 1 for the PETTICOAT. Cut another WAISTBAND pattern too, with seam allowances added.
Susannah’s VEST is designed to be made from felt, so you don’t have to add seam allowances to it.
Place all of Susannah’s pattern pieces in her envelope.
***Jennifer’s Pattern***
|
Jennifer is the most advanced doll to make, and has the most pieces. Just follow along slowly, step by step and you won’t get lost. Jennifer’s ARM, LEG, EAR and COLLAR patterns, and TOE TEMPLATE pattern are draw around and sew, or freezer paper patterns. Re-trace them or cut them from the extra copy you made. The BODY FRONT and BODY BACK patterns need to have the seam allowances added, as do the HEAD FRONT and HEAD BACK patterns. Cut all of the doll parts out. Cut out the darts in the BODY FRONT and BODY BACK that are marked “CUT OUT”. This will leave crescent shaped “holes” in the pattern pieces. I will explain this in chapter 7. It makes it much easier to accurately mark and sew darts within a piece. |
|
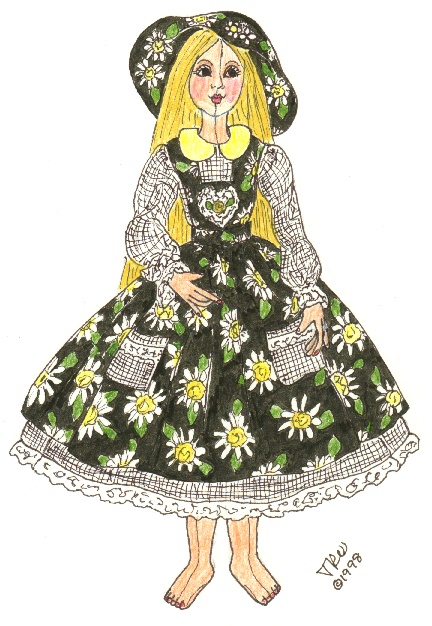
Jennifer uses the same BODICE pattern that Susannah uses. Copy Susannah’s pattern, or add the seam allowances to one on an extra Multi page. Ditto for the PANTALOONS, SKIRT, SKIRT WAISTBAND, STOCKINGS, and SHOES.
Jennifer uses the SKIRT pattern for a PETTICOAT and DRESS SKIRT just like Susannah does. You will need to make a skirt pattern for her envelope. Mark it DRESS SKIRT and PETTICOAT, Cut 1 on fold for each.
Jennifer’s SLEEVE pattern is the longer SLEEVE marked J. It needs seam allowances added all around.
Jennifer also has a PINAFORE. The SKIRT for the PINAFORE is dimensional. It is 11” X 17”, exactly the size of a piece of Ledger sized paper. If you have a piece of ledger sized paper just mark it PINAFORE SKIRT Cut 1.
Otherwise make the PINAFORE SKIRT PATTERN from other paper or pellon.
The PINAFORE uses the POCKET pattern just like Maria’s. Copy Maria’s pattern from her envelope, or add the seam allowances to the one on an extra Multi sheet.
You need to add the seam allowances to the PINAFORE BIB and STRAPS too. Do not add seam allowances where the BIB is marked “Place on Fold”.
The PICTURE HAT can of course be worn by any of the dolls,
but it is with Jennifer’s pattern, and marked with a J. Add seam allowances
around all of the edges, including the inner circle of the brim.
Cut out all of the pieces for Jennifer and put them in her envelope.
Now you have all of the patterns ready for use. Make sure you marked all of them with what they are, how many to cut etc. One real advantage of making the extra copies on a copy machine is that it saves you from having to re-write everything.
When we start to make the dolls, some of parts will be done over on Freezer paper, but don’t worry about it right now.
You will have a High Heel and Formal Gown version for Jennifer coming in Chapter 9. Jennifer makes up beautifully as a high heel doll too. In Chapter 9 I will teach the HIGH HEEL leg and foot. You will also get the pattern for the FORMAL GOWN version of the DRESS in chapter 9.
I was going to include it with all of the rest of the patterns, but decided you have probably had you fill of preparing patterns for a while!
Normally, you wouldn’t be preparing so many patterns at
once, so it wouldn’t be such a big job.
This is a big class, with lots of patterns so you are getting LOTS of practice
in pattern preparation!
Faces for each doll are included with the patterns. You don’t need to worry about them right now. I will be teaching different ways to get them to your fabric as we go along.
When you are using other patterns, whether they are off of the computer, purchased from a store or by mail, treat them the same way. Always keep the original pattern un-cut and intact. Store it and the re-traced or copied pieces in a well-marked envelope. If there is a picture with the pattern, make a copy of it and glue it to the front of the envelope too.
Let’s talk about sizing patterns up and down. As you have undoubtedly noticed, LOL, none of the patterns have the seam allowances on them. That is because when you change the size of a pattern piece, the seam allowance changes too. Most people don’t think of that when they change a pattern’s size. If a pattern was for a 20” doll, with 1/4" seam allowances included, and you reduce it to make a 10” doll, the seam allowances would only be 1/8"! Too small for most of us to handle, and we wouldn’t remember the smaller size allowance anyway. Off we’d go on our merry way, sewing 1/4" seam allowances, and the doll would end up very skinny!
Whenever you choose to change the size of a pattern with seam allowances included, you need to cut the seam allowances off, before changing the size. After you have changed the size, add the correct size seam allowances back on.
Many dollmakers love to change the size of the doll patterns they buy. It adds variety to your dollmaking, and is lots of fun. If you do it for your own use, you are not breaking any copyright laws. If you change the size of a pattern and then call it your own design, because it is smaller, you are breaking copyright laws.
Let’s talk a little bit more about Copyright Laws.
Newcomers to doll making always wonder if they can make dolls for sale, how they should mark them etc.
Most (but not all) designers will be happy for you to make dolls from their patterns for sale. If it doesn’t say that you can make dolls for sale from the pattern, on the pattern somewhere, many designers will give you permission to do so, if you contact them. Some will request pictures of your work, before giving permission. They don’t want poorly made dolls out there with their names on them as the designer!
The correct way to label them is with your name as the Dollmaker, and give credit for the pattern to the Designer. Even if you made changes to the pattern, it started as a Design from someone else. The only time you can legally call a design your own, is if you start with blank paper, a pencil and an idea.
One idea for a label on a doll for sale would be for instance.
|
Jennifer From a pattern designed by Judi Ward of Judi’s Dolls. |
Another label, for a doll that you did a lot of custom dressing and artistic extras on would be.
|
Jennifer |
I have heard, but don’t know for a fact, that some of the big companies like Disney, licenses patterns for their characters, but will actually confiscate your dolls made from them if they see the dolls at a show.
Some designers will put a limit on how many dolls you can make for sale from their patterns.
In a nutshell, it is best to get written permission to make and sell dolls made from other designer’s patterns, even if it says on the pattern that you can do so.
You have permission to make the dolls in this class for sale if you wish to, as long as they are labeled correctly, made on a one at a time basis, in a home based setting.
When permission is given to make dolls from another designers patterns, that permission is for making the dolls on a one at a time basis, by yourself. It is not permission to set up a little industry with several people working on the dolls. Making dolls from someone else’s patterns, in a factory like setting is not what giving permission covers.
Well, your homework is cut out for you with this chapter. Go at it slowly and carefully. Don’t get frustrated with all there is. Just go a step at a time and put parts away in the envelopes, so they don’t get all mixed up.
Remember, if you mess a part up, you always have your masters to go back to.
Don’t worry about the extra faces on any page. I will be showing you some things in later chapters for them.
You will want to have your sewing machine all primed for the next chapter. There will be some sewing practice to do on paper and on fabric scraps.
Also have your favorite hand sewing needle ready, and some fabric scraps, stuffing and Metrosene thread, so you can learn and practice the Ladder stitch.
“See” you in a few days!
Judi
Go to.. Classroom...
Copyright Notice: All pages and graphics are copyrighted by the Internet Visions Company and/or Judi Ward. You may print these out for the use of the class only. All other uses or distributions are forbidden.
Crafty College and Doll
Net are Divisions of
the Internet
Visions Company.
© 1998-2017, Internet
Visions Co. All rights reserved.
All trademarks are owned by Internet Visions Company.
http://JudisDolls.com http://DollNetMarket.com