Ó 2000 Judi Ward -Judis Dolls
Attaching the
legs and arms to the body.
Now lets put the legs on***
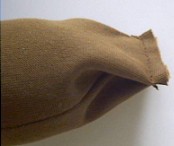
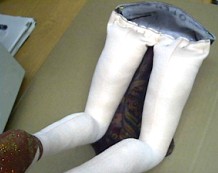 Legs pinned on, knees to chest. bottom. |
 Sew the leg tops to the body. Note the overlap in the middle. |
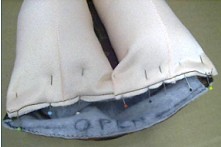
20) Now, fold the lower body back edge over the machine sewn edge, and pin in place.
21) Hand stitch the lower body back edge neatly all along the edge, closing the bottom of the body.
This whole edge will be covered with lace to simulate panty lace, so if your hand stitching isnt perfect, it wont show at all. I usually do a ladder stitch here, but have done a small whip stitch. Remember, it wont show.
 The back edge all pinned in. |
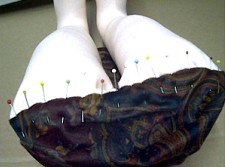
 Remember the dark skinned doll with the red body that I am doing too? Shes back. |
Here they are with the back edge all sewn down. I used a small whip stitch. Note the loose area at the top of the legs. It has to be unstuffed there or your Milli wont sit right.
Here we are ready to have
our bodies stuffed.
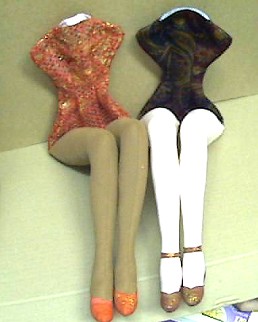
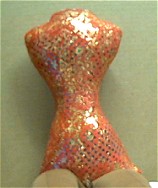
Check out those gams! This is one of
those dolls that looks good even unfinished!
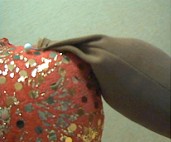
Push stuffing out into the rounded shoulders till they are hard! It will take way more stuffing than you imagine to make them hard.
NOTE>>>You will be amazed at how much stuffing you can add up in the top while you are closing the opening.
I know I am repeating myself, but I just can not stress too much the need for this body to be REALLY firm and full. There is a lot depending on it! Of course, there is a place where it is too much, like if the stitching starts to come loose!
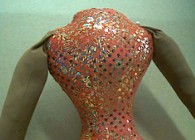
 Front view of the stuffed body. *Note the curved top* |
 Side view of the stuffed body. |
The body is ready for the arms now. The stuffing in the arms has probably "puffed" up while the arms have been waiting. Push it back down hard so you have about 1 1/2" of empty space.
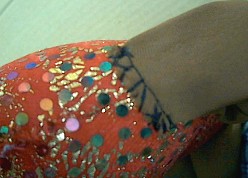
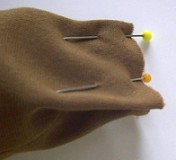 Arm top pleated in and pinned. |
 Arm top sewn across. |
Personal note>>>About those mis-matched pins! Many of you are wondering why I have so many different pins! And none of those great, flower topped ones! Well, I was "willed" hundreds of thousands of pins a few years ago, and I am determined to use them up. I actually get excited when one seems dull and I can throw it away!
I never pick them up when they fall on the ground either. I just vacuum them up.
Thank goodness for a Rainbow vacuum. No impeller for them to get stuck in!
Be sure to have the hands facing
the correct direction! Thumbs to the front. Sit back on your hands to see
how your hands would be. Whip stitch them in place. It wont show.
 One arm pinned in place. |
 Both arms pinned in place. |
Note how the arm tops drape over the shoulders. The edge of the shoulder plate will be pulled down tight to the stuffed part of the arms and the unstuffed part will be under the shoulder plate when we are done.
The arm top whip stitched on.
See, I told you it could be kinda sloppy here!
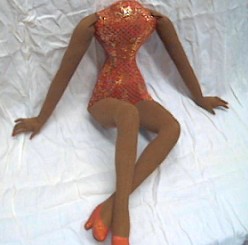 Sittin Pretty. |
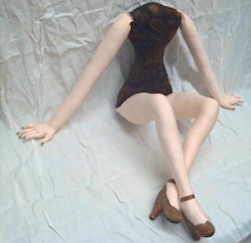 Sittin Pretty. |
Notice that even though the dolls arent finished, their hands are kept in form and nicely shaped. Try to do that as you are working with your doll. It is so much nicer to see the hands posed, than to have those fingers going every which way as you work. Often, pretty hands make or break a dolls looks.
Get in the habit of keeping the hands nice all the time you are working. They will be an inspiration for you as you are dealing with things in dollmaking that may not be quite so much fun.
I posed the bodies on some crinkle cloth because they are designed to sit sort of back on their hands, on a bed or sofa and they slip on a slick surface.
Well, now you have the legs, arms, body, fingernails and base shoe color done on your doll.
In the next chapter, we will make and attach the shoulder plate, including stuffing the "boobs" and doing the clay in the neck. When chapter 5 is done
" Milli will be waiting for her head.
Why do I do the head last you ask .Well after you have done all this other work, you will be more inclined to make a second head, just in case you mess up the first one, so your doll will be finished! No one would want to leave that body assembly sitting around headless!
Just for fun Two finished heads.
The one with the tattoo on her cheek got the tattoo to cover up a tiny paint mark. I love the tattoo! May do it on purpose for a doll.
The one with the LONG black and gold eyelashes was used as a needle felted, hair demo doll for the Cloth Doll Magazine. She was not finished at that time.
In fact, she had painted eyelids then rather than applied ones and she didnt have those Wonderful Eyelashes!
When we get to the head chapter, I will show several more "heads shots". All done with the templates you have but all finished a little differently. Even with templates there is a huge variety of "looks".

|

|
Dolly Hugs, Judi
Go to... ~ Classroom ~ Pattern ~
Copyright
Notice: All pages and graphics are copyrighted
by the Internet Visions Company and/or instructor.
You may print these out for the use of the class only. All
other uses or distributions are forbidden.
Crafty College and Doll Net are divisions of the Internet Visions Company.
© 1997-2003, Internet Visions Co. All rights reserved.