Ó 2000 Judi Ward -Judis Dolls
Attaching the shoulder plate to the body and stuffing the boobs.
24. The shoulder plate is sewn on from in front of one arm, securing the sewing very well there by sewing in place, then over the top of that arm, down the back to the V and back up to the other arm, over that arm and tightly secured at the front of the second arm.
I sew the shoulder plate on with a ladder stitch, making sure each stitch in the shoulder plate is into the top layer, which makes the seamed edge go underneath and makes such a nice finish .but .Guess what?!?! If you want to sew this on with a whip stitch, you can. It is not going to show. The whole edge will be covered with lace and/or trim.
I do think it is easier with the ladder stitch though. I personally find it hard to go through the torso fabric and shoulder plate fabric at once.
When I ladder stitch, I always use a quadruple thread. The thread doesnt show and the quadruple thread doesnt break while sewing.
I pull off about 2 yards of thread. Put both cut ends through the eye of the needle and then pull the ends even with the folded end. Tie a knot and you are ready to sew.
Remember, the ladder stitch enters and exits on the right side for EACH stitch. I will show a picture of each stitch, one in the shoulder plate and one in the torso, then a picture of several stitches before pulling them tight. If you take 3 or 4 stitches before pulling them really tight, you will have a nicer ladder stitch.
 Sew several times here to start. |
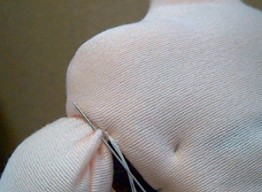 The first stitch. Pull it up, but not real tight. |
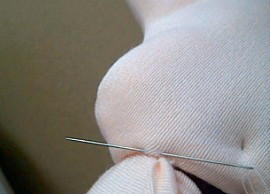 The next stitch. |
 Several stitches before pulling tight. |
25. Continue all the rest of the way, making about 4 stitches and then pulling them tight. Pull near the stitches, not on the needle. The thread will often break if you pull clear back at the needle.
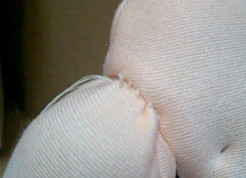
 A few more stitches, before pulling tight. |
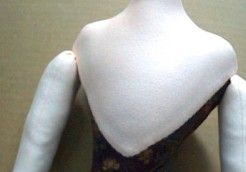 All sewn on in the back and over the shoulders. |
Poor
Milli', she still had "baggy Boobs!
But we will remedy that now.
Take the pin out of the front.
Now, stuff the boobs through the slits in the back. Force the stuffing out into the
fronts (the gathered edges) first, then bring the stuffing up farther, and shape the
boobs so they have the proper curve. Dont stuff all the way up into the shoulder area, and dont stuff in the center. We will needle sculpt the "cleavage" after the center of the boobs are stitched down.
I will try to make the photo so it shows the shading of the curves. The hardest part about stuffing the boobs is keeping the stuffing out in front, and shaping it in a curve from the center towards the shoulders. Also, knowing when to stop!
You dont have to close the slits. When the trims are on the bodice, they will be held
down and together plenty. I promise.
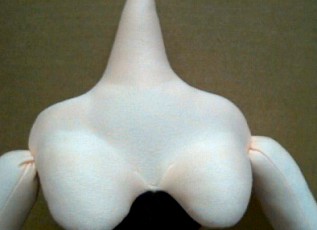
Pull down hard in the center front to "test" the shape and the curve. When it is nice,
Pin it down and then stitch the center front down very firmly. ONLY the center! Dont stitch all around the boobs.
To sculpt the "cleavage", first be sure the center is sewn down firmly and then bring
your needle out slightly to one side of the curve of the boob, about 3/4" up, and then back in at the center. Then out at the curve of the other boob, about 3/4" up and back to the center. Take a few more stitches in the center to anchor the stitching.
This will be shown in pictures for clarity. Sometimes the words are sooooo confusing.
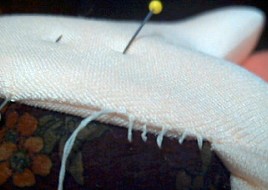
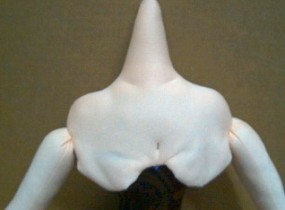
 The center pinned down to check The progress of the boob stuffing. Notice how the stuffing curves away from the center . |
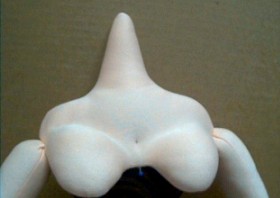
 The center sewn down and the first needle sculpture stitch done. The second stitch is started. |
This is easy. Basically you are just making a V between the boobs.
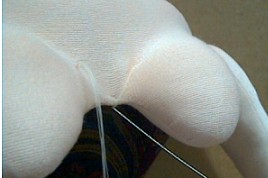
The sculpting stitches are done and the thread is sewn a few more times right in the center to anchor the stitches. Then "lose the ends" Remember, you bring your needle and thread out a little ways from the last stitch, clip the thread close to the fabric and lift the fabric with the needle point to "lose the ends".
You can still add more stuffing through the slits if you think it is needed.
When we do the blush on the face, we will blush the cleavage too. You can also draw with a colored pencil a little darker than your fabric, right on the sculpting stitches to make the "cleavage" show more Hey, Ill do that right now and take another picture.
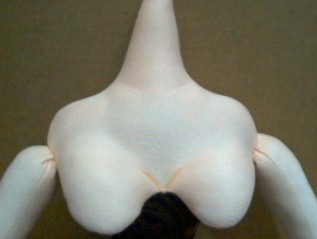
The "cleavage" darkened with colored
pencil.
The final shot for this chapter .A line up of Millis at this level of finish, taken in a class here at the Castle. Fun!
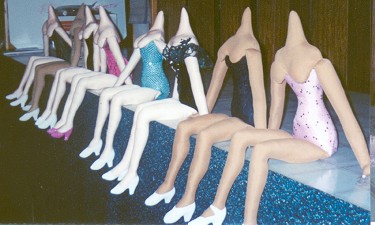
See you in 3 days for the .HEAD .
Now we are getting really serious here J
Have your stuffing skills polished to perfection.
Get your small piece of oven baked clay ready.
Get your TINY paintbrush and acrylic paints ready.
Have your colored pencils ready for drawing around templates and for shading.
Be ready to learn a way to "design" eyelids to fit any doll. NOTE>>>We will apply the eyelashes after the head and hair are on.
Have your hair ready (either a mohair strip about 1 yard long or a 12" wig.)
Why do we do all of the rest of the body before the head? Because I found in some other classes, that after doing all the work on the rest of the doll, most dollmakers will really finish their doll, even if they have to make 2 heads to get one they really love.
Dolly Hugs, Judi
Go to... ~ Classroom ~ Pattern ~
Copyright
Notice: All pages and graphics are copyrighted
by the Internet Visions Company and/or instructor.
You may print these out for the use of the class only. All
other uses or distributions are forbidden.
Crafty College and Doll Net are divisions of the Internet Visions Company.
© 1997-2003, Internet Visions Co. All rights reserved.