Ó 2000 Judi Ward -Judis Dolls
Chapter 6 Part 3...
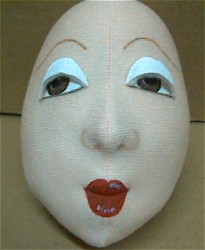 Still a little too "sleepy" for me. |
 Trimming another fraction off. |
 I like them now. |
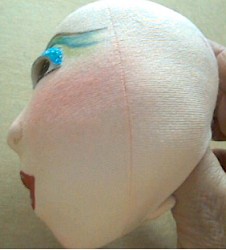
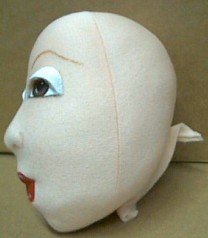 The side view. |
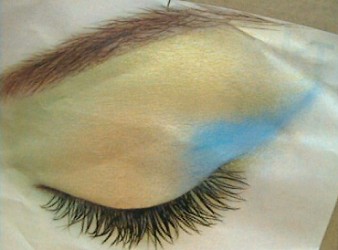
11. Now, paint a coat of colored paint on the
eyelids, one at a time and sprinkle extra fine glitter over the wet paint.
(Do this over a piece of paper, so you can pour the excess back into the
bottle.)
(I have some here called Diamond Dust, some called Micro Fine and some called Crystal Glitter.)
The extra fine glitters come in several " crystalline colors". I usually use the warm "gold" tones with the gold eyelids or warm toned eyelids. I use the cool or blue tones with the cool colored eyelids. There is also one called Multi, that seems to have every color in it. Now, none of the above color combinations is written in stone. Put warm toned glitter on blue eyelids, cool on gold, etc.
AND .Guess what?! If you dont like what you have done, paint over it and do it again.
Dont worry about the glitter getting on her face, you will brush it off AFTER the paint is dry A stiff paintbrush will help brush the excess off.
In my shop, glitter has a life of its own I love the stuff. Dont care if it is on the carpet or floor. It seems to make everything happy!
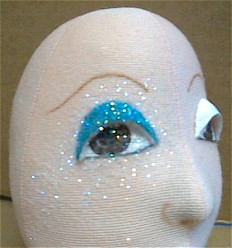 One eyelid painted and glittered. DON"T brush it off yet!!!! |
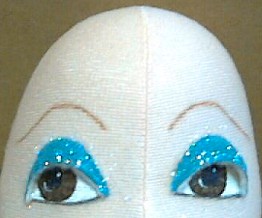 Both eyelids painted and glittered. |
A little Glitter will stick to the face for
quite a while, even after you brush the excess off.
Think of it as a bonus decoration!
1. After the paint and glitter is dry it is time for the eye shadow. The eye shadow is done with colored pencil, and OH! It is so much fun! You can make one color, two, three, get real dramatic or more subdued. Milli begs for elaborate, dramatic shadow though!
Following is a picture from
a magazine ad of some great shadow work.
Perhaps more detailed than you wish,
but just an idea.
3. Start with a full covering with a base color. In the following picture I have teal eye lids and have done the base eye shadow with a green colored pencil.
I followed with blue over part of the green.
Note how the eye shadow rounds at the inner eye corner and feathers out at the outer corner.
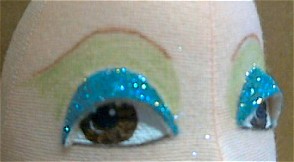 The green base. |
 The blue over the green. |
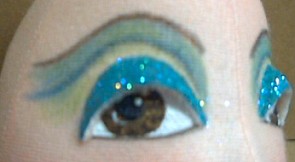
Note the little glitters still hanging in there on the face! The stuff is alive!
I decided to add a little dark blue line between the two shades too, and to darken the eye brows.
See, even for me, it aint done til its done!
I will probably do more above the eyes after the eyelashes are on too.
To blush your dolls face, simply whisk the brush that came with the blush across the blush, and apply the blush to your doll the same way you would do for yourself. Darker on the "cheekbones". A light dusting across the nose. Dust lightly on the lower cheeks and chin.
Use a blush with pink tones for all but the darkest skinned dolls. The dark skinned dolls work up well in a mauve tone.
You will need to make the blush darker than you really think is needed, because it will fade away as you add the eye lashes and hair. You can also wait to do the blush until after the doll is nearly done.
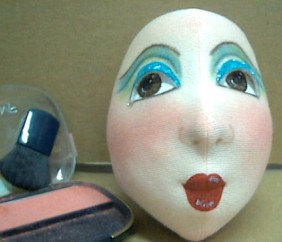
The blush and a blushed
face.
Remember We will do the eyelashes, the gloss on the eyes and lips, towards the very end of making this Milli.
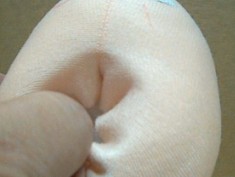
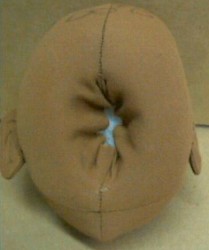
A final thing to do the head, after you love the shape. Hold the head in your hand, face against your fingers and the nose between your first and second finger.
With your screwdriver, push straight in, very hard to compact the stuffing away from the opening. You may find that you need to add more stuffing!
Do this all around the opening, pushing straight away from the opening into the sides and chin areas, and especially up into the back of the head and make sure there is an area up in the back of the head for the neck.
Once in a great while, stuffing needs to be removed if you have just been too vigorous with stuffing the head. If you cant stick your thumb up in the "hole" and have the head stay on your thumb in a natural position, you either have to push the stuffing in harder, or take some out.
My thumb up in the back
of the head.
The tab in the back of the neck opening is different for Milli than for several of my other dolls. It is angled and makes a self facing. You dont have to glue it at all, but surely can if you wish.
If you want to, rub some Glue Stick Glue on the inside of the "tab" and press it into the stuffing in the opening.
When the head is tied on tightly, the tabs stay inside, but the glue makes sure of that!
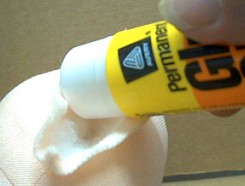 Rub some Glue Stick Glue on the tabs. |
 Press the tabs against the stuffing. |
Let dry.
***OPTIONAL***
If you dont want ears, skip this and go to putting the head on.
***Now lets put the ears on***
You may want to wait to do this after you decide on the hairdo. If you are putting a wig on your Milli, put it on and see if you need ears. Most wigs left in a down position dont require ears.
If you are going to do the mohair upsweep, either needle felted or glued, you can plan to eliminate the ears, by bringing the hair down to below the area where the ears would be.
Some hairdos do require ears though soooo
If you want ears, here is how to do it.
The following pictures are of the dark doll. The other head got ears during a hands on class.
This head got its eyelashes a while back in a class.
Just keeping you on your toes and keeping your mind open to possibilities!
Hmmmm? Where do the ears go? I have a way for you to get them on in the right place if you cant just eyeball it. If you can eyeball it, go ahead.
Ears align, just about between the eyebrows and the top lip. The top of the ear is the wider part. They will sew on just behind the seam line. If they are put in the seam as you sew the side seam, they are too close to the face. I tried the design with the face front wider, but it looked funny sooooo the ears are put on by hand.
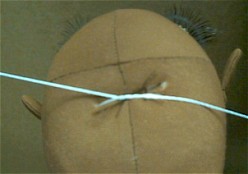
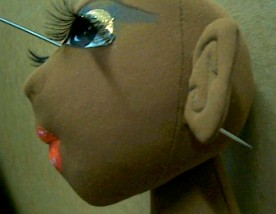
1. Put a thread across her face front, just under her nose. Fasten it on each side by putting a straight pin into the head right on the side seam, and wrap the thread around the straight pins a couple of times to secure it.
2. Place the ear with the sewn side towards the face. Have the lobe just in front of the pin head. The raw edge will be about 1/2" back from the side seam of the head.
3. Pin the ear in place. Repeat for the other side. The following pictures will explain better.
 The string across the face. |
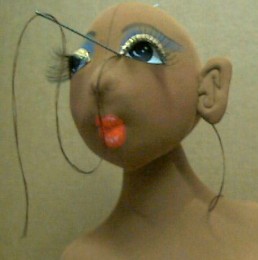
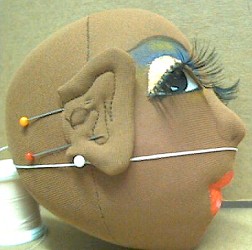 The ears placed in the right position. |
The ears look huge, but they really arent. It is that "fore-shortened" appearance from photographing so close.
4. Hand stitch the ears onto the head along the straight edge, about 3/8" inch in from the raw edge. Don't stitch them down flat to the head yet though!
After the hair is on, the ears will be pressed back against the head so they are flat. Dont do it before the hair is on though! You wont be able to get the hair down behind the ears if you do
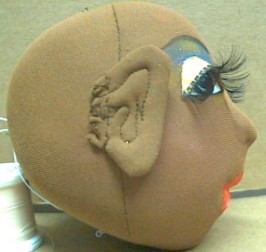
Stitch ears on with a back
stitch.
Whip stitch the raw edge.
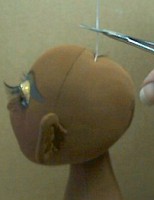
5. When the ears are sewn on, they will stick out at the sides and it will look kinda like you just made a Monkey!! Never fear, as we go along, the Monkey look will go away! I PROMISE!
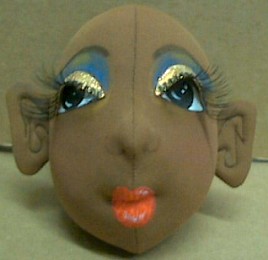
Lookin' kinda Like a MONKEY!
Now lets put the head on the body.
You can use this method for any tab head doll that has a "hole" in back for the neck to fit into.
This turning head can be attached in 30 seconds! A whole lot less time than sewing the head on!
Gives your dolls so much personality too.
Lay your doll, FRONT DOWN on a table to do this. You want the head on the right way! If you have the body front facing you, and the head back facing you, the head will be on backwards, and it can't be turned all the way around to "fix" it.
This turning head actually turns like a real head. About 1/2 way to each side and it also tips up and down.
The pictures are done with my doll sitting. Hubby said he could see it better in the pictures that way. Do yours lying down.
Before you start, "try" the head on the neck. Gently work it down and make the "hollow" fit the neck. You may need to poke the neck into the hollow in the head with your finger.
If the head goes way down on the neck, the head isn't stuffed enough. You want Milli to have a long, willowy neck.
1. Now, thread a single strand of my jointing cord (about 1 yard long) through a needle sculpture needle (4" or 5" long) and put it through the neck, from side to side, about 1" down from the top. (Or use 4 strands of dental floss)
2. Check again to be sure the head is stuffed just the way you want it. Last chance!
Just Kidding! Actually, you can easily cut the cord and remove the head any time before putting the hair on.
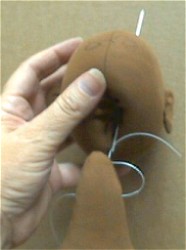
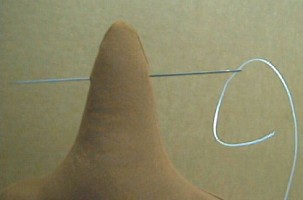 Put the needle and cord through the top of the neck. The needle will go through the Model Magic clay even after a week or more! |
 Check to be sure you have that "hollow" with the "facing" pushed inside. It will be "wrinkly" at this point, even if you glued it. |
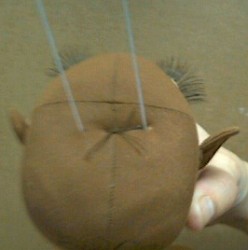
3. Now, thread the cord on the right, through your needle sculpture needle, (4" or 5" long) and put the needle up through the "hollow" and out the top of the head, to the right of the seam, and back about 1/2". Don't come out right where the seams cross. That is too far forward.
Don't catch any of the fabric in the opening with the needle.
4. Take the needle off. You now have one cord out the top of the head.
 Put needle and cord through "hollow" and out top of head. OOPS! the eyes on the back of her head show!!! I was testing a new Gel Pen, and used her head for the test. A new version of "eyes in the back of the head" . |
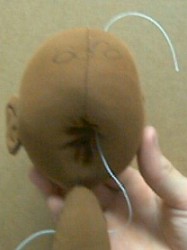 You now have one cord out the top of the head. |
5. Now, thread the other cord through your needle, and pass it up through the opening to the top of the head, on the left side of the seam.
6. Pull the cords and work the head down on the neck. Be sure to tuck all of the fabric in the opening to the inside.
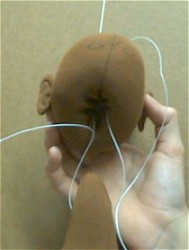 The other cord up through the head. |
 The cords out the top of the head. Note that they are about 1/2" from The center seam. Right about where you tied the mouth thread. |
7. Tie the cords, which keeps the head on the neck. Remember, the nurses knot…but…you may have to put your finger on the first tie to keep it tight while you tie the second time.
8. Cut the cords, leaving about 1/2" ends.
 Tie the cords at the top. Note that they are about 1/2" from The center seam. Right about where you tied the mouth in. |
 Cut the cords. |
My head is on.
Judi pinned my ears down. Boy am I glad!
If you desire, you can tie the corners of the eyes in now, before we go on to the hair in the next chapter.
This is another option.....
For this head shape the inner corners sometimes need the sculpting in, For many they dont.
The outer corners almost never "ask" to be sculpted in.
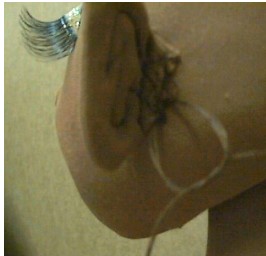
 The needle carrying the thread enters At the front and exits behind the ear. |
 Repeat with the thread still hanging from The eye corner. |
4) Tie the threads behind the ear, pulling in the inner corner of the eye.
5) Repeat for the other eye.
 Tie behind the ears. |
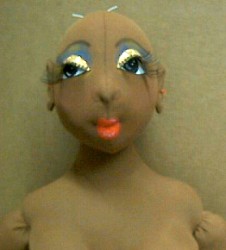
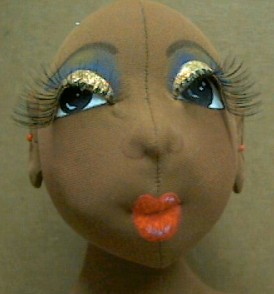 The inner corners pulled in. The little dark line on her face, by her eye is the shadow of her eyelash. |
Well that does it for this chapter. I hope changing the doll as we go along isnt too confusing. The techniques are exactly the same, and I think this doll begs for diversity and the best way to get dollmakers to think out of the "box" is to show lots of differences within the same doll.
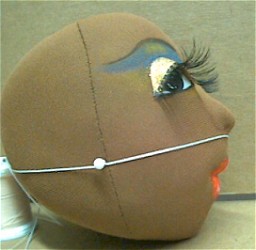
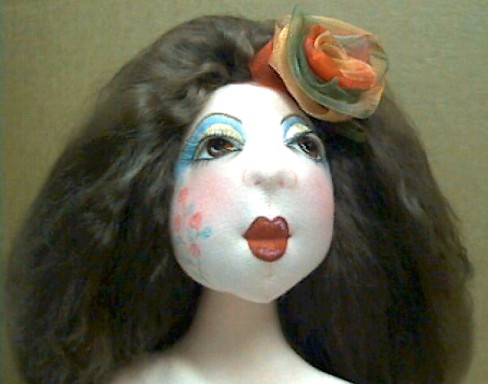
A parting shot .Remember the head with the tattoo on the cheek? Well she got put on the body I started at the beginning of this class. She also got her hair done during a hands on class.
Her hair is mohair, partly needle felted on and partly glued on. It is a full wig, because I just kept going around and around with the mohair, til I got to the crown.
The only thing she is missing is the gloss in her eyes and on her lips.
Remember!!! It aint done til its done!
Dolly Hugs, Judi
Go to... ~ Classroom ~ Pattern ~
Copyright
Notice: All pages and graphics are copyrighted
by the Internet Visions Company and/or instructor.
You may print these out for the use of the class only. All
other uses or distributions are forbidden.
Crafty College and Doll Net are divisions of the Internet Visions Company.
© 1997-2003, Internet Visions Co. All rights reserved.