Ó 2000 Judi Ward -Judis Dolls
... Applying and styling the hair into an upswept hairdo using felting needles ...
You can also glue the hair, use a felting and glue combo or
use a real doll wig. Milli takes a size 11"-12" doll wig..
***The Rat***
The "rat" is needed to provide lift at the top of the head for the upsweep to be secured to.
1. Take a wad of stuffing about as big as
a baseball and wad it up in your hand to compress it.
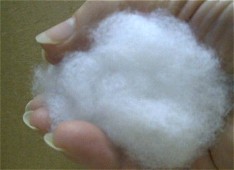 A wad of stuffing. I have compressed it some already. |
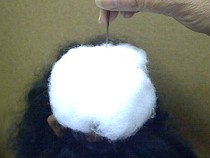 Starting to "felt" the wad into the head. |
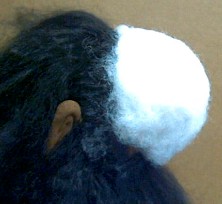
The stuffing felted in place. I cheated
and started this before the glue was all dry, so you
can see a little white by her ear.
It will all dry clear though.
The little bits felted over the
stuffing rat.
WOW! What an image!!!!
But, this too will pass and your Milli will be glorious real soon!
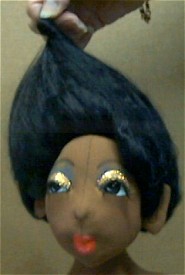
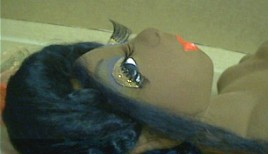
4. Now, carefully "finger comb" and use a big needle (or that broken felting needle) to comb the hair up to the top of the head. Twist the ends together at the top and put a big straight pin straight down into the twist and into the head to hold the hairdo in place for a minute.
5. You may get it "right" the first
time, and you may have to untwist it and do it again.
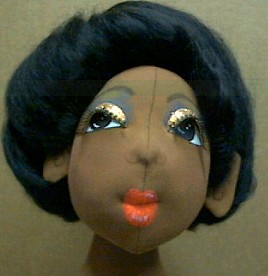
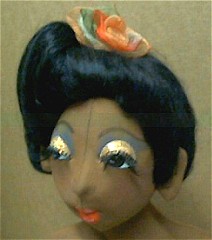
Following is a picture of the twisting and one of the hairdo a little "off". I am going to "needle comb" the hair a little more and re-twist it to make it more symmetrical.
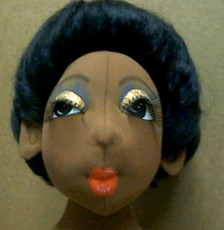
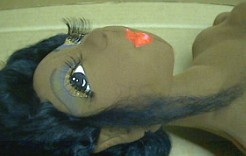
Then I am going to re-twist it and make an
upsweep that is "planned" to be asymmetrical.
This can get addicting!!! CAUTION***If you are a perfectionist where hair is concerned, "an every hair in place person", you will have to give up at some point soon, and go with the look you have achieved. Mohair simply doesnt work for "every hair in place" hairdos.
 The twist. Twist til the hair twists back on itself some. |
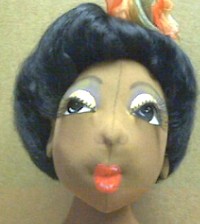
 This is too uneven for my liking. |
 Quite symmetrical. A little prim? |
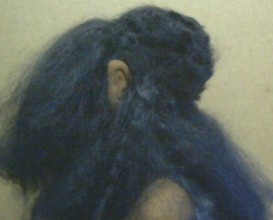
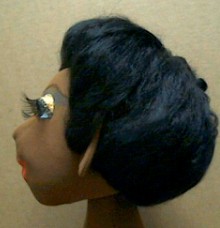 The side view. |
 Planned asymmetry. The twist was done slightly to the side. |
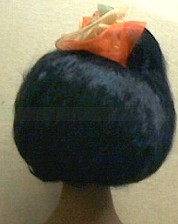 From the back. The "rose" put to use again. |
-
I am going to "go with" this asymmetrical
hairdo for this Milli . (Now I have to make a red rose or 2 or 3) Hope
I remember how!
6. To secure the twist after you like what
you have, we go back to the felting needle. I simply push it in several
times, where the twist is fastened down with the long pin. This pushes
some of the twist into the head and secures it.
You can also simply leave the pin in, rather than "felting" to secure, or do both. I do both.
7. Now, glue her ears back. I put a little dab of hot glue (about the size of a big pin head) right in the center/back of the ear, and press it down with my finger. Only glue the center, not around the edges. By pressing in the center, the part of a real ear that sticks out will stick out on your doll too.
 Her ear glued back. |
 Nice flat ears. Nice lobes for ear rings too. |
8. Once her ears are glued back you will need
to spray her hair REALLY WELL with hair spray, or for a really permanent
hold, I use Clear Acrylic spray. Her hair becomes a "near sculpture"
this way. When the spray goes on, it will look bubbly
Dont mess with
it. It will dry clear and bubble free. (Dont
spray a loose hairdo, only the upsweep)
9. Now lets add those little tendrils in front. These dress up the hairdo so much.
Use the little swatches of hair you saved, or cut off a bit of the extra hair you have left over. Lay the little swatch along the side of the head, right where the hairline is. The picture will tell it better. Needle felt the swatch right into the hairline, pulling the little swatch into the head to about the top of the ear level. Repeat for the other side. You may want some at the back too, or farther up on the forehead. It is your choice and it is so easy to do.
 The swatch laid in place. |
 The swatch pushed into and felted into the hairline. Be sure to felt it right into the hairline, not where it is laying in the first picture. |
 Both sides felted into the hairline. |
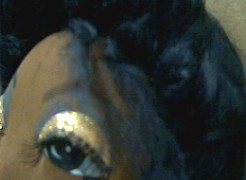 Some shorter tendrils felted in. |
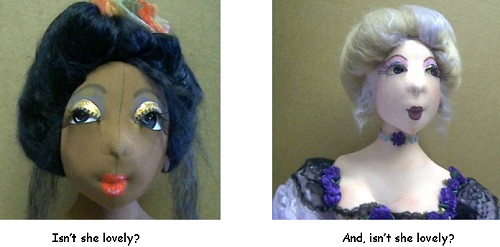
Following are 2 pictures. One is of the doll we have been working on and the other is of another doll that I did a two-tone hairdo on. Her hair is blond and I felted in lavender tendrils. I left some hanging down and needle combed some back into her hair too. Love the "look"!
A final Quick lesson .How to put a doll wig on.
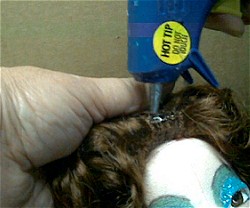
2. Heat your glue gun up.
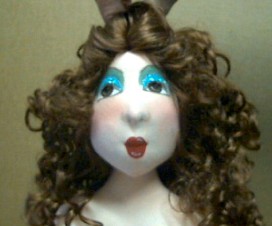
The wig I will demo on is a loose, long curl wig with a center part. When I took it out of the bag, I shook it really hard to loosen the curls more, and took the silly pink bows out. The wig I am using is a 12" WTA2 from Tallinas doll supply. (Address at the beginning of the class.)
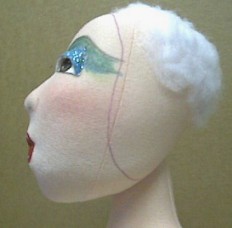 Remember this head? The Rat is on. |
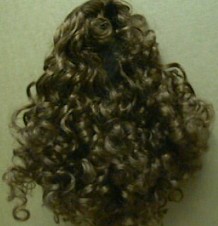 The wig, shaken out. |
3. Place the wig on your dolls head with the center at the front hairline. Put a straight pin in there.
4. Pull the sides down to below the ear level for this style (no ears needed)
5. Put a pin in there.
 The front pinned down. |
 One side pinned down. See how low it is? All of the marks for the hairline need to be covered. |
Be sure to cover the hairline marks that you drew.
 Gluing in the center. |
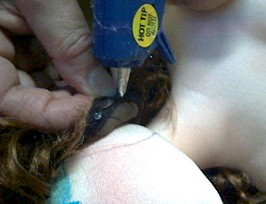 Gluing by the jaw line. |
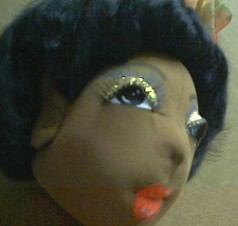
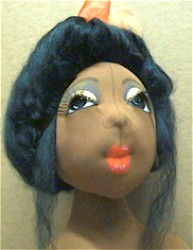
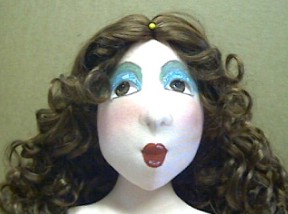
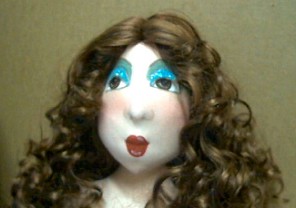 All glued on. A little plain looking? Of course, she has no eyelashes yet either . |
 How about a little lift. Ahhh, Yes, I like that. The curly, messy "look". I will neaten the pulled up part some and tie it in with strong cord. |
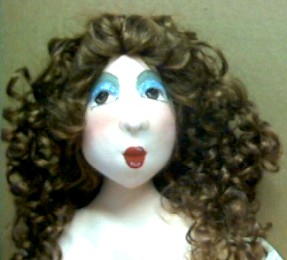
The top hair
tied in. She has the sultry "look" already.
Just wait til she gets her eyelashes!
Well, thats all for the "hairy stuff"!
Have fun with the hair. Dont get too frustrated with the mohair if you have chosen to do the upswept hairdo. It is a little messy and takes a little while but is very lovely.
Our next lesson will be the simple clothes and trims. I will be using things available at stores nearby for trims, like pre-made "silk" flowers etc. If you have wonderful flowers, beads, buttons, ribbons, baubles and trims to use, please dont feel like you have to find just what I show. I show these because I know they are available at Jo Anns, Michaels, Wal Mart, and most other fabric and craft stores. They look very nice and you wont go crazy trying to find some "delicacy" local to my area, that is not available anywhere else!
Oh Yes, I promise we will get those eyelashes on soon. They are just really hard to deal with when we are doing all this other stuff. "Near bout" tore them off the dark doll while I was doing her hair.
Dolly Hugs, Judi
Go to... ~ Classroom ~ Pattern ~
Copyright
Notice: All pages and graphics are copyrighted
by the Internet Visions Company and/or instructor.
You may print these out for the use of the class only. All
other uses or distributions are forbidden.
Crafty College and Doll Net are divisions of the Internet Visions Company.
© 1997-2003, Internet Visions Co. All rights reserved.