Ó 2000 Judi Ward -Judis Dolls
... Decorating the shoes and applying the eyelashes. ...
Also***some extra makeup application and simple "jewelry" ideas and some final pics.
You have a ton of shoe stuff in chapter 3. Pictures of several shoes and such.
What we are going to do here is, decorate the shoes "step by step", for the dolls that I have been making in this class.
Please, these are just ideas, and you can make your dolls shoes as simple or elaborate as desired. I am keeping these rather simple.
First lets decorate the red shoes. These will have the Shoe tabs that I made from clay in chapter 3.
The tabs may have warped a little from molding, to baking, to cooling, but they will press back on well enough. The tabs have a little flexibility in them, but not much, so dont force them too hard or they will crack. If there is a little gap at the vamp, dont worry. You will be decorating that area anyway, so any gap will be covered.
I first glued the sides/ back part of the shoe trim on, and then I glued the trim along the edge of the tab.
Apply the glue with a toothpick or a small paintbrush that has gotten hard because you forgot to clean it Have any of those? I do.
 The shoe tabs glued on. |
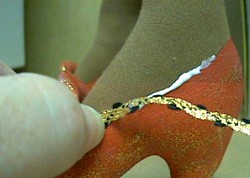 Gluing the trim along the side. It will go all the way around the back and the other side. |
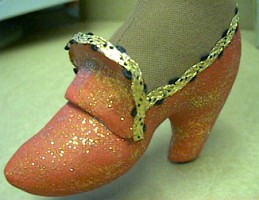
The trim glued in place.
3) Now decide on, and glue the flowers or whatever to the vamp. Lets look at some ideas.
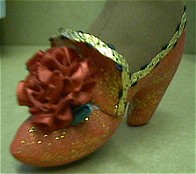 A big flower? |
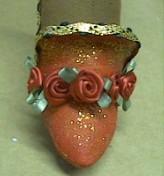 A lot of little flowers? |
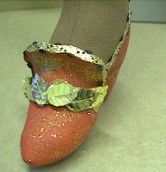 Gold "sequin" leaves? Kinda, like that. |
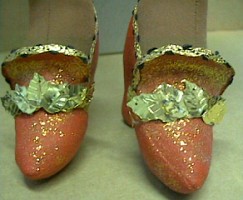
Gold "sequin" leaves on
both shoes…Hmmmm?
Nope, don't like the holes showing in the sequins.
What I have settled
on is a ribbon gathered down the
center with the braid trim down the center gathers.
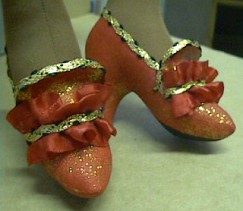
The decorations I have decided to
keep for the red shoes.
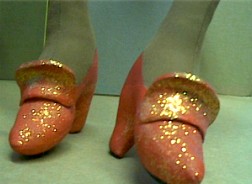
For the rust colored shoes with the gold glitter, I had only one decision to make. Rat tail cord or little black pearls for all around. I had already decided to use a heart button at the vamp and a flat button (cut the shanks off with wire cutters) for on the strap.
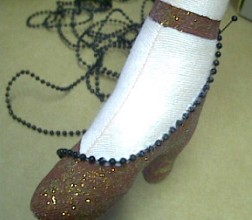 The black beads? |
 The rat tail cord? |
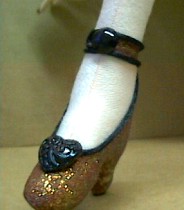
The simple shoe.
Have fun decorating the shoes. There a lots of ideas in magazine pictures of those resin shoes. Some VERY elaborate and beaded etc.
If you are a tole painter, omit the glitter and paint designs on the shoes If you do decoupage, affix cut out flowers to the shoes and then coat them with Mod Podge. The little glass beads that you pour over glue, work well for a different look too. So many things, so many ideas, so little time!
***The Eyelashes and coating
the eyes and mouth with clear gloss,
like Crystal Lacquer or Mod Podge***
Your dolls will finally have wonderful eyelashes, if you already put them on that is fine. Drove me crazy too, looking at my doll with "bald eyes"!
The strips have a little adhesive on them, but this wont keep the eyelashes on for long. We will glue them on with tacky glue, after they are applied.
This set fit just right. I didnt have to cut any off.
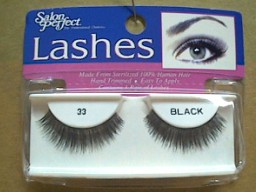 The eyelashes. These came from Wal Mart. |
 The eyelash applied to one eyelid. |
3) Using a stiff paintbrush, needle, or toothpick and tacky glue, carefully put a line of glue along the strip of the eyelash. It will be on TOP OF the strip and will go onto the eyelid a little too. .If you try to put it under, the eyelash just keeps popping up and you need 20 fingers and 2 hours to hold it down!
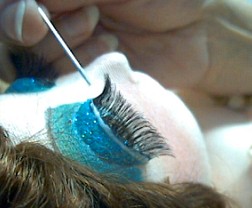 Applying the glue along the strip. |
 Both glued. See the band of white glue? It will dry clear. |
Some eyelash strips are solid at the base. The ones I just applied are.
Some have little gaps at the base, and need to have "eyeliner" painted along the glue.
 The glue is dry. This strip is solid. |
 This strip has little gaps at the base. |
4) If your eyelashes have the little gaps, you may want to paint a solid
black, (or
.blue, brown, lavender?) line along the edge to make the eyes
more dramatic. I also like to extend the line beyond the edge of the eye
on the outer corner for more drama. Might
do that for the other doll too.
 Painting the gaps. |
 The eyeliner extended at the outer corner. |
The other dolls eyeliner extended
A final "EYE" dea!
I found these wonderful eyeliner jewels at Wal Mart, of course. Sorry, it is about the only store in town that has "stuff" galore.
They didnt match with the dolls we have been working on, but really jazzed up another doll I have here.
They have adhesive on them too, but it doesnt stick to the dolls. I found the thing to glue them on with is GEL type super glue.
I applied it a little at a time with a toothpick and pressed the strip to it. Stuck like "glue"! Be careful with it though. It also sticks to you like glue!
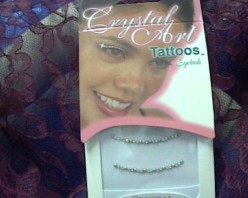 The crystal "eyeliners". |
 The eyeliners on a doll. They really sparkle more than what it looks like in the picture. |
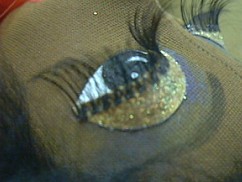
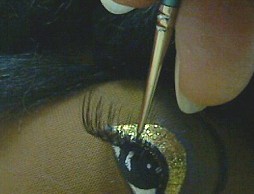
Now, lets put the gloss on the eyes and lips. I like to actually "fill" the eyes with gloss. It pools up under the eyelids and strengthens them too.
You can use any clear gloss. I used to always use Mod Podge, because I had a lifetime supply of it from owning a craft shop!
Now I love Crystal Lacquer the best .but in reality, both work equally well.
1) Tip your dolls head back, so the clear gloss can seep to the back, UNDER the eyelid, and then spread some out into the rest of the eye with a tiny, pointed paintbrush, covering the whole eye. Be VERY careful not to get any on your dolls skin. It will make a spot, and your doll may then need a beauty mark you hadnt planned on. Sometimes this works out well, but, sometimes the spot is in the wrong place for a beauty mark!
2) Now, cover the lips with some clear gloss too .again be careful!
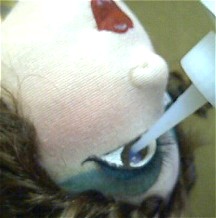 The head tipped back. Dropping some Clear gloss into the eyelid. |
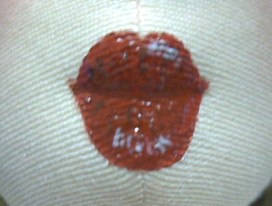 The lips all shiny. |
After all this messing around, my dolls are in need of some more blush! Cheeks, tip of chin, tip of nose, forehead, backs of hands and at the bust on either side of the "cleavage".
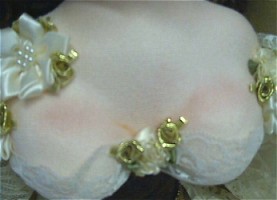
Blush on the cleavage.
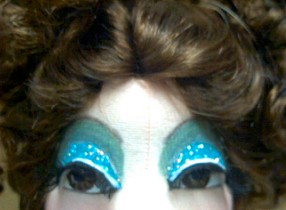
It is also time to check the eye shadow Do you want it darker? To add another color over the ones you have? Extend it farther from the eyes?
Milli has a narrow fore head, so sometimes I extend the eyeliners so far they are under the hair when I put the hair on! Thats O.K., it looks fine.
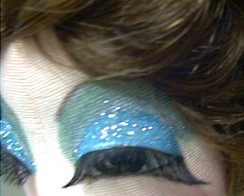
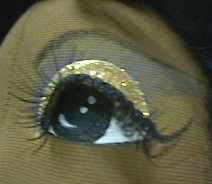
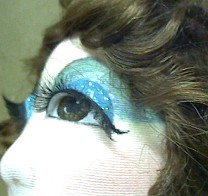
I have added some Gold Glitter Gel Pen to the centers of the dark dolls eye shadow and right under the brow. I have added the gold high lights right above the light dolls eye lids.
 See the highlight in the center and under the brow? |
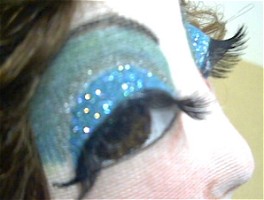 See the highlight above the eye lid? |
***AND THEN***
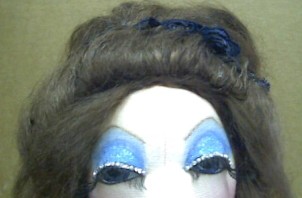
The hairdo for the light doll! Dilemma!
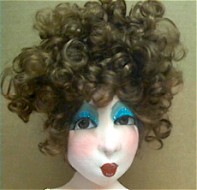 Should it be way up? |
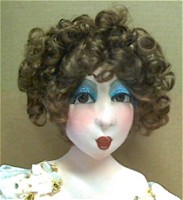 Part way up? |
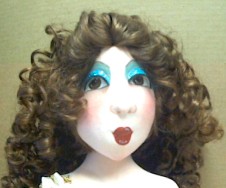 Or down? |
I like the part way up do best.
The doll in red? How is she coming along? Remember the Dragon? I have to decide where to put it after I get her all dressed. Be back in a minute!
Here she is all "dressed". A completely different "take" on the trims and decorations.
I found some black, leafy appliqués and glued them over her boobs.
Glued a boa all around where the lace went on the other doll.
A gold braid "necklace" with a flower in the middle.
A gathered ribbon hair ornament with a flower inside and 2 in back.
THE DRAGON! He went on her face!
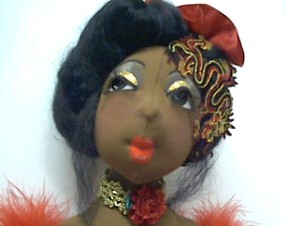 Head close-up. |
 Bodice close-up. |
LOVE that dragon! A bit on the risqué side!
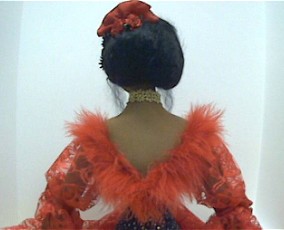 Back close-up. |
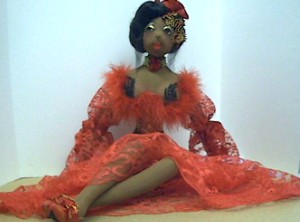 Full length. |
I made a simple necklace and ear rings for the cream and brown Milli.
Remember, beading is not my favorite thing, and the cats dumped the beads while I was working Reason number 2 why it isnt my favorite thing to do! We have 3 cats who LOVE beading! Just wish they could string them!
But, the necklace and ear rings are pretty and easy to do. Design some of your own and if you love beading, really go for it.
You can also use bracelets for necklaces and real, post ear rings.
When I make beaded jewelry for Milli or any doll, I start at the back of the neck and actually sew the thread to the neck, then bead and then end by sewing the thread to the neck in back again. Lose the ends of the thread, so you dont have little tied places.
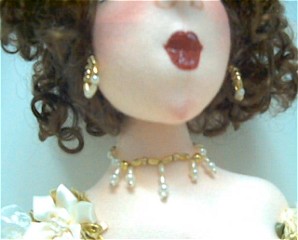 Showing the simple jewelry. |
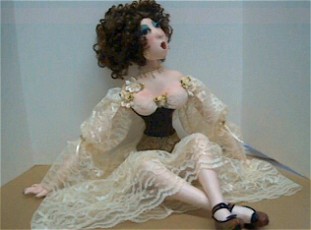 Full length. |
A diagram of the necklace and ear
ring assembly.
That all folks!
Next chapter will be a few adaptations for the FRENCH COUNTRY MILLI.
A short chapter, Honest!
Hope you have had fun, stretched, let your imaginations go and made " A Boudoir Doll" a part of your vocabulary and doll collection.
Dolly Hugs, Judi
Go to... ~ Classroom ~ Pattern ~
Copyright
Notice: All pages and graphics are copyrighted
by the Internet Visions Company and/or instructor.
You may print these out for the use of the class only. All
other uses or distributions are forbidden.
Crafty College and Doll Net are divisions of the Internet Visions Company.
© 1997-2003, Internet Visions Co. All rights reserved.