Lesson 2- Mastering Measuring Techniques
It's time now to familiarize you with the measuring methods we will be using throughout the course. Rest assured, we will continue to explain them as we work through the various projects until these techniques become second nature to you. To create the basic pattern shapes needed for the hats, we will be working primarily with rectangles and circles. We have done everything possible to minimize the "M" word (math.) Rather than fuss and bother with minute fractions - who has time for that! - we have found it so much easier to cut paper and crease it to find many of the measurements we need. We call this the
Fold and Mark Measuring Method (FAMMM or FAM for short.)
|
|
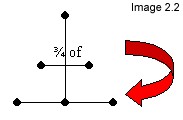
The easiest way to find the center of a piece of paper or a pattern piece is to fold it into quarters and open it back up.

Now, let's see what else we can do with this method (FAM.)
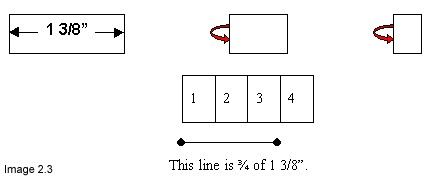
Suppose you have a line that is 1 3/8" (1.375") and you need
to make another line that is 3/4 (.75) of that length. We will be using
this when we make sectioned crowns.
1.375" x .75" = 1.03125"
Yikes! How do you find that on your ruler?!
Cut a strip of paper 1 3/8" wide (the length doesn't matter.) Fold the paper in half and crease, then fold and crease it again. Open up the paper. It should be divided into 4 equal sections.
Perhaps you have a line that is 2 5/8" long and you want to mark off points at 1/8 and 7/8 on the line, as we'll do when we make a top hat in COURSE 2. Cut a piece of paper 2 5/8" wide and fold it in half three times.

Open the paper. It should be divided into 8 equal sections. Now you can easily mark the points at 1/8 and 7/8.

We thought it would be a good idea to refresh your memory about circles
and go over several ways of getting the circles the size we need.

In many instances we will be able to find household objects like plates, pots, bottles, cups etc… that we can trace around to get a circle the size we need for our project. When it is necessary to draw a circle from scratch the following method is the easiest.
1. When you know the diameter (distance across the circle) you need, cut out a square of paper at least 1" larger than the diameter.
2. Fold the square into quarters.
3. Divide the measurement of the diameter in half to find the radius (the distance from the center of the circle to the outside edge.)
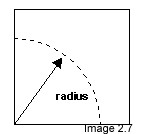
4. Keeping the paper folded, use a measuring tape or ruler to measure out from the corner that is the center of the paper, as shown.
5. Cut along the dotted line to obtain your circle.
The easiest and most accurate way of all to get a circle exactly the size you want is to use your computer. If your word processing program will make shapes for you, place a circle on the page and then format it to be exactly the size you want.
Creating perfect circles using Microsoft Word.
1. Get a blank page in Microsoft Word.
2. Click on the oval auto shape at the top, bottom, or side of the page.
3. When you bring the cursor onto the page you will notice a little cross shape. Click on the page where you want your circle to begin. You will now have a cute little circle with nine tiny boxes around it.
4. Put your cursor into the center of the circle and right click.
5. Now click on "Format Auto Shape"
6. This will bring you to a screen to change the color and line. At the top click on the box that says "Size."
7. Under height enter the diameter measurement.
8. Under width enter the SAME diameter measurement to create a perfect circle. If you want to make an oval, the height and width will be different. In this case the height is how long the oval is (front to back), and the width is how wide from side to side. We will be making oval shapes in future hat classes.
9. Ignore rotation unless you are creating an oval that needs to fit on the page. Then you can rotate it to fit your page.
|
|
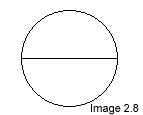
The easiest way to measure the circumference of a circle, oval or teardrop shape is to:
1. Cut the shape out of paper.

2. Fold the shape in half.
![]()
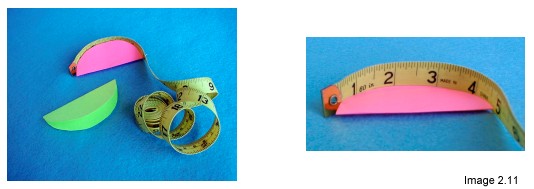
3. Use a measuring tape to measure the outside edge of the half shape.
4. Double this measurement to find the circumference of the entire shape. Frequently we will only need the half measurement.
If, for any reason, you have trouble holding the measuring tape against the paper, put a piece of masking tape around the edge. Mark the tape at the beginning and the end, remove the tape and measure between the marks.
If you would
prefer to find the circumference of a circle mathematically, simply
multiply the diameter by 3.1416 (p
= Pi.)
Example:
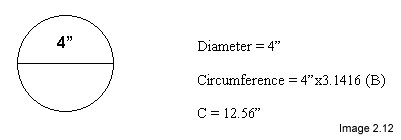
To be quite
honest, it's better to physically measure the pieces with a measuring
tape to allow for imperfections in the way they are cut out.
The two key issues to be addressed in creating
a hat for a doll are:
1. The PROPORTION of the hat style you wish to make in relation to the size of the doll's head and
2. The size and shape of the hat opening
1. Determining the correct proportion:
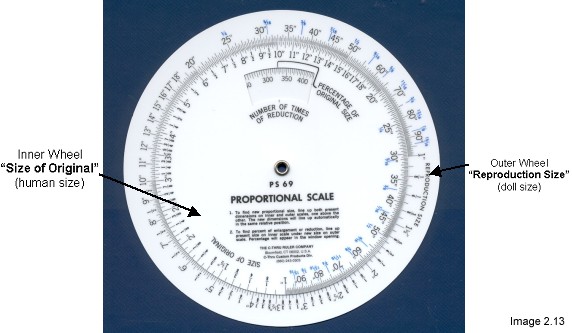
We have a found an indispensable tool for determining the correct proportion for a doll's hat which is called, amazingly, a Proportional Scale. This round slide ruler, used by engineers, architects, artists, publishers and other professionals who need to create accurate enlargements and reductions, consists of two wheels held together in the middle by an open rivet. The inner wheel is labeled "size of original" and it has a window that says "percentage of original size" and "number of times of reduction". The outer wheel is labeled "reproduction size".
Sizing General Doll Accessories:
If you wanted to know what size to make a general accessory for a doll,
you would first find the average size of a human female - 65" or
male - 72"- on the inner wheel (original size) and line it up with
the height of your doll (reproduction size) on the outer wheel. For
our example let's say the doll is 16" high. Line up the 65"
and the 16" and then DON'T MOVE ANYTHING. Measure the life-sized
object, find that measurement on the inner wheel (original size) and
the outer wheel will tell you what size to make the doll accessory.
An umbrella, for example, measures 36", so a 16" doll would
need one about 8-1/2" long.
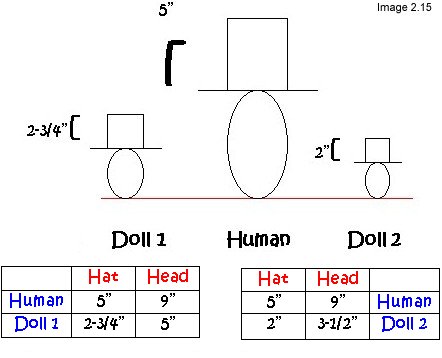
Sizing Doll Hats:
To make a doll hat to scale comparing the height of the doll to a height of a human does not work. Due to the tremendous variation of types of doll bodies and heads sizes, few dolls are made in correct human proportions.
Bonnie has two dolls that are both 20" tall. One has a head that is 5" high. This measurement is taken straight down from the top of the head to the tip of the chin. The second doll has a head that is 3-1/2" high. The average height of a human head is 9".
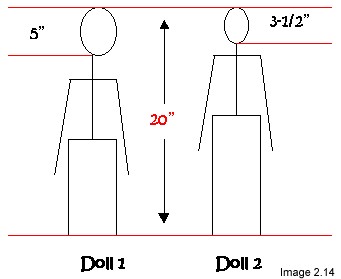
We wanted to make top hats for each of these dolls and we knew that
the average height of a human top hat is 5". For each doll we matched
up the size of the doll's head to 9" (height of human head) on
the scale.
Throughout the course we will continually be comparing the size of the
doll head to the human head, and then looking at the sizes of the human
hat parts to find the correct proportions for the doll hat parts.
Fun With Calculators
In the American measuring system we use inches and feet. One foot is
equal to 12 inches. Our measuring tools usually divide each inch into
1/4ths, 1/8ths and even 1/16ths. If we need to use a calculator to work
with these fractions, we must convert the fractions into decimal numbers.
The following chart will help you do that quickly and easily. You may
wish to print an extra copy of this page so that you can keep the chart
handy as you work.

2. The size and shape
of the hat opening:
Doll heads come in an infinite variety of sizes, shapes and compositions. Cloth doll heads made of two identical pieces of fabric (known as a pancake head) can be quite flat.
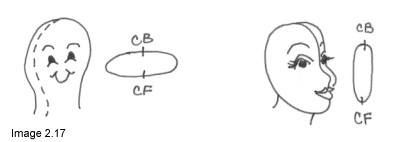
Heads formed with three pieces of fabric can take on a triangular shape.
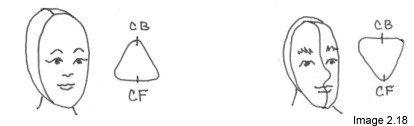
The doll's hairstyle will also have a major influence on the shape of the hat opening and the way the hat will sit on the head.
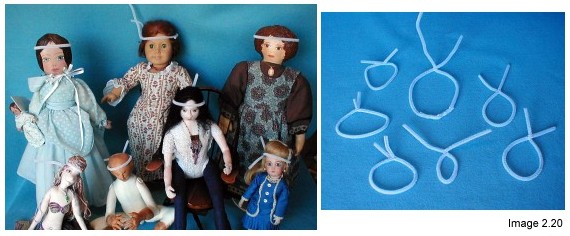
To get the size and shape of your doll's head onto paper you will need the following sophisticated equipment:
-
pipe cleaners
-
piece of paper and a pencil
-
optional: 1 plastic bag to cover the doll's head
NOTE:
If your doll will have hair it must be applied before the measurements
are taken or the hat will not fit the head!
Procedure:
1. If the doll has an elaborate hairdo, slip a plastic bag over the head and secure at the neck if necessary.
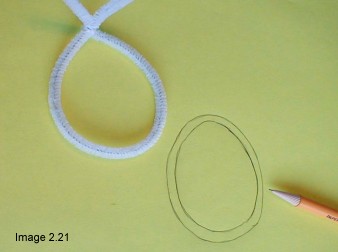
2. Take a pipe cleaner and wrap it around the head where you would like the opening of the hat to rest and twist the ends together. If the circumference of the head is greater than the pipe cleaner, twist 2 pipe cleaners together first.
3. Gently remove the shaped pipe cleaner from the head and set it down on a piece of paper.
4. For a hat that has no attached brim, draw around the INSIDE of the wire form. A hat with a brim will have a seam allowance made up of several layers of fabric and buckram that will reduce the size of the opening. To compensate for this, move the wire to the other side of the paper and draw around the OUTSIDE of the wire form.

5. Using a light source, if necessary, fold each shape you've drawn in half. Cut out your shape. This is your OPENING TEMPLATE. Always mark the center front - CF and center back - CB on every pattern piece. Mark the piece with the name of the doll it's for and the words INSIDE OR OUTSIDE OPENING TEMPLATE. Measure the circumference of each piece and record that on the template as well. You'll be surprised at how much difference there is in the circumference of the two pieces. These pieces will become the foundation for the remainder of the hat depending on the hat style you choose.
Well, now
that wasn’t so hard, was it? Once you understand and master these
simple measuring techniques you have taken the first step on an exciting
adventure into the wonderful world of millinery. In Lesson 3 you will
put some of these principles into practice as you create a Hat for All
Seasons.
See you there.
Bonnie
and Mary Ann