Bleuette in Cloth! Chapter 5 - Part 1 Now, you have the head and body all together, so it is time to do the mild, easy, face sculpturing; placement of the features and painting. When doing a face, or face sculpting on a child or baby doll, less is more; most especially where the needle sculpting is concerned. Pinching the nose can ruin a child doll, by making it look "snarly" or "old". A very few dollmakers can make a "fully needle sculpted" child's face that looks like a child. For this reason, the mouth will be pulled in, the eye corners will be pulled in, and the nostrils will be pulled in very slightly. When the mouth is pulled in, the doll face is "cute" without any paint on the lips at all. You can opt to simply shade the bottom lip area with a bit of "people" blush, or colored pencil. If you are a face designer/painter/colorer/gel penner/or penciler please go right ahead and do the face you desire Do the mild sculpting and then gesso and paint the whole head, and do an oil painted face, or whatever you love to do for your doll's faces. If you are not a face designer/painter ..Easy to follow directions, both for getting those features to the doll's face and painting and finishing them are contained in this chapter. If painting is REALLY SCARY! I have a face painting class here at Crafty College that will teach you the skills to paint nice doll faces of any kind. If painting is SO SCARY that you won't even try, you can easily and beautifully embroider the face for your Bleuette. Please use a single or double strand of ordinary sewing thread to do this, and the features will be delicate. I will also show you a really simple face with button eyes and a pulled in mouth that is shaded soooo easy .And still cute. Let's proceed I needle sculpt with a quadruple thread. Not quilting thread, just ordinary thread that I am using for sewing the doll. Remember; always pull on the thread not on the needle. Also, "help" the stitch pull the area in, by pressing on the area with your finger to indent it. If you try to let the thread do all the work, it will often break! Tie your thread off using a nurses knot. This is an automatic Square knot. You don't have to think, right over left-left over right. Simply start the first tie as usual, but take the loose end of the thread around once more. Pull, help dent the area you are sculpting with your finger, and tighten that first tie. Then just tie the second tie as you normally would. The first tie, done the nurses knot way, usually won't loosen up, while you are tying the second tie.
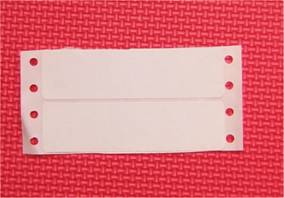
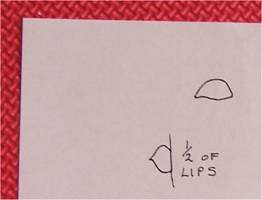
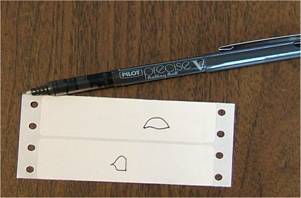
The Nurses Knot Use this knot for almost anything you tie, and you usually won't even have to have someone put their finger on the knot while you finish it. Always use a needle that is long enough to reach from the sculpted part to the back or top of the head, without "squishing" the head to do so. I enter from the front for all needle sculpturing that will be tied in the back, top or side. If you have ever done any needle sculpting, you will recall how hard it is to get a needle to come out where you want it to on the face! I solve that by entering every stitch from the front. I start each stitch exactly where I want it on the face and then exit where I desire on the top, side or back of the head. The exit spots on the head aren't so exactingly crucial. This method really solves the problem of poking around, trying to get the needle to come out where you want it! Honest! It is worth the effort to thread the needle twice for each pulled in area. First we will pull the mouth in after getting our templates ready 1. Thread your needle sculpture needle with 2 strands of thread about 40" long. Pull half way, so you have 4 strands. Don't tie a knot in the end. (A quadruple thread) I have you get this ready now and set it aside for directions, so when you get to the directions, viola! you can proceed. 2. You will need to find your Face Templates on the pattern sheet. You will find only one eye shape and 1/2 of a mouth shape! There is a reason for that .When you cut the eye shape from the sticky label, you will fold the label in half and cut 2 eye shapes at once. When you cut the mouth shape from the label, you will fold the label on the line and cut both sides at once. This helps a lot in getting the features even and matching. Now get out a sticky label You know, those labels that say "Hello, My Name Is" or the plain ones for labeling things. Mine are incredibly old and were made for the computer, but they are available in small packages in an office supply store, in Wal Mart or in the drawer of your desk. <smile>
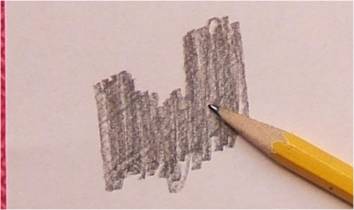
3. First, "pencil carbon" the back of the features area on your pattern sheet.
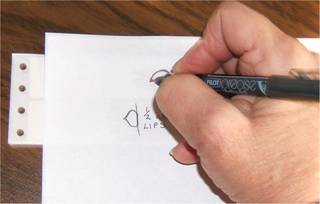
4. Place the "penciled" pattern area over the label/labels and draw on the features with a sharp pencil or hard point, fine line marker.
5. Now draw over the pencil carbon lines with a fine point pen, so you can see them very well for cutting them out.
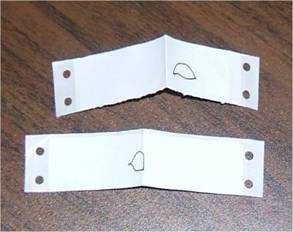
6. I put the mouth on one label, and trace one eye on another label, simply because these are the labels I have on hand. 7. Fold the label in half, so you can cut 2 eye shapes at once. 8. Fold the mouth in half down the center of the "V" in the top lip so you cut the mouth out on a fold. This makes both sides of the mouth match.
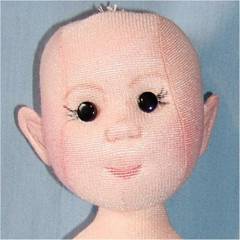
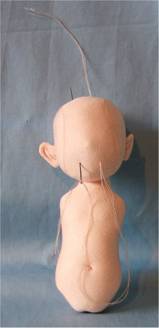
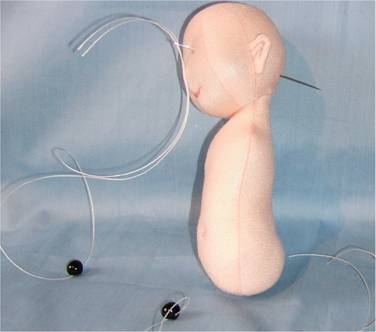
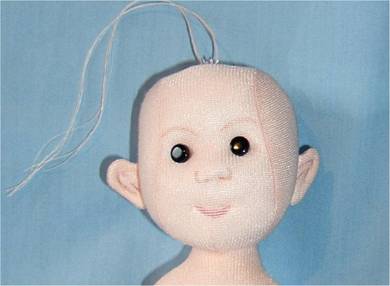
NOTE Of course, you will fold the label tightly together for the cutting! 9. Now, cut the eye and mouth shapes from sticky labels. Cut just inside of the lines, so the features don't get bigger. (*** Remember*** When you draw around something it gets bigger.) Set the feature shapes aside carefully while we pull the mouth in. NOTE We will take the backing off of the features later, for use to make the painted face. (You can of course, put your mouth template up in the mouth area to help deduce the location of the mouth corners if you desire.) Easy sculpting and the button eye version 1. For Bleuette the corners are about 1" up from the bottom of the neck. (Not from the chin from where the neck touches the body) The mouth width will be about ½". Why do I say about??? Because every person stuffs and sews differently and "exact" is impossible. I am also not having you draw around the mouth template at this time, because you may need to move the mouth cord, if you get it too low or high with the first try. Remember a child's face has the features lower than an adult. A babies features are lower still. If this concept is foreign to you, please check out a portrait book and get a feel for the placement of the features. I am going to show the easy face first, and the first picture will be life sized so you can easily compare it to your doll's head. The locations will be the same for the easy face and the painted face.
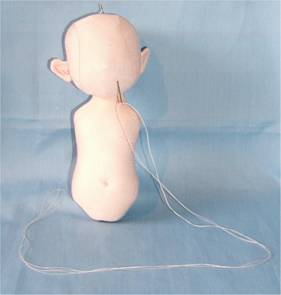
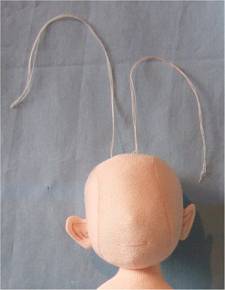
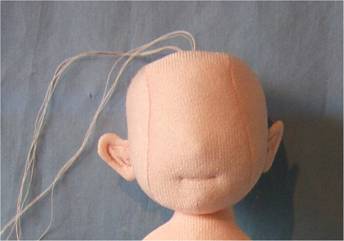
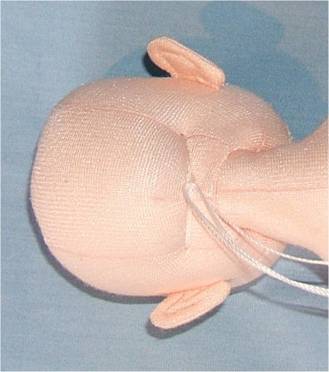
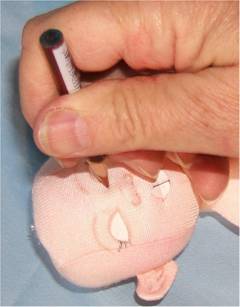
2. Put the needle in at one mouth corner and out the top of the head. Leave the longest thread length hanging out of the corner of the mouth. You only need about 5" coming out of the top of the head. 3. Now, thread the thread hanging out of the corner of the mouth onto your needle, and put the needle in at the other mouth corner and out the top of the head, near the first exit place. I don't like to mark the mouth corners but if you do, use a pink colored pencil NOT a lead pencil, and mark very lightly.
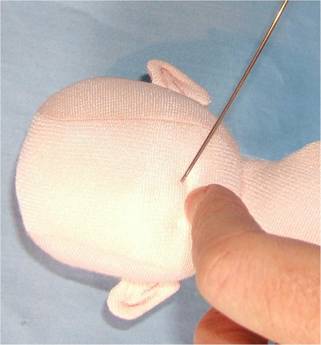
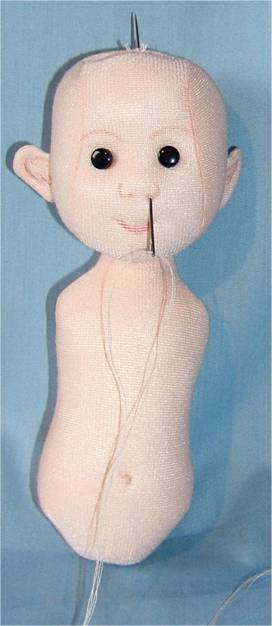
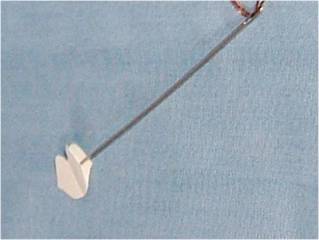
1. Let's pull the eye buttons in. Make little dots with a colored pencil where the thread will go in, which will be the center of the eyes. Study the full sized picture of the finished, "easy face" to help if needed. (That picture is at the beginning of this section.) 2. I use heavier cord for the button eyes. Either Dental floss or my jointing cord. Use about 20" of cord and thread the button onto it. Thread both ends of the cord through a 4" or 5" needle. 3. Put the needle in at an eye dot, slanting the needle down to bring it out at the SIDE SEAM in the back. This way it will miss the neck of the doll, so the head will still turn. 4. Repeat for the second button, and then tie the sets of cords at the back of the head. Clip the threads close to the knot and apply a bit of glue to the knot. The wig will cover the ties.
5. For the nose, (which has the little Pom-Pom bump under it,) make another quadruple thread and looking at the full sized picture, put 2 TINY brown dots where the nostrils go, and little crescents at each side. Less is more here! Don't do anything dark! You can darken it later if desired. 6. Enter the needle at one nose dot, and out the back of the head. Re-thread your needle with the thread coming out of the nose and enter a fraction of an inch from the first entrance, then out the top of the head again. 7. Tie the threads and pull the nose in very lightly. Repeat for the second nostril.
Add powdered blush to the cheeks and darken the nostril lines if desired. Draw simple, light brown eyebrows too, if you haven't already. Also, add very thin, eyelashes at the corners of the eye buttons to depict eyelashes.
The buttons already shine, so no highlights need to be added with paint. Notice the simple little eyelashes. This little face is so easy and cute, and if someone wanted to, they could do the eyelashes and lip in embroidery too. Now for the painted features Find the feature templates you cut out. I had you cut them out before the "Easy" face, because many of you will skip the easy face, and need to be ready with your templates. NOTE To get the backing off of the labels is a trick at times! The easiest way is to slide the point of a needle between the label and backing. Get your bi-focals out for this, or take them off, whatever works!
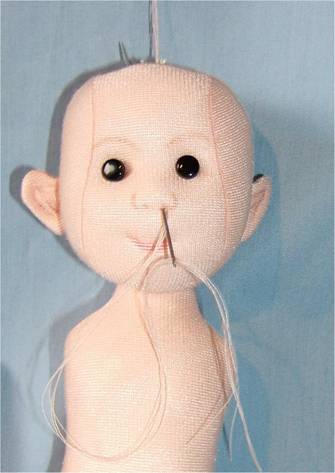
Stick the template features on your doll's face using these guidelines. The bottom of the mouth will be a little less than 1" above bottom of the neck. It is actually very easy to locate where the mouth goes because the center of the mouth goes along the pulled in thread. The bottom of the eyes will be about 1/2" above the TOP of the top lip. There needs to be about one eye width between the eyes. This placement is not written in stone, but be very careful not to put the eyes up on the forehead, and the mouth down on the chin! You can adjust the features a little at this time. Perhaps slant the eyes a little, or move the mouth up or down a little. Each tiny move of the features will give your doll a different look. You can even color the sticky label parts to get a better "pre look" at what the finished face will look like.
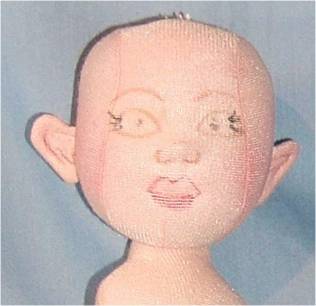
Remember I am using the head that I did the EASY face on, so there are small black eyelashes showing under the templates. When the face is done they will be hidden. Doll faces metamorphose as each step is done. It isn't DONE, til it's done! It won't look just the way you want it to in your mind, until every step has been done. When you take the templates off, you will think OH MY! How will this ever look great?!?! When I took the templates off of this face, I really had a shock! Remember those eyelashes and holes from the button eyes and the shading on the bottom lip! BUT this too shall pass. <smile>
MY OH MY! Marks all over the place! And 2 holes too!! Your face won't have these extra marks though, unless you also did button eyes and then changed your mind! |