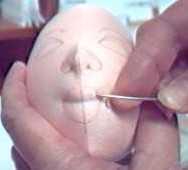
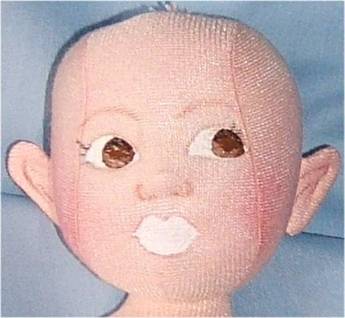
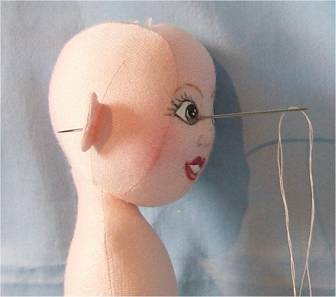
Bleuette in Cloth! Chapter 5 - Part 2 Time to paint But first, before you paint, you may want to pull some stuffing into place above the thread, and sometimes below, to give the mouth more of a smile. Pull stuffing into place, with the point of your needle, The nose bump may need to be pulled up a bit too.
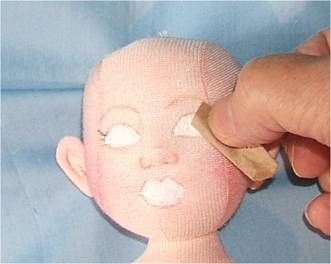
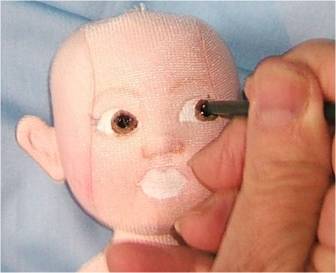
This picture is from the Whatever! Class. It showed what I wanted, so I didn't change it. No sense recreating the wheel! The technique is the same, and someone took the pic so I have my hands in it. When painting doll faces, the first, foremost, and perhaps most important thing to remember is that you don't get to freely stroke the paint on in flourishes like an artist doing an oil painting Unless you are an artist, and know what you are doing! The minute you start to stroke the paint on with the side of your paintbrush, is the minute your paint will go out of the lines! When painting doll faces, you are just filling in pre designated spaces, neatly and fully. You need to paint with very tiny (000 to 00000, even 10 zeros! My favorite brushes are ten zero spotters.) You need pointed paintbrushes, and you need to learn to paint with your paintbrush held STRAIGHT UP AND DOWN . The weight of your hand will rest on your little finger. I call it "assuming the position" and below is what it looks like. NOTE If you want to learn a whole lot about painting doll faces, mixing colors, etc. (Over 60 pages worth) I do teach that class at Crafty College too.
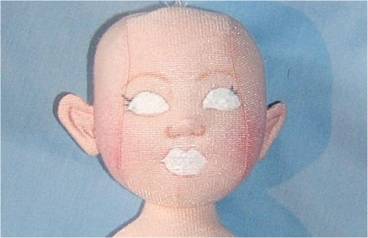
The correct hand position for face painting. 1. First do a fill in, on the eye and mouth shapes with white Gesso. Gesso seals the fabric and readies it for the paint. Gesso also prevents any "paint bleed" from occurring, as long as you keep the paint on top of the Gesso. Once in a great while, acrylic paint will bleed. It usually occurs when the paint hasn't been shaken up really well. Some of the "watery" liquid comes out first, and that is what bleeds. ALWAYS SHAKE YOUR PAINTS REALLY WELL BEFORE USE!!! 2. Apply the Gesso quite thickly and dot it around the edges to make the edges smooth. Let dry or blow it dry with a blow dryer. You can sand it after it is dry with a piece of Brown Paper Bag. It works, really! Apply a second coat of Gesso, LET DRY, and sand again. A fabric note It is a bit harder to paint on Craft Velour, even the smooth side, due to the little fibers that stick up. With a bit of patience though, you can do it, and the ease with which you can make the rest of the doll makes up for the little bit of extra care you must take to paint on it.
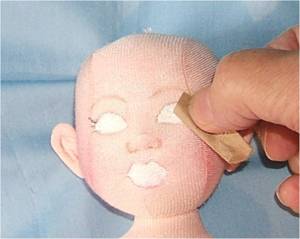
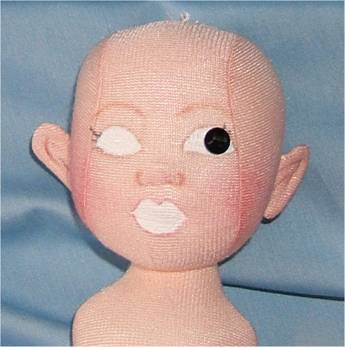
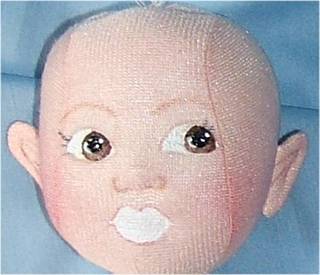
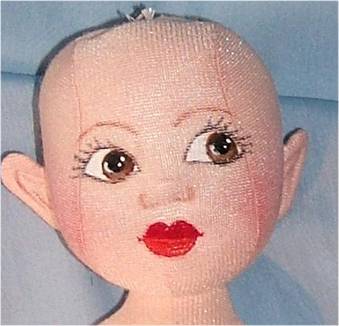
Sure looks better already! When I am done, you won't even know that this head had button eyes first! BUT>>>Remember , it ain't done, til it's done! Every step will bring you closer to perfection but in between you will have some weird "look'in" times. 3. Use a small button to draw around for the iris of the eyes, if you don't feel confident drawing them freehand. Make the eyes looking either to the right or left. It is very hard to get eyes to look correct if you try to center them in the whites. Be sure to have a little of the colored part of the eye drawn to appear to be under the edge of the eyelid. If white shows all around, your doll will look beady eyed. REMEMBER! When you DRAW AROUND something, it gets bigger, so the button you need to use may be lots smaller than you think. I used the little 1/4 " one that I used for the button eye version. I free hand the irises, (and the whole face) but for the class, I like to show "nearly foolproof" ways with the face, so most anyone can succeed. AND, for the class this is what I have done.
NOTE I drew around the button with a brown colored pencil because the eyes are going to be brown. It is easier to cover the colored pencil marks if they are the same color as the eyes. If you do miss a speck, it won't show. NOTE Think about the clothing colors when choosing eye and mouth colors. But .the nice thing about painted faces, is you can change your mind about the eye and mouth color right up to the time you say, it's done! 4. Now fill the whole iris (the round part) in with one color. You choose .As mentioned above, be sure part of the iris is "under" the eyelid area, or your doll will look beady eyed. 5. Add a tiny bit of black paint to the eye color and paint that along the upper iris. 6. Add a tiny bit of white paint to the iris color and paint that color along the bottom edge of the iris. 7. Dip your small paintbrush handle in black paint and press it into the center of the iris to make the pupil. 8. Add tiny white dots at the 2 o'clock position and a tiny white crescent at the 7 o'clock position in each eye. Pictures follow
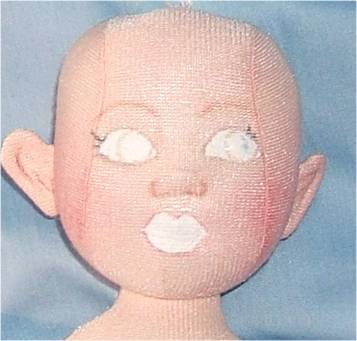
9. To outline the eyes, use black paint and a incredibly small, pointed, paintbrush, or that wonderful black Gel Pen and carefully paint (or draw) a VERY THIN LINE around them. If you paint the outline, DON'T try to work the paint down into the fabric. The line will be on top, and may even have tiny breaks in it due to the "knit" of the fabric. It won't show on your finished doll, unless someone comes with a magnifying glass! To paint a VERY THIN LINE of paint, your paintbrush needs to be loaded with paint, and you need to hold the paintbrush STRAIGHT UP AND DOWN , so the paint flows off of the tip, rather than off the side of the paintbrush. The paint right at the tip is the only thing that touches the fabric. You will have to reload the paintbrush after about 1/4 " to 3/8 ". Keep that line thin! Since the "invention" of the Gel Pens, I have been using them for this outlining, and really love them. It is much easier to get that fine line. This is especially good news for the painting challenged. I don't use fabric pens, like Pigma ©, on velour. It will bleed almost every time you try. Now, if you are both paint and Gel Pen challenged, you can do a wonderful outline with embroidery. Use a single strand of ordinary sewing thread , and do a back stitch all around the eyes.
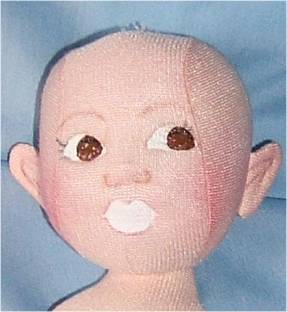
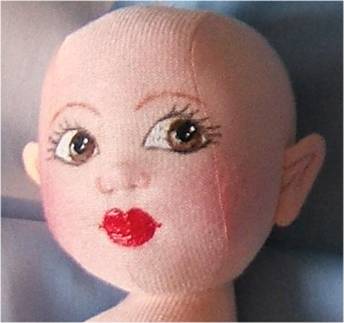
Now, let's paint a coat of lip color on the mouth The original Bleuette was a porcelain doll and they had red/orange lips, not pink. If you only have a true red color paint, add a bit of yellow to it to make a red/orange.BUT This is your doll and if you want pink lips, you can have them! 1. Simply fill the space in, fully and thickly with a red/orange color, and with the tip of your paint brush, draw the paint up at the corners of the mouth. Keep that drawn up part VERY small!!!! Let dry. 2. Sand the lips with a bit of paper bag, then paint a second coat of lip color on, but this time do the bottom lip with a little bit lighter color. You can add either yellow or white to the red for the bottom lip. NOTE The bottom lip will be below the sculpting cord so it is easy to define. Don't forget the "dotting" of the paint around the edges, and do keep the paint on top of the Gesso.
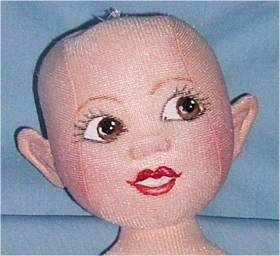
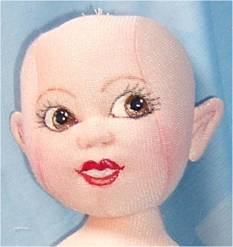
HAVE THOSE EARS STICKING OUT DRIVEN YOU INSANE YET?!? 3. Now we are going to add white to the center of the lips to look like teeth, and to give the inner part of the upper lip a little curve. This has to be done free hand but if you mess up, just paint over it and start again. I also did a bit of white over the sculpting cord to curve the inner lower lip. On some dolls this needs to be done, on some it doesn't. Each is different. The "real" Bleuette's often had a rather homely face, and all were what was called Dolly Faced .some had "teeth" some didn't. There were so many different ones over the years that you have pretty much free reign to do what you desire. (This Bleuette has larger lips than the last I did, because I needed to fully cover the penciled lower lip, from the button eye version.) 4. With white paint, add a little "lite" to the lips too. On the top lip add the "lite" in the same upper quadrant as you did for the eyes. On the bottom lip, add it in the center. 5. At the time of the final white additions, I refined the inner lips a bit with tiny dots of red paint. I also added red paint to the corners of the eyes in the "tear ducts".
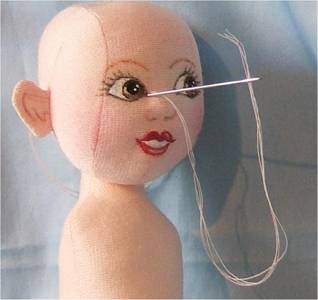
6. If you desire, you can pull the corners of the eyes in too. It is done exactly the same way you pulled the nostrils in, except you will exit the needle out at the lower sides of the head, behind the ears.
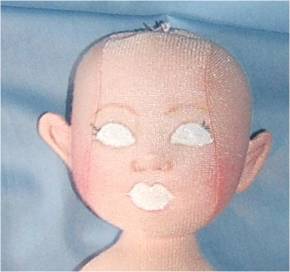
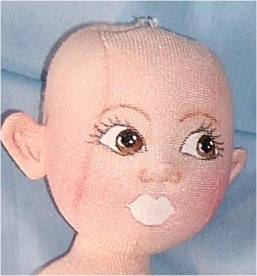
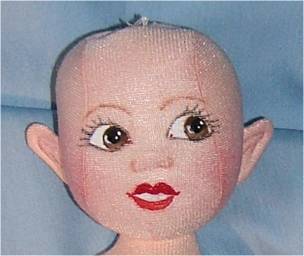
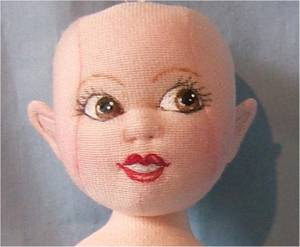
The little face all done, and ready for the LEGS AND ARMS!! The part you all have been waiting for! NOTE .The wig goes on last and the ears are tacked down after that soooo you will have to keep looking at those ears! On a final note .The light changes in my studio from one minute to the next! All of the backgrounds are light, baby blue!!! Really! The pictures on this page were done in the space of 5 minutes at the most .Oh Well, it won't let you go into "the baby blue doldrums". One more final note. .You can add dimples to Bleuette's cheeks the same way you did the eye corners or the nostrils. And one more, final note!...I know you are all wondering why we put the head on before all of the sculpting It will be the very first question asked on the blackboard Here is the answer With the neck up in the head, the head should be firmer, the shape of the head is easier to control, and if you did all of the sculpting first, you might have a hard time getting the neck up into the head with all of the sculpting threads going here and there. You will notice that all of the sculpting threads are planned away from that neck too, so the head still turns. |