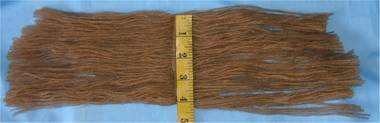
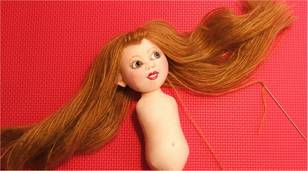
Bleuette in Cloth! Chapter 8 The hair for Bleuette in Cloth is a simple wig, purchased from a Doll Supply web site or catalog or pulled from your wig stash. I am also giving a very quick and simple braided hairstyle done with very fine "machine knitting" yarn. You could make this little braided style from other yarns or embroidery floss too. The finer the strands of yarn or floss the better. I have even thought that making the braided style from ordinary sewing thread would be great, but I have not done that. It would require a lot of patience, and a couple big spools of thread. The thread hair would have the same directions as the yarn hair, just many more strands. 1. Lay out as many strands of yarn or other fiber, at least 15" long, as it takes to make a part down the center of the head, from the forehead to the nape of the neck in back. This measurement is "about" 4". If you have a yarn winding loom, that makes this quick and easy and also keeps the ends the same. 2. Sew down the center of the strands, pushing the fibers under the presser foot of your sewing machine, close together and evenly. 3. Place the "part" down the center of your doll's head and either glue it in place or sew it in place, down the center "part". If desired, pull out a few strands for "bangs" or .you can make a little bundle of fibers and sew them in place for the bangs. 4. Pass the needle, (threaded with the same fiber as the hair) through the side of the head right below the ear. 5. Smooth the fibers on one side and tie them tightly at the side. Repeat for the other side. 6. Tightly braid the fiber at each side and tie the ends with the hair fiber. Trim the ends evenly, and add a ribbon if desired. .Pictures Follow .
One side tied down. I pulled out a bit for bangs, trimmed them and rolled them under, then tacked them down from underneath. A little yarn bundle is actually better though. You don't have to sew it down underneath.
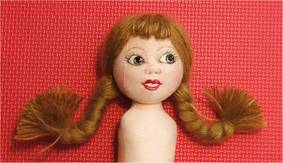
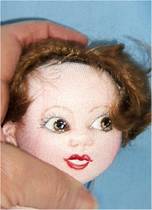
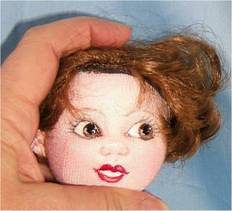
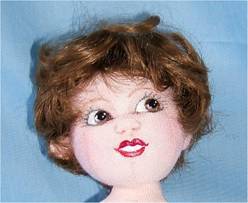
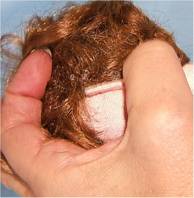
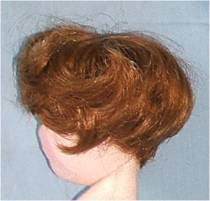
Both side are tied down and braided. Add ribbons to match your doll's clothing. It Is Done! THE WIG PLACEMENT The doll wig is the easiest "hair" method. Simply pull the wig down on the doll's head, making it even all around. It does not matter what the style is. Either sew or glue the edge of the wig to the head all around. Remember those ears?....I pull the wigs down all the way behind the ears, and then tack the ears down over the edge of the wig. This lets the ears "sick out" a little, but not too much. The only small wigs I have as I am writing this class are the little "baby wigs", but they make a nice 30s bob style and are very cute with the big ribbon tied at the crown. Pictures follow The wig part of this doll is the easiest part of all, so I am not going to belabor it.
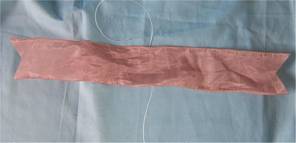
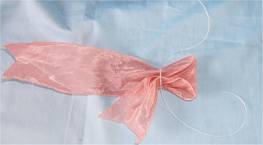
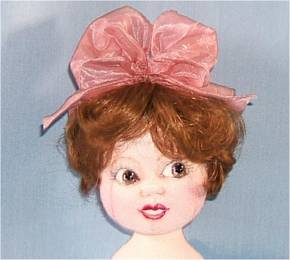
Now stitch or glue the wig down. Be sure to stitch or glue the ears down right against the edge of the wig. Brush the wig into style if it needs it. If you are using the ringlet wig, it usually doesn't need to be styled. The BIG BOW is cute with the bobbed hairstyle. BIG BOW PICTURES ONLY
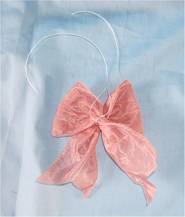
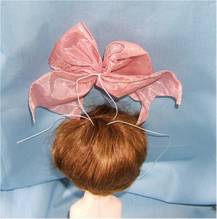
Tie the cords tightly, pulling the bow onto the top of the head. Trim the ends and arrange the big bow. DONE |