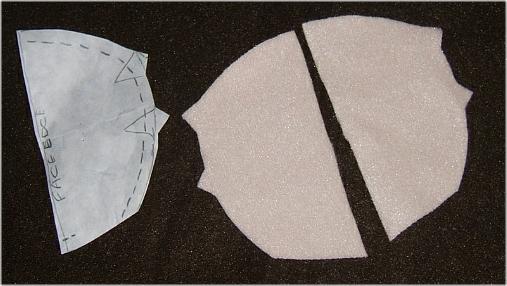
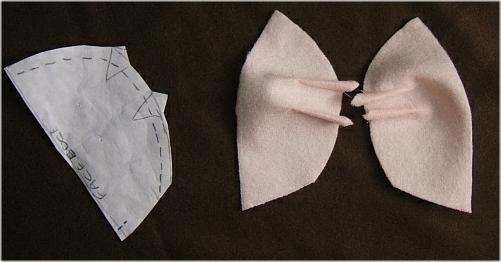
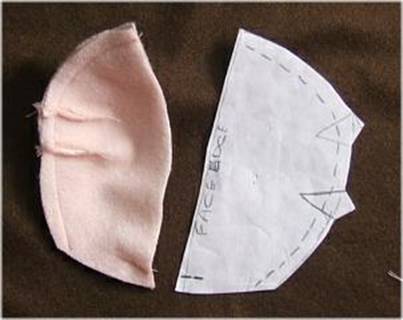
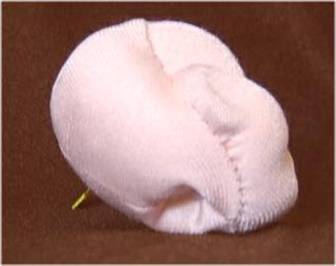
“BLEUETTE” Chapter 2 - Part 2 NOW FOR THE HEAD BACK . BIG, GIANT, NOTE>>>> If you have any fear of doing face painting, even when the face is already "pressed" on, DO NOT attach the head back yet. Wait until you have done a face you like. OR If the face you have done doesn't meet with your approval, or you used Tacky glue instead of Glue Stick, and some seepage occurred, you have not spent the time attaching the head back yet. If you want to do a Gesso and Paint coat over the face you don't like, add the back and then do the Gesso and Paint, and paint the features again. If you do the Gesso before the back is sewn on, it is nearly impossible to sew the back on. Later in the lessons I made a head with Tacky Glue and made sure it seeped onto the fabric, and did a "Gesso and paint over" for you to see. I wanted to show a "fix" for a bad face Then I almost deleted it completely, but decided it was needed. The same Head Back, attaching technique will be used whether you are leaving the cloth as is, or doing a Gesso and paint coat. Please read the above again At first read, it is confusing, but I want you to have options. I am going to make and attach the head back now, and then paint the features .Please do it the way you feel the most confident with! Head back attached, and then paint or paint and then the head back attached. 1. Cut the head back out and sew in the darts. 2. Sew the center back seam, leaving the straight edge open. Be sure to sew the tiny bit shown in the lower left of the photo. This seam needs to be at least 3/8" long, so you can fold it under to sew the face to the head back.
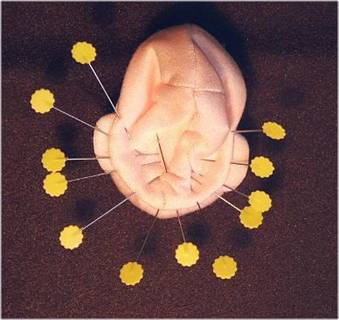
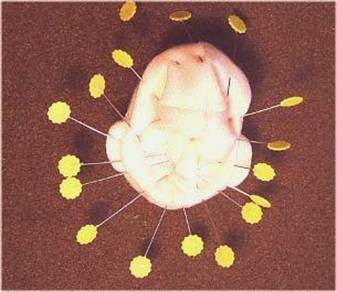
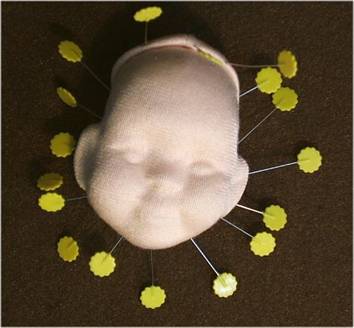
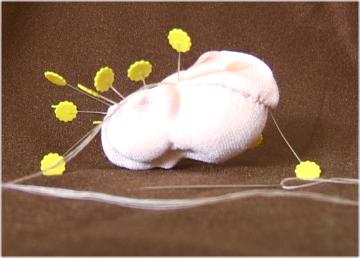
4. Now you will pin the head back in place all around the face. Start at the bottom, centering the short little seam in the middle of the chin. Turn the edge of the head back inside about ¼" as you fit and pin it in place, all around. NOTE>>> Personally, I like to work from the chin up on each side, so that any adjustments can be made at the top where they won't show. Since we all cut, and sew differently, the head back could be a tad big or you might need to stretch it a little to fit around. Any fixing is best done at the top, where it will be under the hair. NOTE 2 >>> Keep the sewing of the head back as far back as possible under the chin and up behind the ears. You can bring it forward on the top of the head more as this won't show under the hair.
5. Thread a thin needle with 2 strands of your sewing thread and Ladder Stitch the front to the back all around. I start and end the sewing at the top, so I have no anchoring threads to worry about at the chin. The pins will drive you nuts, so remove them as you sew around!
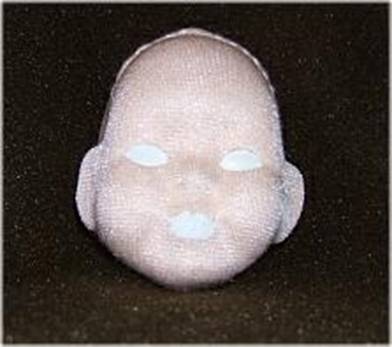
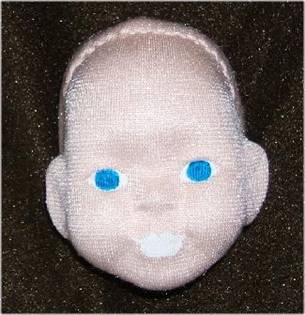
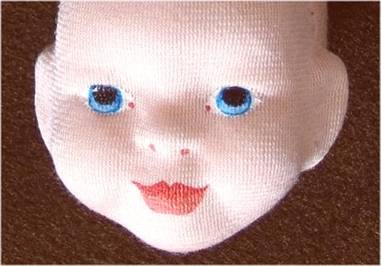
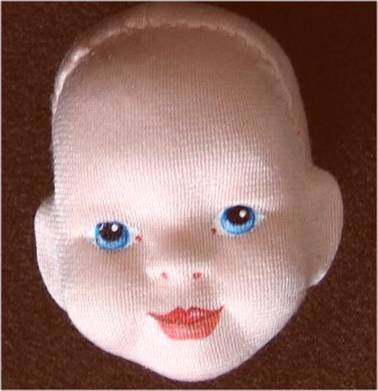
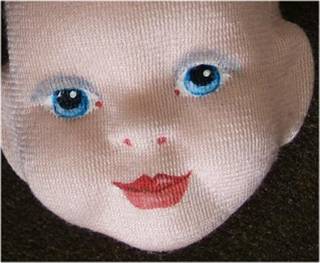
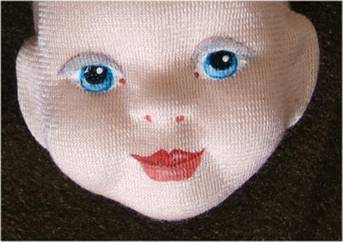
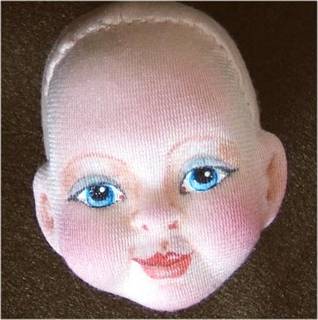
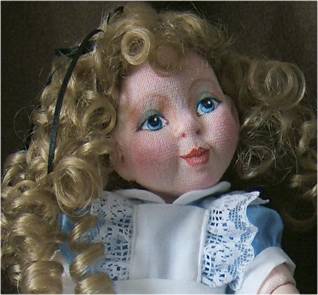
6. Now we will paint the face. I usually like to do this before attaching the head back, but for continuity I am doing it with the head back already in place. Remember THE BIG GIANT NOTE on a previous page??? 7. Let's Paint! First fill the eye whites in fully with white Gesso with the TINIEST bit of blue added. The blue makes a younger looking eye white. Also paint the lip shape with white Gesso. Now, Remember! You are not "painting" you are filling in a space cleanly and crisply. Thinking about "face painting" in this manner takes away the feeling of "I am not a painter"! Along the edges, you will "DOT" the Gesso on to fill in the little "knits" in the fabric. The smoother and neater you do the fill, the nicer your face will be. Remember, being admonished to "color inside the lines" as a child? If you never could do that, it is not too late to start! UNLESS, of course, you are a portrait painter .Then paint the face as you desire!
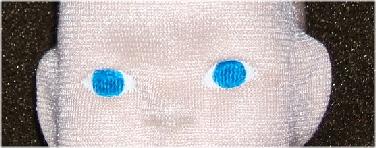
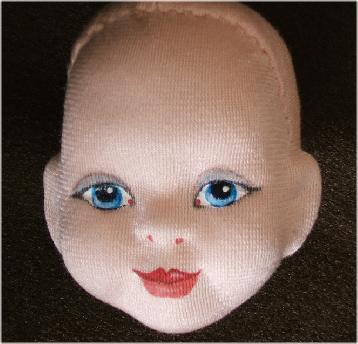
11. Mix a tiny bit of white into your eye color, and paint that lighter color on the lower part of the iris. Make it in a Crescent shape at the lower iris, leaving a bit of the darker color showing along the bottom edge.
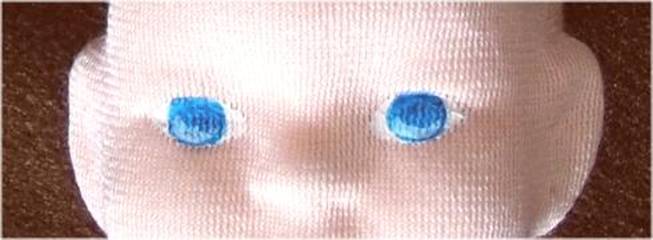
12. Now, paint the pupils in the eyes. Make them large and make them a bit under the top eyelid for this eye shape.
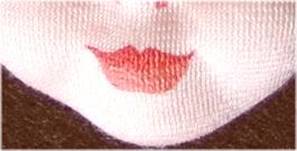
There is a little shiny spot in the upper left corner of the eye. I don't know what it is, because it does not show when I look at the face in person. It must just be a reflection from something, because all of these pictures were taken at the same time and place. 13. Now get some red paint, some yellow paint, and some white gesso on your palette. (My Palette is an old plastic lid.) Mix a bit of white and yellow into a bit of red and paint the top lip with it. Mix a bit more white in and paint the bottom lip. Stay in the lines! I also use the lighter red orange for the tear ducts and nostrils while I have it here. I usually add brown colored pencil to the nostrils later too.
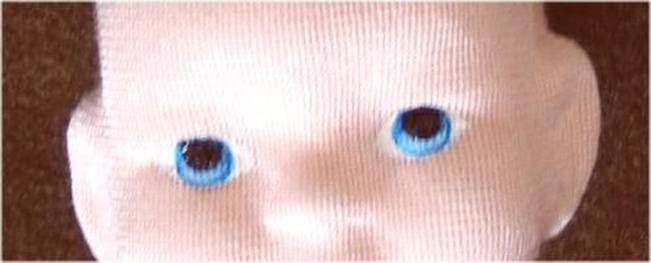
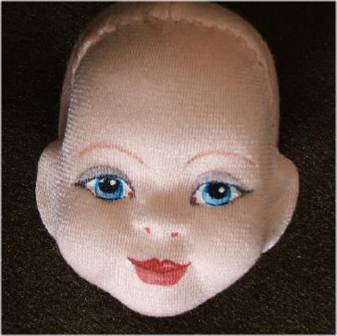
14. Now let's add some "light". With a little white gesso, add "life lite" dots to the top right corner of the iris, and a tiny crescent in the lower left corners of the iris. Add a bit of white in the center of the lower lip and top right corner of the top lip. For the lips, keep the "lites" muted. 15. With brown paint, paint a thin dividing line between the lips or wait and do this with a Gel Pen later.
16. Now for the finishing touches. With a colored pencil I chose a blue gray, shadow over the eyes. Also, darken the crease line with a dark brown pencil or a Gel Pen, if you pressed it in...Even if it didn't press well, you can draw the crease in.
First a PEN NOTE>>> Test ANY Pens you plan to use, right before you use them , on the back of your dolls head. Humidity affects pens. One day they are great, the next day they bleed! I have the best success with GEL PENS. I have never had them bleed. With a black GEL PEN ( Or if you are VERY careful and don't press, you can use a very fine point, black Micron pen) . outline the eyes VERY LIGHTLY, AND CAREFULLY ! Simply make the upper outline a bit wider as it extends beyond the outer eye shape to hint at eyelashes. This dolls face is so small that trying to make separate eyelashes is really too hard. 17. Also with a brown colored pencil draw in the eyebrows. Make them light first, and then if you are happy with what you did, darken them. You can also darken the EYEBROWS with a brown Gel Pen or Micron pen if desired. If you are really confident, do the eyebrows as little hair lines. Porcelain dolls often had the "hairy" eyebrows, called "brushstroke" eyebrows but just as often had a more solid line for eyebrows .And, it is hard to make the brushstrokes nicely on the fabric, due to the knit.
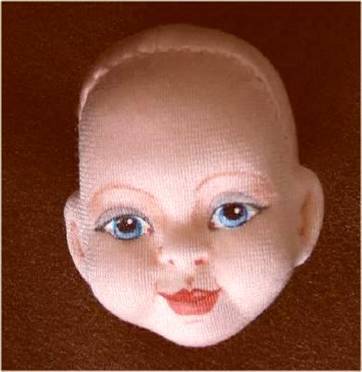
18. With a brown colored pencil, darken the nostril flares, and the little dent in the center of the upper lip. Shade at the inner and outer eyes and along the bridge of the nose. Shade inside of the ears too.
19. Blush to the cheeks, forehead, nose and chin and for a final touch, using a white colored pencil, color the white thickly, in the center of the eyelids, tip of the nose, sides of the top lip, middle of the forehead and between the eyes. You could also add this white with gesso, brushing it on VERY lightly.
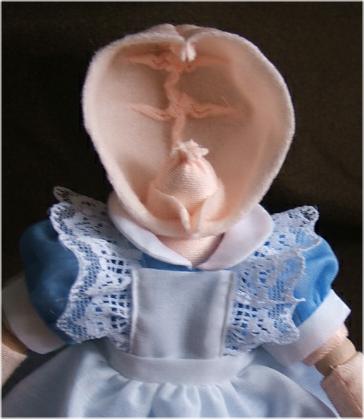
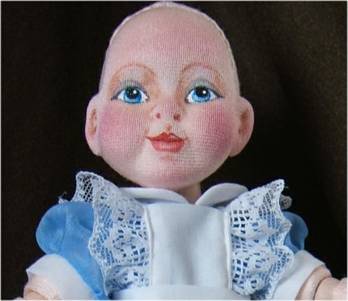
20. Tie your dolls head on exactly as you did for the regular head. BE SURE there is enough stuffing up in the head back so that you dolls head does not go way down on her shoulders!
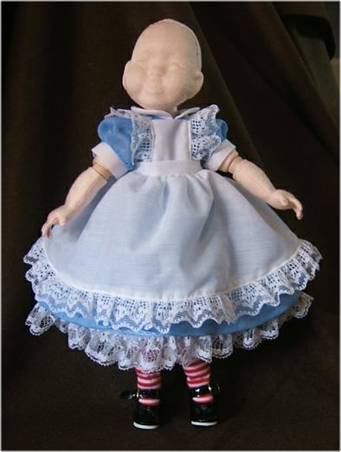
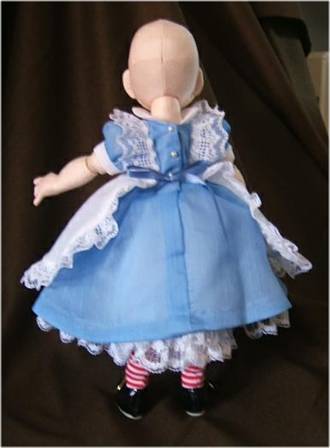
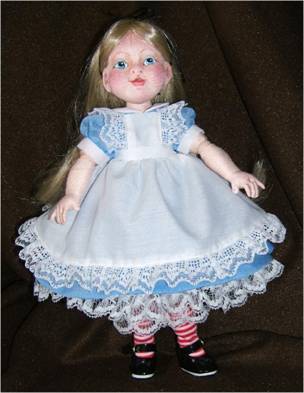
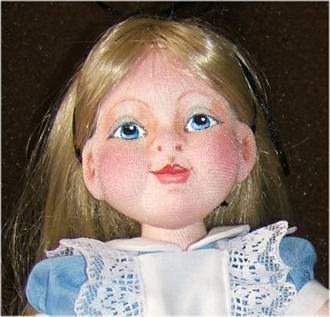
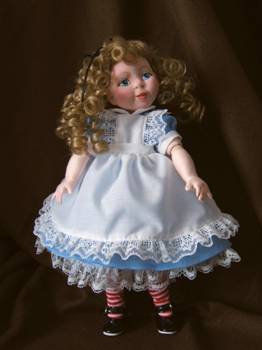
21. Glue the wig on. (I prefer hot glue for this, as it can easily be removed with a blow drier if you want to change the wig.) and tie a ribbon around the hair, and you are done. I did her the first time with the long, straight, blond wig. The second picture is with the darling, curly, blond wig.
|
||||||||||||||||||
| Go to... ~ Classroom ~ | ||||||||||||||||||


Copyright Notice: All pages and graphics are copyrighted by the Internet Visions Company and/or instructor.
You may print these out for the use of the class only. All other uses or distributions are forbidden.
Crafty College and Doll Net are divisions of the Internet Visions Company.
© 1997-2006, Internet Visions Co. All rights reserved.
All trademarks are owned by Internet Visions Company.