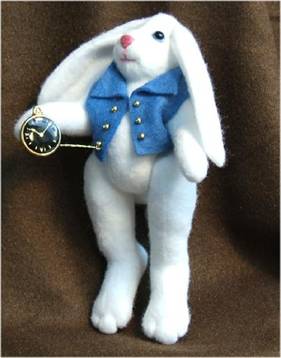
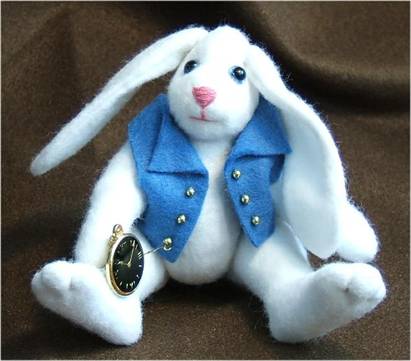
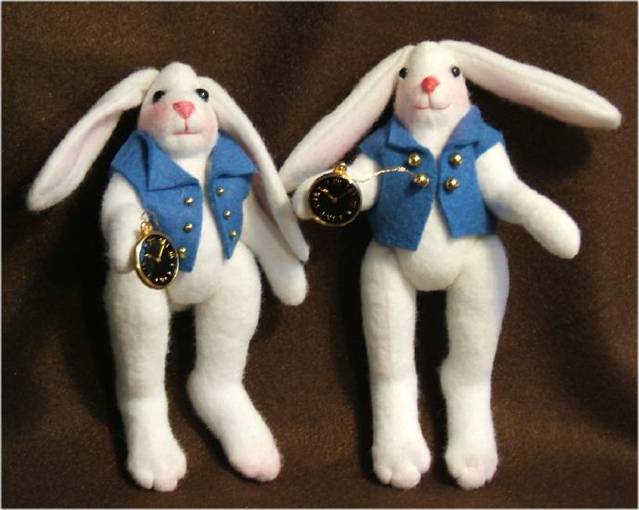
“BLEUETTE” Chapter 3 He is so cute and would make a good prop or toy for other dolls too.
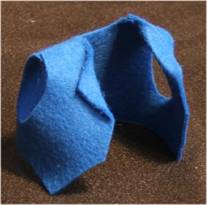
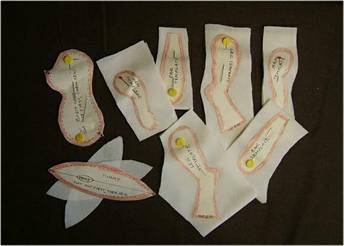
I make my White Rabbits from White velour. With the stretch side to side, you will have a shorter, fatter Rabbit. With the stretch up and down, you will have a taller, slimmer Rabbit. You could also use white felt, but it would need to be lightweight felt for ease of turning .A hint for using the white Freezer Paper patterns on white fabric . Color the edges of the pattern pieces with colored pencil so you can see the edges as you are sewing around the templates. 1. Iron all of the pattern pieces onto the wrong side your doubled fabric. In this case, I want to Fuzzy side showing on my Rabbit, so I iron to the smooth side of the velour. 2. Cut the tummy center and the body sides out right along the paper. They have the seam allowances already on them. THROW AWAY one tummy piece You only need one. 3. Cut the template parts away from each other for easier handling. 4. Cut the vest from felt, and glue the shoulder seams with fabric glue, press the lapels back and glue them down too.
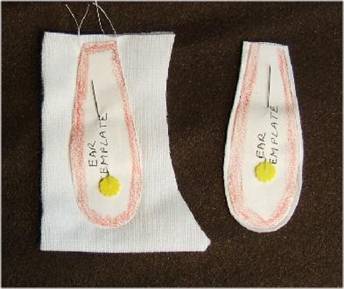
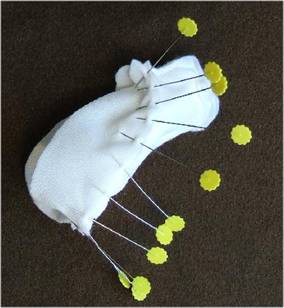
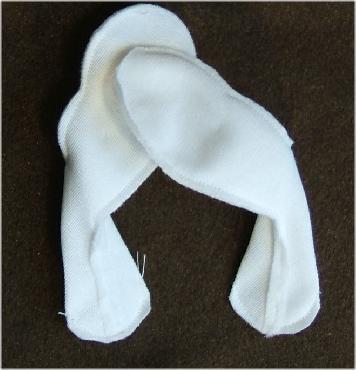
5. Sew the ears around the edge of the template, leaving the straight edge open. Cut them out a scant 1/8" from your sewing, and turn them right side out NOTE All template pieces will be cut out the same way 6. Slit the head sides where shown on the pattern, and sew the straight edge of the ears into the slits, folding the edges of the ears to the inside to make the ears fit the slits.
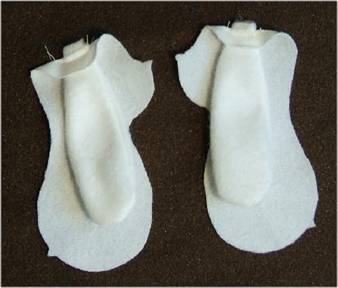
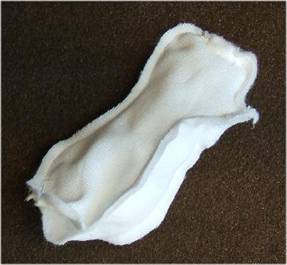
6. Sew the body sides together from the nose triangle, over the top of the head, to the triangle at the back. 7. Fit, pin and sew the tummy in place on one side. I like to work this part from the nose to the back on one side, and then from the nose to the back on the other side. Any adjustments can be made at the bottom, back, where a tail will be.
8. Fit, pin and sew the other side of the tummy to the other side of the body side. Again, I start at the nose and work towards the bottom. LEAVE an opening for turning and stuffing at the bottom.
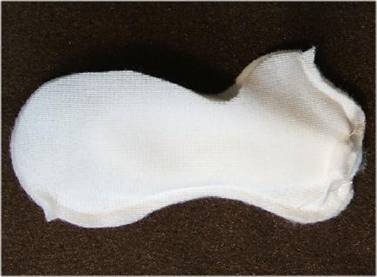
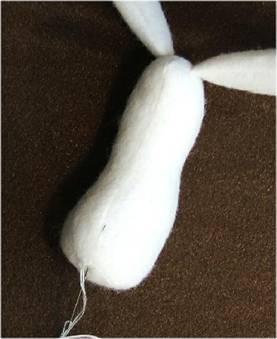
9. Stuff the Rabbit fully, shaping as you stuff. The Rabbit being made in this class is made with the stretch up and down, so he will be thinner. 10. Sew the opening shut and bring your needle out at the lower back to sew on the tail. I have used a cotton ball here, and sewn into the body and through it several times to give it a lumpy look. This is also where you will anchor of your stitching, right under the tail.
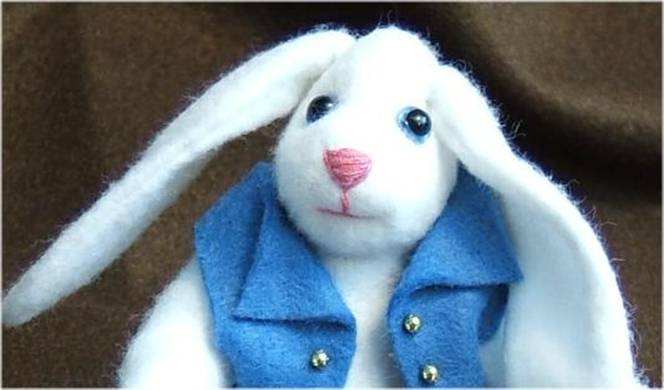
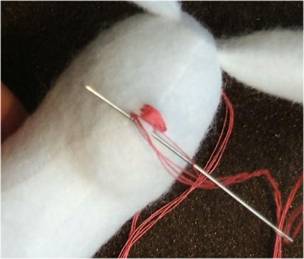
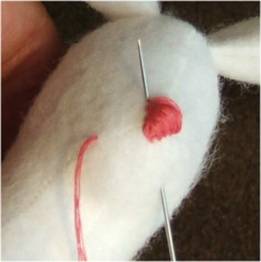
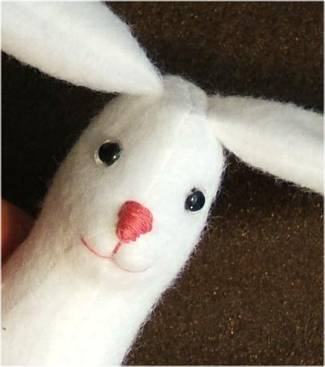
11. Embroider the nose as a triangle, making a satin stitch from wide to narrow. Bring your needle out at the mouth corner, and then bring it across to the other side and out at the top of the nose. From the top, come out at the tip, and make a stitch straight down from the tip of the nose, to the center of the mouth. Bring the needle out at the top of the nose and sew a few more satin stitches in the nose to cover any spots you missed. Exit out at the side of the head. I like to put a coat of clear drying glue over the satin stitched nose too. Mostly, because I am a TERRIBLE embroiderer! I almost always end up with a piece of thread that is loose. Did it this time too!!!!!
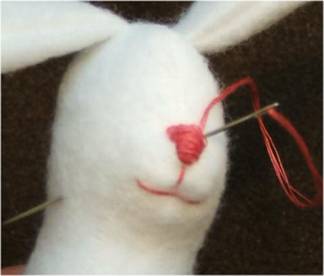
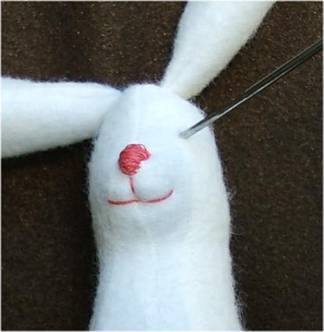
12. You can also sew a line of your pink along each side of the triangle nose, to clean the sides up a bit .OR .You can paint the nose, and do only the mouth with the thread. 13. To get the eyes in, you will need to use your big, jointing needle and poke and work a good hole where the eyes go. Then put some glue on the stem of the eye, and push it into place. You could also use beads or tiny buttons for eyes, sewing them in by going back and forth between them several times and then bringing your thread out away from the eyes.
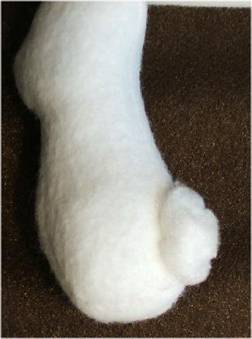
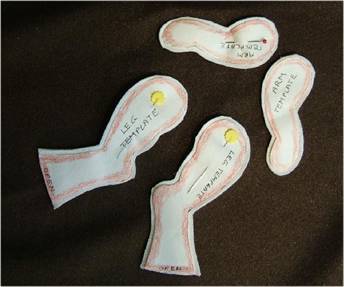
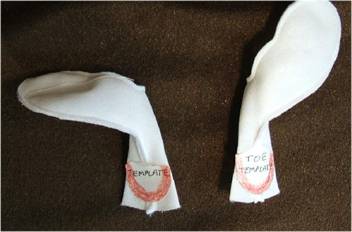
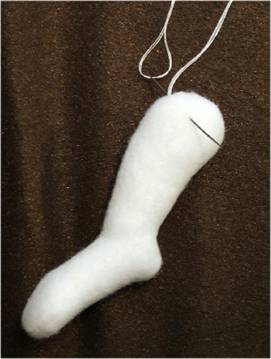
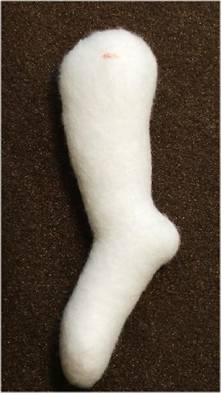
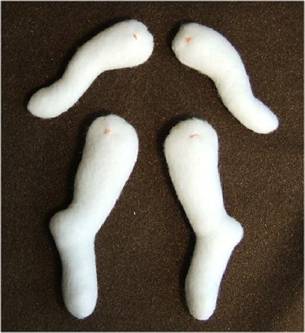
14. Sew around the leg and arm templates, leaving them open where marked on your pattern, and cut them out. 15. Fold and press the foot fronts "seam to seam" and then iron the toe templates in place. Sew around the front of the templates to make the foot fronts. Trim the front seam. 16. Stuff the limbs very firmly and ladder stitch the openings shut. After stitching, bring your needle out at the inner side of the limbs to anchor off your stitching. Stitch in place several times and then exit away from the stitching. This thread at the inner limbs will be where you sew for jointing. I have colored it so you can see it. BE SURE to make a right and a left for legs and arms. This small Rabbit does not need buttons inside for jointing.
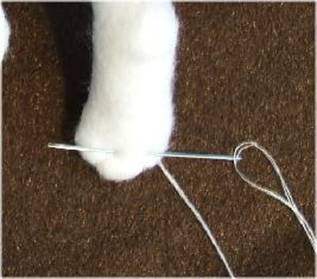
17. Joint your Rabbit just like you do for dolls, except you will sew through the stitching for extra strength, rather than having a button inside. 18. Needle sculpt toes if desired. To do so, enter at the bottom of the foot, about half way between the side and seam. Bring your needle out and sew around a couple of time. Exit at the top of the next toe division. Sew around there a few times. To anchor off the sewing, sew back and forth, between the toe stitching several times and exit away from the stitching.
19. Sew beads to the vest to simulate buttons. Sew the Clock button to the White Rabbits hand. With gold thread, sew from the clock to the button on the vest, to simulate a watch chain.
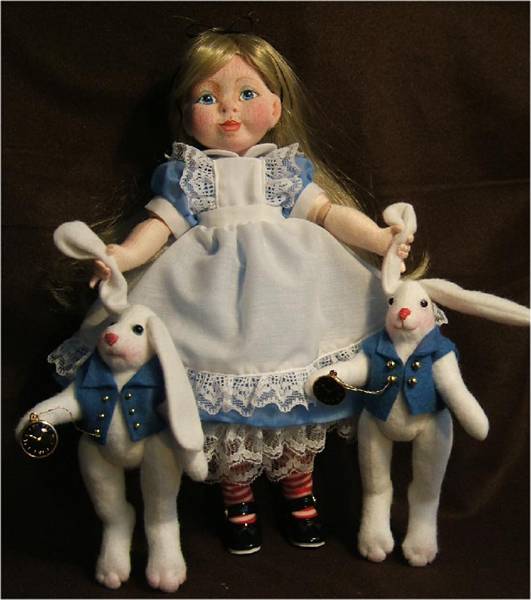
ALICE HAS CAUGHT THEM BOTH!
|
||||||||||||||||||||||||
| Go to... ~ Classroom ~ | ||||||||||||||||||||||||


Copyright Notice: All pages and graphics are copyrighted by the Internet Visions Company and/or instructor.
You may print these out for the use of the class only. All other uses or distributions are forbidden.
Crafty College and Doll Net are divisions of the Internet Visions Company.
© 1997-2006, Internet Visions Co. All rights reserved.
All trademarks are owned by Internet Visions Company.