Merna takes a test drive
Online Cloth Doll and Fish Class
by Kate Erbach
© September 2006
Lesson 2 - Fish Body
Fish body: The fish body and gussets are pattern pieces with 1/4 seam allowances included. Cut two body pieces and two gussets.
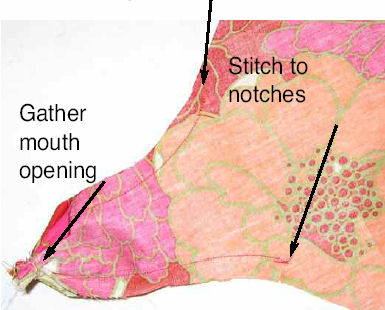
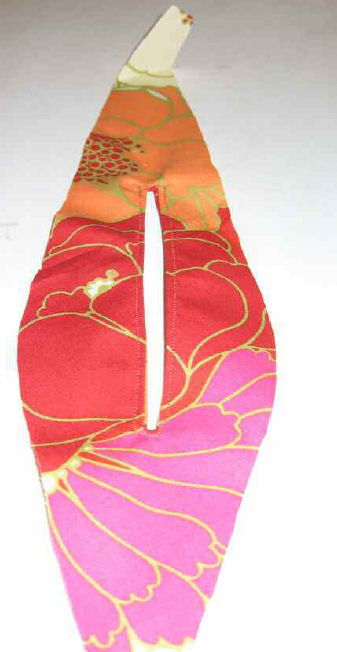
Stitch the sides of the mouth from the end to the notch on each side.
Hand gather the end closed. Grasp the gathered end and pull it through the mouth till you can just grab it from the right side.
|
 |
| |
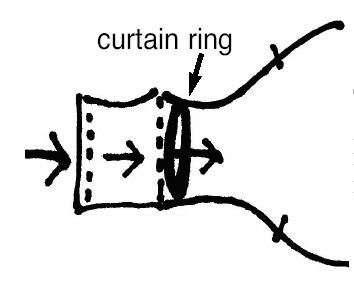
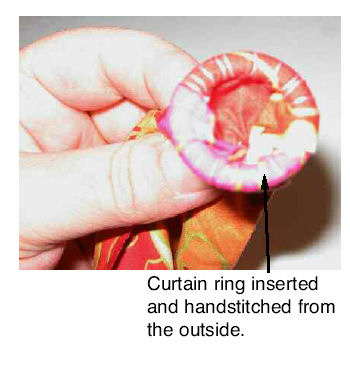
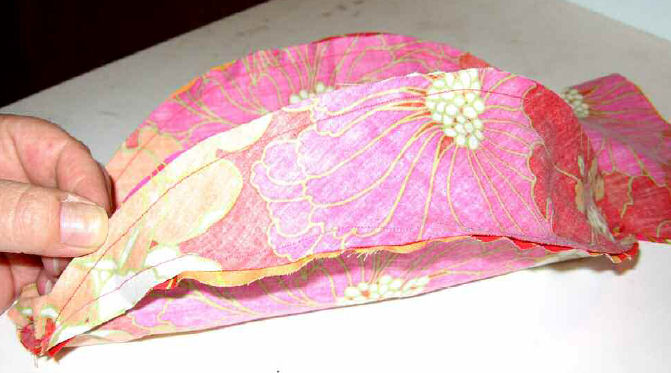
Take a 1 curtain ring and place it over the gathered edge and slide it down to where it is marked on the pattern for the facing, pull the mouth back over on itself covering the ring.
|
|
From the right side, stitch by hand all around the ring with an overcast stitch. This gives your fish a nice rounded open mouth. |
|
|
 |
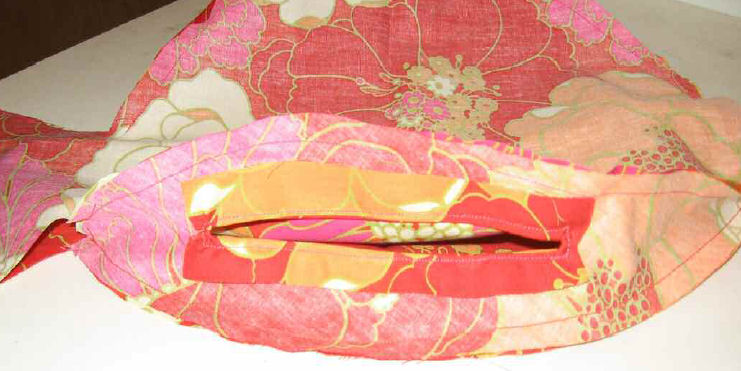
Cut a 2x5 piece of body fabric for a facing in the bottom gusset. Center the facing RST on the bottom gusset.
Stitch a very thin rectangle in the center of the facing, approx. 4-1/2 long by 1/4 wide, remembering to pivot at the corners.
Slash down the center of this stitched area, slashing into the corners but not through the stitching. |
Turn facing to inside, finger press. You may topstitch around the opening if you wish.
This creates the opening for stuffing through and for placement of the support dowels. |
 |
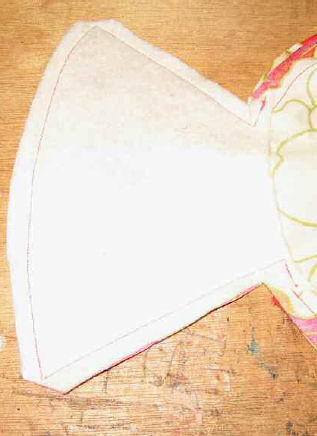
Take the top gusset and stitch with a 1/4 SA from point A to B and C to D on each side. Remember to stitch the top gusset to the top of the fish, (the gusset with the facing is the bottom gusset) this is shown on the pattern piece or the more rounded edge of the fish body.
Stitch bottom gusset to body from point A to B and C to D on each side.
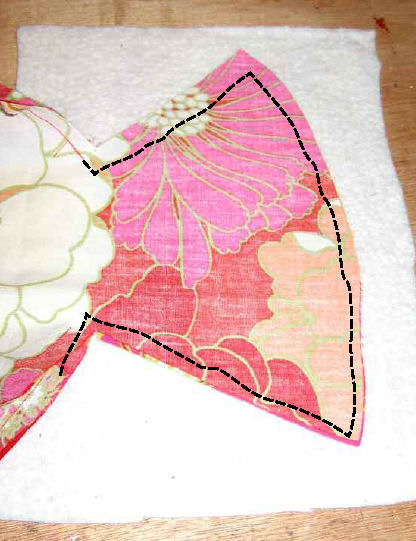 |
With RST place a piece of Warm & Natural or batting under the tail section on the body. Start stitching from a point where you ended the gusset stitching and stitch around the entire tail ending up at where the other gusset finishes. Because everyone sews differently, your tail seam may not meet exactly where the gusset ends. Not to worry, the fins that are added later will hide any inperfections. If you need to take a tuck here, do so. |
Clip batting close to stitching, clip curves.
Turn fish RSO through the facing in the bottom gusset. |
 |
|
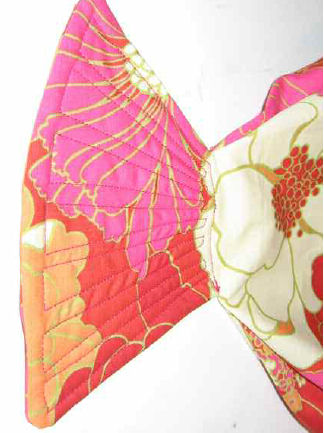
Quilt lines onto the fishes tail using any configuration you desire. If you desire to bead or sequin the fish's tail, do so at this point. I sometimes like to use random beading with sequins thrown in too. Use the method and pattern you are most comfortable with. |
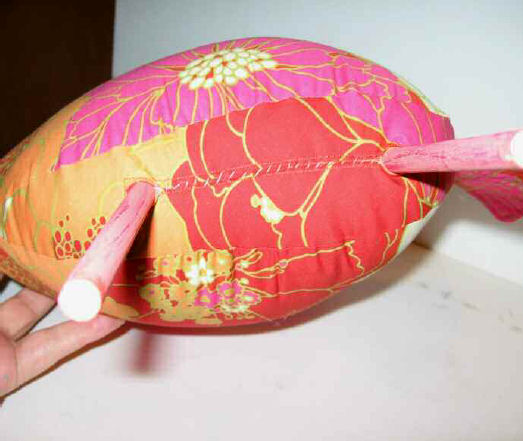
Start stuffing the fish in the mouth area. Place smaller bits of stuffing in to fill out mouth smoothing area as you go. Be careful not to push out the gathered facing. Continue to stuff the fish until it is all filled out. The stuffing should be firm but still have some give, kind of like a plump cushion. Take the 11 dowels and insert through the facing at the bottom and push up into the fish. Approximately half of the dowel will be in the fish and the other half outside (the painted part).
 |
Thread a needle with upholstery thread and stitch the facing opening closed
around the dowels. Set fish aside.
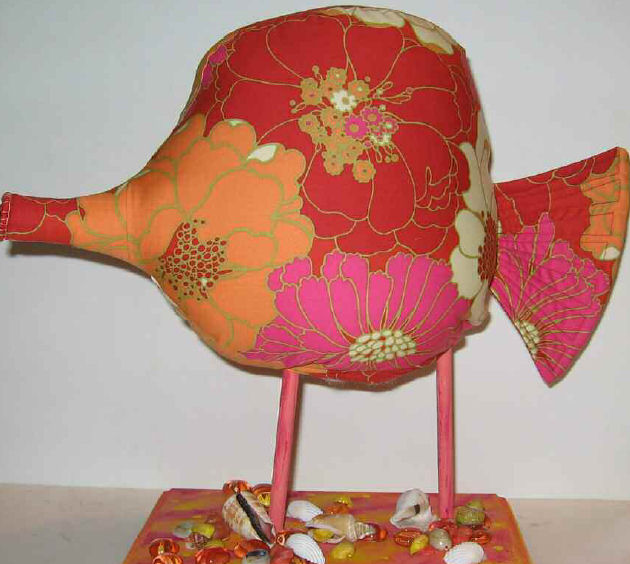
You can insert your fish into your stand for the time being. |
Next comes the fins, eyes and bridle.
© Kate Erbach 2006