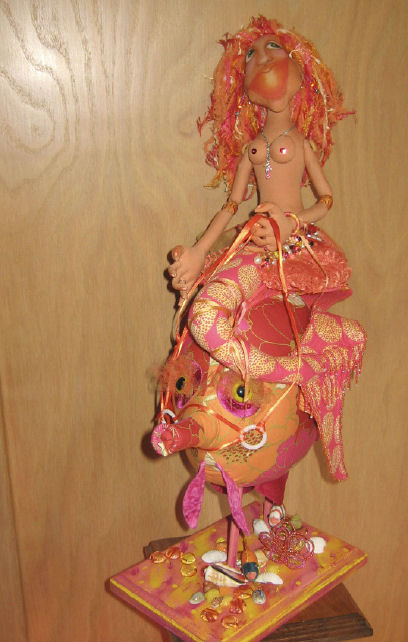
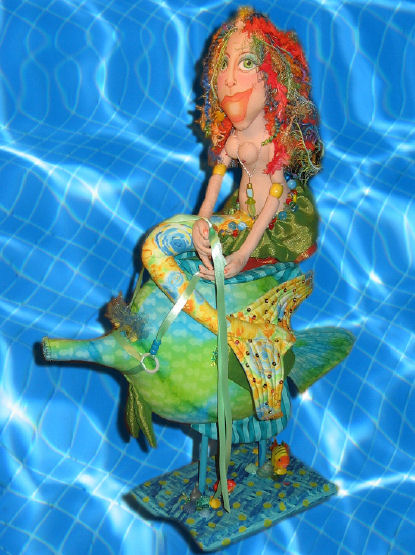
Merna takes a test drive
Online Cloth Doll and Fish Class
by Kate Erbach
© September 2006
Lesson 7 - Ears, Head and Face, Finishing
|
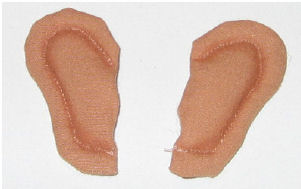
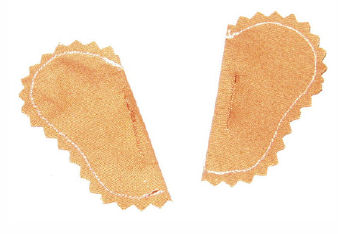
Ears: Place ear templates on fold of fabric. Stitch around and cut out leaving a 1/8 SA.
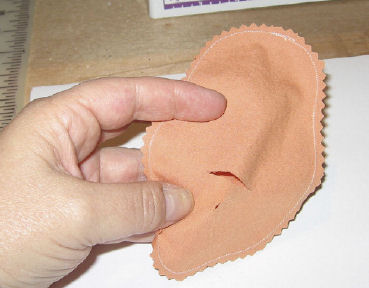
Cut a small slit on the back of each ear close to the fold, (remember to have a right and left ear) turn RSO through slashed opening.
|
Lightly stuff ears. Topstitch 1/8 from edge all around ear. Shade over the topstitching with a lt.brown, umber or sepia Prismacolor pencil and blend in. |
|
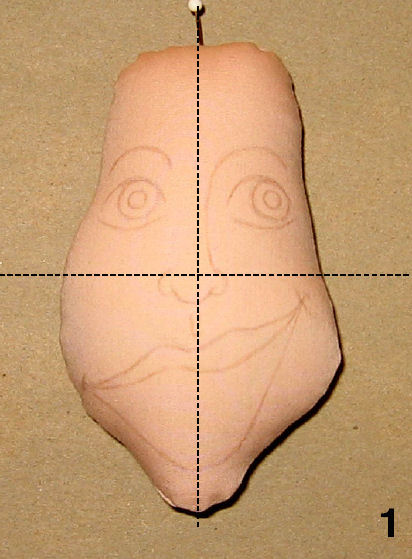
Head : Iron head template onto doubled fabric. Sew completely around and cut out with pinking shears.
On one side only, snip a small T shape at the lower end of the head for turning. Turn RSO. You may want to apply Fraycheck on the edges of the T slit to fortify this area. Stuff head firmly.
|
|
Face Drawing and Coloring
I use an assortment of Prismacolor pencils, gel pens and paint pens for doing my faces. 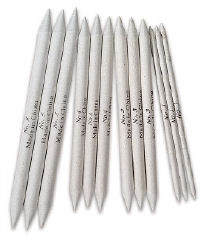 A white paint pen for whites of the eyes and teeth (if present), brown and black gel pens for face details, and Prismacolor pencils in an assortment of colors for the actual face coloring. I have also found that a white pastel pencil is perfect for adding highlights to the skin areas. I am a firm believer in blending colors for a more natural look. To get this I usually use a blending tortillon (see picture at left), these can be found at art supply stores or in the art supply department of craft stores. Decide the color of eyes and lips you want Merna to have and choose 2-3 shades in the same colorway.
|
1) Lightly draw the features on Merna's face with a mechanical pencil. Take care to keep the eyes and nose in relation to each other while the lips are exagerrated. Proportion is still important even when doing caricature faces. If the nose was exagerrated then the eyes and lips would be in proportion to each other; if eyes are exagerrated then nose and lips are in proportion. If you are unsure about placement, first draw Merna's face on paper. Do this a couple of times until you are comfortable transferring to fabric.
In the case of Merna, She uses half of the head for her mouth. |
The bottom of her nose is located halfway between top of head and bottom of chin. The eyes are in the middle between the bottom of the nose and the top of the head.
Make the mouth extremely exagerrated. Don't be afraid to stretch it out to the sides of the head. Her mouth is meant to be her dominant feature. |
|
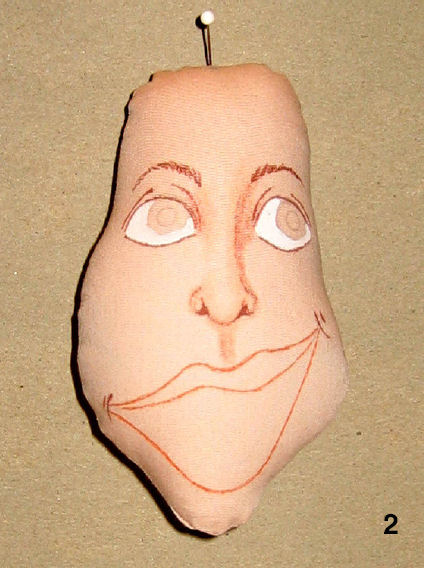
2) Color in whites of eyes with a white paint pen.
Lightly shade the nose flares, up the side of the nose and into the eyelid, below the nose and at the corners of the mouth.
Deepen the eye crease with a gel pen and make the nostrils with a dark brown gel pen.
Draw light, short eyebrow lines with a dark brown gel pen.
|
3) Select 3 shades of one color for the eyes. First draw around the iris with the darkest color, also deepen the top lash line with this color.
Color in half of the iris with the medium shade of the color chosen, do the other half of the iris in the lightest shade.
Blend the colors of the eyes together with a blending tool. Add more color if needed. You may also elect to add lines into the iris with a coordinating gel pen. Use a light hand and draw radiating lines out from the area where the pupil will be. I usually add lines only to part of the iris, perhaps half way around.
|
|
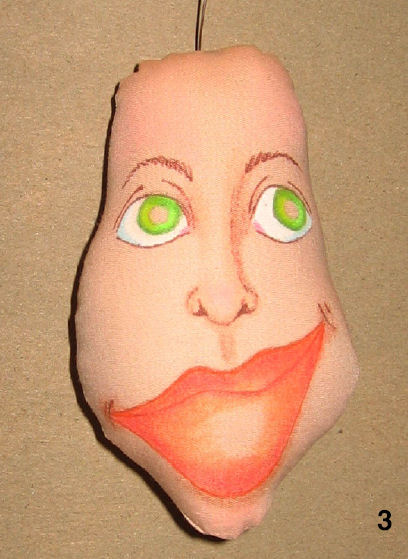
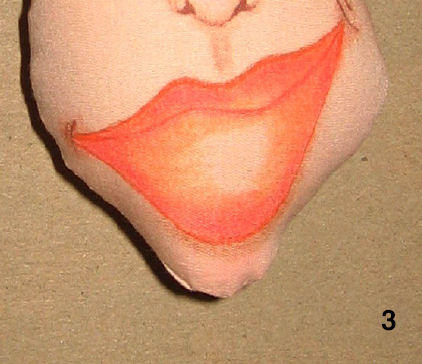
For the lips, choose 2 to 3 shades of Prismacolor pencils plus a lighter color such as white or cream for highlighting. Here is where the pastel pencils come in handy.
Use a gel pen in a color close to the colors chosen for the lips and outline the lips with the gel pen. Also line the center dividing line on the lips.
Using the darkest color chosen, color in the top lip and the outside edge of the bottom lip.
|
|
With the medium color, color over the top lip and add color to the central area of the bottom lip leaving a circular portion in the center empty of color. Blend the colors of the lips well with a blending tool. I will often go back and apply more layers of color to the lips and then blend more. Always with the blending, SHEESH!
With a white or cream pastel pencil, blend into the center area on the bottom lip for highlight. Blend this highlight out into the surrounding area of the lip.
Redefine the lip line dividing the lips with the gel pen. |
4) The final details to the face. Make pupils with a black gel pen or paint pen. Remember to locate the pupils in the center of the eye, larger pupils will give a more innocent look while smaller ones will indicate slyness, meanness, sleepy, lazy and other like emotions.
|
|
You will notice that the iris is drawn so that some white still shows at the bottom the eye. This gives a more openness and innocence to the face of the doll.
Go around the outside of the iris again with a darker color of the main iris color. A thin line around will do.
Add a drop of white highlight with a paint pen to the eyes. This indicates direction the light is coming from so when you attach the head of your doll to the body remember to tilt the head so the highlight is at the upper edge of the tilt.
Now darken the eyeliner on the top eyelid, drawing a line with a black, deep blue or deep green gel pen. I usually make the line thicker at the center of the lid to give more lift to the eye. Draw a few eyelashes out from the top eyelid using light sweeping strokes. With a brown gel pen add light lower eyelid lines, remembering not to draw in the complete line. Lightly go over this line with a shading color and blend.
Put on eyeshadow in 1 or 2 colors on the lid and a light color for under brow highlight. Blend. Go back and deepen the eyelid crease again with a brown gel pen.
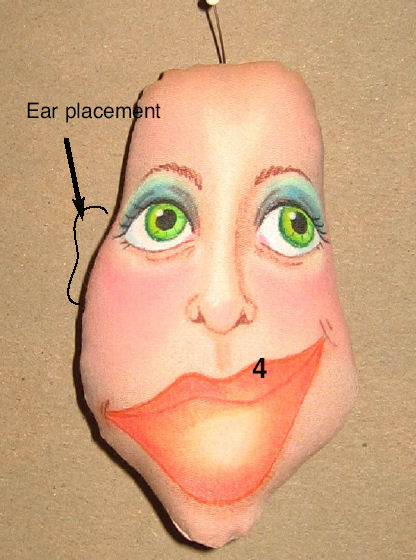
Stroke white pastel color up the center of the nose into the forehead, under the lower eye in a gentle swooping curve, maybe a touch on the chin and add a bit more to the lip highlight. Blush cheeks using 2 colors of chosen blush color. With the lighter of the 2 colors, make a triangular shape on the apple of the cheek, with the darker color add color around the two side edges of the triangle. Blend the lighter color at the top of the triangle into the highlight. Blend, blend, blend the rest of the blush into the lower face and up into the temple area. Put a thin strip of FabricTac on the fold edge of each ear and place on the dolls head with the top of the ear lining up with the top of the eye and the bottom lining up with the bottom of the nose. Glue folded edge onto side seam of head. Isn't she beautiful?
To attach her head to the body, insert her neck into the slit made at the head back. Position the head with a slight tilt and ladder stitch the head to the neck with tiny stitches.
Alternate faces for Merna.

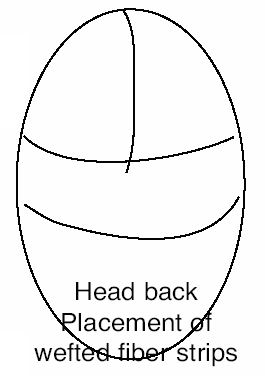
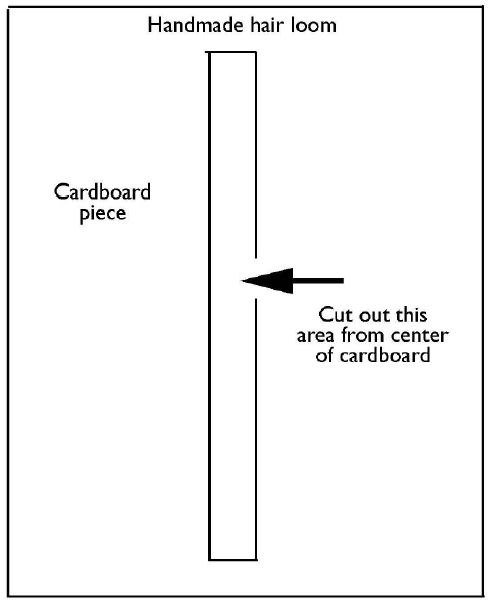
Hair: Merna's hair is made with an assortment of fancy yarns, strips of tulle and ribbon. Use a hair loom to wrap the fibers and then weft stitch down the center, turn and stitch back the way you came. Cut the fibers off the loom and cut the weft piece into manageable pieces to fit Merna's head. Starting from the back of the head, lay a strip of wefted fiber from ear to ear and glue down with FabricTac. Repeat about a 1/2 above this section. Take a third section and glue that to the center of the head with the weft running from front to back, laying over the last wefted piece at the back by a 1/2 or so. If you don't have a hair loom you can easily make one from cardboard.
|
|
|
Take a piece of stiff cardboard and cut it so one side is shorter than the other. In the center of the cardboard draw a rectangle about 2 inches wide and the length of the cardboard minus 1 inch at top and bottom. Cut out this rectangle.
Wrap fibers across the width of the cardboard using the cut out as the area where you can sew. Slide the cardboard loom under your presser foot and sew down the center of the cut out rectangle, wefting the fibers as you go. Cut the outside edges and trim the wefts for applying to the dolls head.
|
Jewelry (optional): I sometimes like to add jewelry to Merna. To do this I use an assortment of small beads in colors to compliment her clothing. With a beading needle and Nymo thread, anchor the thread at the base of her neck in the back, start adding on beads till you reach the length you want and pull the thread to the back of the neck and secure. For earrings I use a long eye pin (3), place a few beads on the pin, poke a small hole in each of her ears, thread the end of the eye pin through the hole and bend down to secure.
And now the final look: Place Merna on top of the fish allowing her tail to bend down on the side of the body. Sometimes Merna doesn't want to sit right and I have also placed strategic hooks and eyes to hold her in place. Usually I place the eyes on the inside of the fins to coincide with the back of her butt. Then stitch hooks onto her butt to use to attach to the eyes already sewn in place. I have also laced a silk ribbon through the front of the top dorsal fins and wrapped around Merna's tail and tied off in a bow and let the ends dangle. Many times it is just how the fish is p ositioned on the supports. I have found that if the fish is slightly raised in the front, Merna will sit easier which allows the curve of her tail to conform to the curve of the fish's body. Pull the ribbon reins up into her hand and bend her fingers around the ribbon. And now Merna is ready to take her test drive. Maybe there's a spot in your home that she would like to drive to.
|
© Kate Erbach 2006