Getting started:
Please read through the instructions before beginning your doll. I have included both a curved leg pattern and a straight leg pattern.
Use the leg you desire on your doll.
Set your sewing machine for small stitches.
Backstitch at the beginning and end of each seam.
Clip curves as needed.
Hint: Sometimes the marks from a disappearing ink marker don't always disappear. Put a little white vinegar on a cloth and dab the marks. They'll vanish instantly!
|
Step 1:
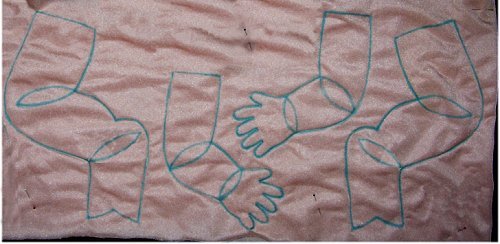
Trace all the pattern pieces onto freezer paper and cut out. Trace 2 arms and 2 legs, reversing one arm and one leg.
With right sides facing, fold the robe velour in half creating a double thickness of the fabric. Pin the double thickness together in several places to hold it securely.
With the waxy side of the freezer paper toward the fabric, lay the doll pieces (arms, legs, and body only) on the fabric - use only one set of legs, either the straight or the curved pattern piece.
Don't crowd the pieces. Allow approximately 1/2" between each one.
With a hot iron, press the freezer paper pattern pieces onto the fabric.
The arrows represent the "straight of the grain". The straight of grain is parallel to the selvage edge of the fabric. The arrows on the pattern pieces show which way the pattern is to lay on the fabric.
Using a disappearing ink marker or a pencil, draw around each piece.
If using a pencil, draw very lightly!
Peel the paper patterns off the fabric.
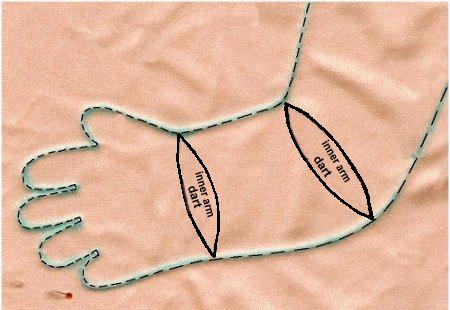
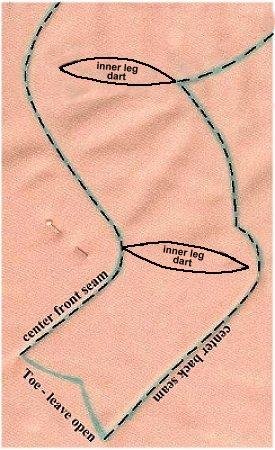
Draw all darts onto the pieces, as shown in the picture at the right.
DO NOT cut out the pieces. The pattern pieces do not have a seam allowance. The lines you drew around the pieces on the fabric are the seam lines.
|
Step 2: Sew the center back seam and the center front seam of the Body.
Leave the neck open and leave the lower edge open.
|
Step 3:
Sew each arm. Leave the top open for stuffing.
When sewing around the fingers, sew slowly and carefully around each one.
At the tips of the fingers, make two or three stitches, stop (with the needle down), lift the presser foot, turn the fabric slightly, then lower the presser foot. Make another 2 or 3 stitches. Repeat around each finger and the thumb.
Do not sew to a "V" between each finger. Always make 1 or 2 small stitches between each one.
Don't sew the Inner Arm Darts yet.
|
Step 4:
Sew down the sides of each leg - the center front seam and the center back seam.
Leave the top open for stuffing and
leave the toe open - do NOT sew the toe of the foot.
Don't sew the Inner Leg Darts yet.
|
Step 5:
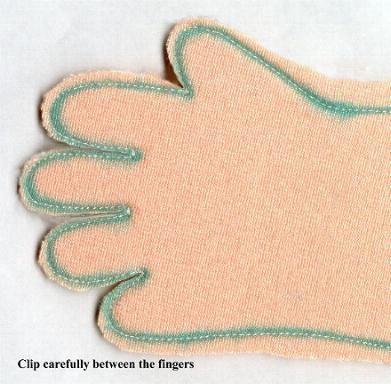
Cut out the body pieces leaving about a 1/4" seam allowance. Clip the seam allowance on all curves.
Cut carefully between the fingers so you don't cut the seam. The seam allowance between the fingers is only about 1/16" or less, so you have to watch closely and
cut carefully.
|
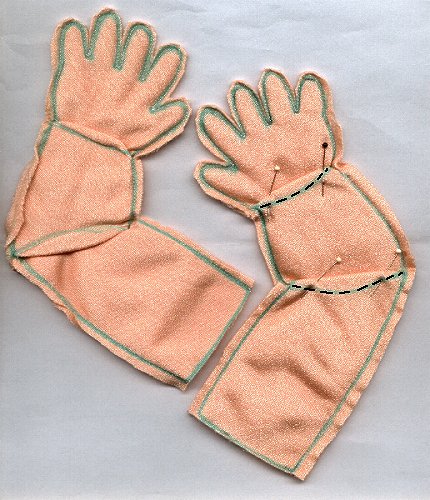
Step 6:
Pin the darts on the inside of each arm and sew. Do not sew any darts on the outside of the arms.
Turn the arms right side out, using a hemostat, or other turning tool, to turn the fingers.
|

Step 7:
Pin the darts on the inside of each leg and sew. Do not sew any darts on the outside of the legs.
|
Step 8:
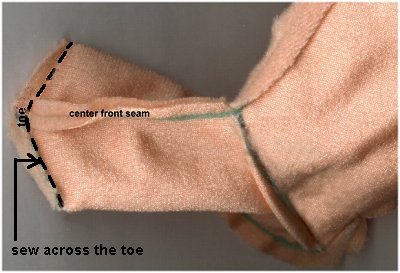
Right sides facing, match the center front seam of the foot (which is the top of the foot) to the center back seam (the bottom of the foot). Pin the two together.
Sew across the end of the foot.
Turn the legs right side out.
|
The arms and legs are now ready to be sewn to the body.
But next we'll make the doll's head,
then we'll be ready to make the body and put it all together.
Go to Chapter 2
|