Step 1:
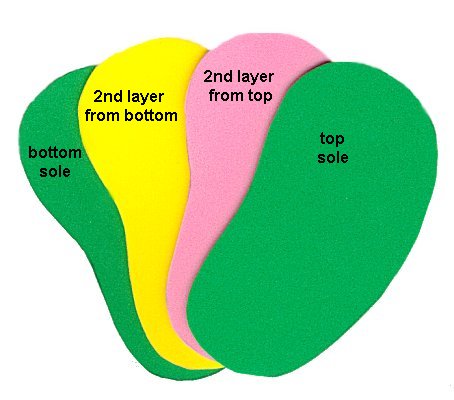
Cut 4 foam soles for each sandal.
You can use the same color foam for the soles or you can use
2 or 3 different colors.
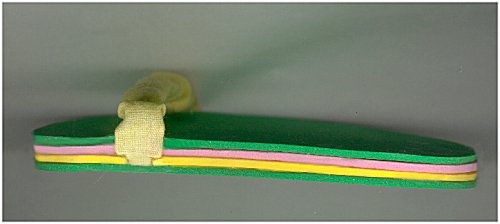
The foam soles will be layered to create the sole of the
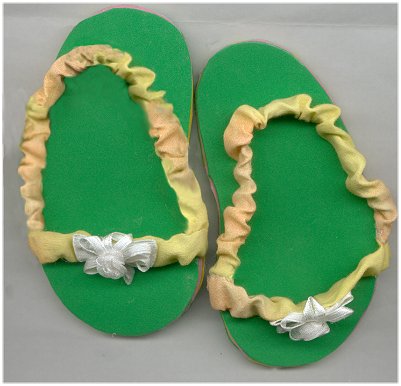
sandal. (My sandals have a green sole on the top and the bottom,
with a yellow and a pink sandwiched between them.)
Cut 4 pieces of 1/4" wide elastic. Cut each piece 5 1/2" long.
From dress fabric, use the Elastic Casing patterns and cut 2 Casings for the Toes and 2 Casings for the Heel.
You'll also need some scraps of narrow ribbon to help turn the Elastic Casing after we sew them.
|
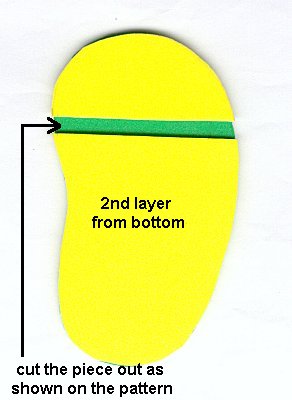
Step 2:
On the second from the bottom foam layer, cut a piece out as shown on the pattern.
Using Beacon's Fabric Tac, or another glue that will glue foam, glue
the two pieces of the second foam layer to the bottom foam sole.
Be sure to leave the open space that exposes the bottom sole. This space is for
the elastic.
Match all the edges. You want all of the foam pieces to match when we get them
all stacked on top of each other.
Let the glue dry for a few minutes.
|
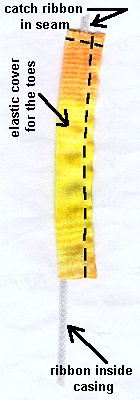 Step 3: Step 3:
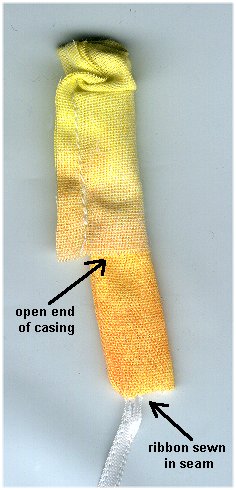
To make the fabric cover (casing) for the toe elastic, place right sides
of the fabric together. Sandwich a length of narrow ribbon inside.
The ribbon needs to be longer than the casing.
Stitch across the top, making sure one end of the ribbon is caught in the seam.
Stitch down the length of the casing. Don't catch the ribbon
in the side seam.
Trim off the ribbon caught in the top seam so it's even with the seam across the top.
Gently pull the ribbon extending from the open end to turn the casing right side out.
|
Step 4:
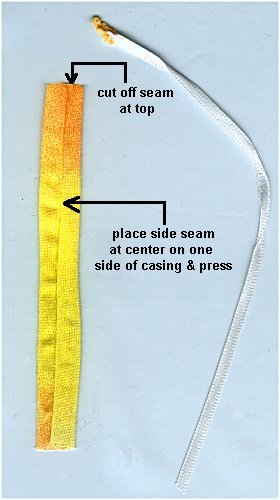
Cut off the seam at the top of the casing. This gets rid of the ribbon used for turning.
The casing needs to be open at both ends. Lay the ribbon aside. You won't need it again for this casing.
Turn the side seam so it is at the center on one side of the casing and press.
Turn each end of the casing to the inside approx. 1/4" and press. A hemostat helps to ease the ends back inside the casing.
Slide a piece of the 5 1/2" long elastic through the casing. If you have trouble sliding the elastic through, pin a small safety pin to one end of the elastic. Push the safety pin through and the elastic follows it.
|
Step 5:
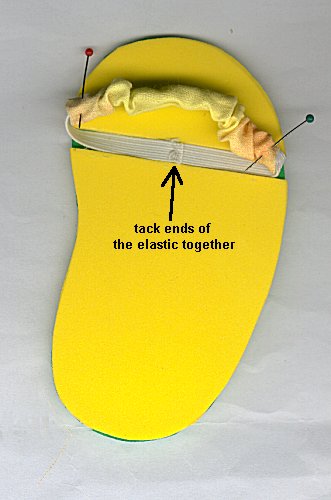
Tack the ends of the elastic together.
Push the casing back to expose enough elastic to fit in the open space on the
second foam sole. Pin the casing back out of the way.
Place glue in the open space and lay the elastic in it. Let it dry for a few minutes.
|
Step 6:
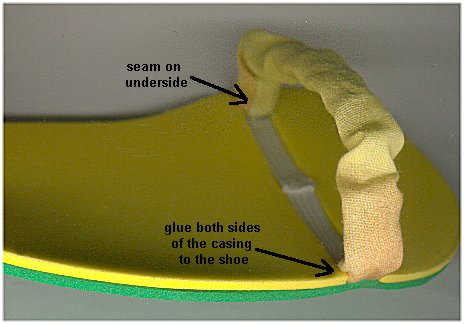
Put a drop of glue at the end of the opening on one side of the sandal sole.
Pull the folded under edges of the casing down in to the glue.
Get a small amount of glue on both the outside edge and the inside edge of the casing so both are glued to the shoe.
Repeat for the other side.
Let dry for a few minutes.
|
Step 7:
Spread glue over the second sole and add another sole.
Spread glue over that sole and add the top sole.
There are now 4 layers of foam.
Make sure all the soles are even on all sides.
Lay a heavy book on top of the shoe and let it dry.thoroughly for an hour or two.
|
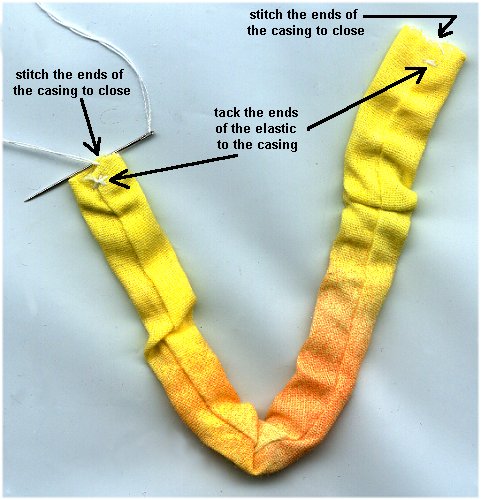
Step 8:
Make the casing for the heel the same way you made the one for the toes.
Slide the elastic through the casing, using a safety pin to guide the elastic.
Tack the elastic to each end of the casing.
Stitch to close the opening on each end of the casing.
|
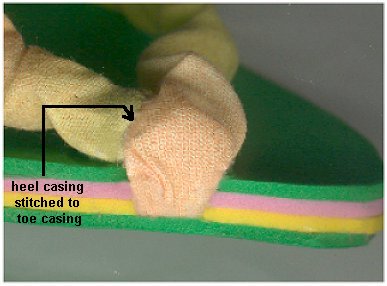
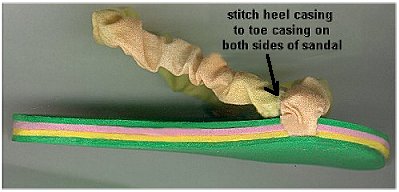
Step 9:
Stitch one end of the heel
casing to one side of the
toe casing.
Stitch the other end of the
heel casing to the other side of the toe casing.
|
Step 10:
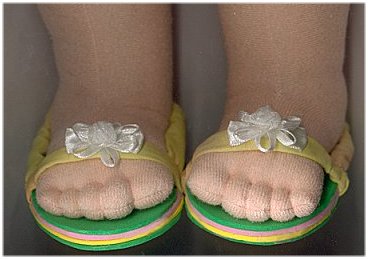
Add some decorations to the toe straps (optional).
I glued a little bow with a flower to the center of the
toe strap on my shoes.
|
I've included another chapter (Bonus!) in this class to show you how to
make an alternative head for this doll.
It will have only ONE face, but it still has an open mouth
to hold a pacifier, bottle, or her thumb.
That's what the next (and last) chapter is all about.
|