|
Awake/Asleep
Pacifier Doll
Online Cloth Doll Class
by Gail Kellison
© 2007
Chapter 13 - Bonus Chapter!
Optional Head with One Face
Optional Head with One Face
This head has only one face, but it also has an open mouth.
We will use many of the same instructions making the head
with one face as we did making the head with 2 faces.
So, you will see references back to other chapters.
There are a few different things we must do though and
those are covered in this chapter.
(You will need th Optional Center Head, Optional Side Head, Wig Front, and Wig Back Pattern Pieces)
Step 1:
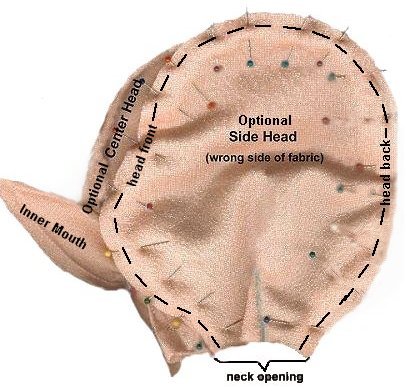
Right sides facing, pin the Optional Side Head Piece on a double thickness of doll body fabric and cut out.
Pin the Optional Center Head piece on a single thickness of the doll body fabric and cut it out. Also cut out one Inner Mouth from the single thickness of fabric.
This head is done nearly the same way as the instructions in Chapter 2. The Optional Center Head has a face on only one end though and you need to sew the Inner Mouth on that face. It's done the same way as it was in Chapter 2.
Step 2:
After you've sewn the Inner Mouth to the Optional Center Head, color the lips following the instructions in Chapter 2.
|
Step 3:
Pin and sew each Optional Side Head from the front edge to the
back edge on each side of the Optional Center head.
|
Step 4:
Stuff the head. Stuff only down to the Inner Mouth.
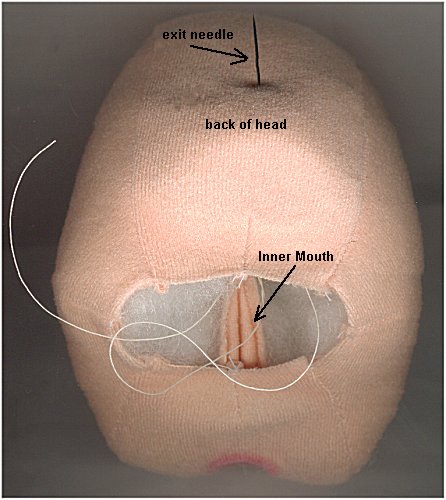
Since there isn't another mouth on the other side of the head, we can't sew the pointed ends of the 2 inner mouths together. To anchor the single Inner Mouth, we'll have to do it at the back of the head.
Use a 3" doll needle and craft thread. Knot the end of the thread. Insert the needle in the pointed tip of the Inner Mouth and then exit the needle close to the center back of the head. Make a small stitch and insert the needle back into the end of the Inner Mouth.
Pull the thread just tight enough to hold the Inner Mouth. Don't try to make the Inner Mouth completely reach the back of the head. The thread will hold it in place so you can finish stuffing the head around it.
Make another stitch and exit at the back of the head. Make one more stitch at the back of the head. Instead of inserting the needle back into the Inner Mouth, exit out at the neck opening. Tie the thread off on the neck.
The next thing to do is to finish stuffing the head. Stuff it firmly.
Add a piece of felt around the neck following the same instructions as Step 11 in Chapter 2.
Make the lips the same way we did in Chapter 3 by making the small stitches around the them.
Chapter 4 explains how to sculpt the face and we do this one the very same way. Follow Steps 1 through 3 to sink the eyes and make the nose.
Do you want open eyes or closed eyes on your doll?
- For the open eyes, follow Step 4 in Chapter 4.
- For closed eyes, follow Steps 5 and 6 in Chapter 4.
|
Step 5:
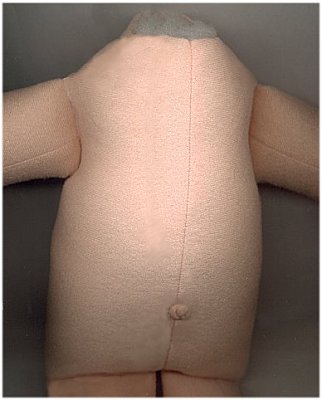
Sew the body the same as it was sewn in Chapter 5, leaving the neck open as shown in the picture at the right. Stuff the body firmly.
Make the belly button and her little bottom following the instructions in Chapter 6.
Make her toes.
Note: I didn't put a swivel neck in this doll, but if you want to do that, you can. Just follow the instructions in Chapter 4, Steps 7 & 8 for the head. The body for your doll would have to have a neck circle and a washer placed in it as shown in Chapter 5, Steps 1 through 4.
|
Step 6:
Make sure the body is stuffed firmly. If necessary, put more stuffing in through the neck, making sure the neck is also stuffed full.
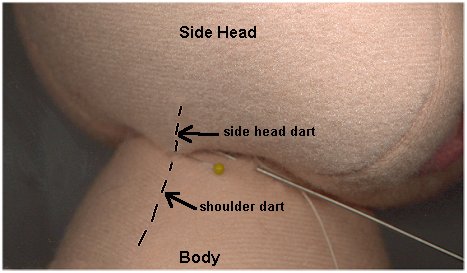
Sew the head on the neck using craft thread. Match the dart in the side head to the doll's shoulder dart on each side. Stitch around twice. |
Step 7:
Using the Optional Wig Front and Back pieces, cut the wig from
long pile fur. Follow the arrows for direction of the hair.
Don't cut the fur, just the backing. Sew the wig front to the wig back at the center seam.
Make the darts in the front and the back .
Brush the center seam and the dart seams to loosen hairs caught in the thread.
Place dots of glue on the top of doll's head. Place the wig on the doll.
Whipstitch the raw edges of the wig to the head. |
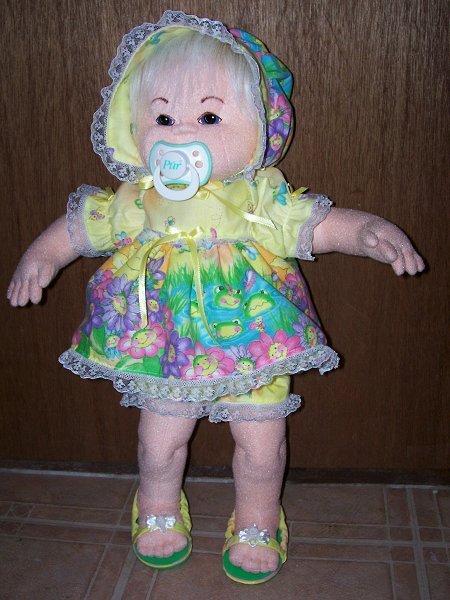
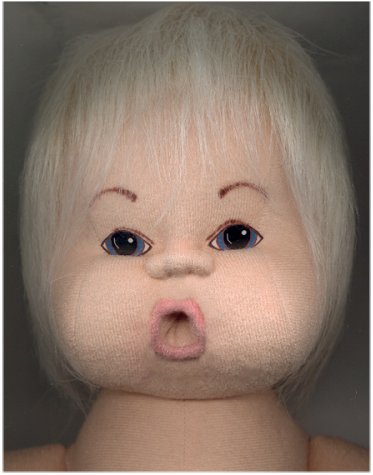
Your doll is now finished.
She's ready to be loved by someone special.
I hope you've enjoyed this class.
Thank you to each and everyone that signed up for it.
Gail
|
|