Step 1:
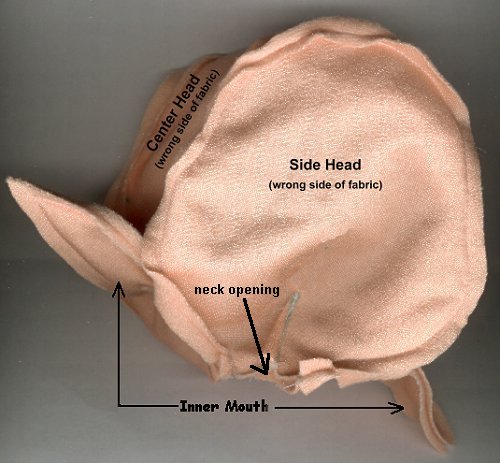
Pin the Center Head piece on the fold of fabric and cut it out.
On the remaining robe velour, pin the Side Head piece, the Inner Mouth, and the Neck Circle on a double thickness.
Cut these pieces out before sewing.
These pieces do have a seam allowance and it's shown on the paper patterns.
Transfer all the markings on the pattern pieces to the fabric. One easy way to transfer the markings is to hold the fabric up to a window with the paper pattern piece behind it. The marks will show through. Use a disappearing ink pen or a pencil and draw the marks on the fabric. If you use a pencil, you must draw lightly - very lightly!
|
Step 2:
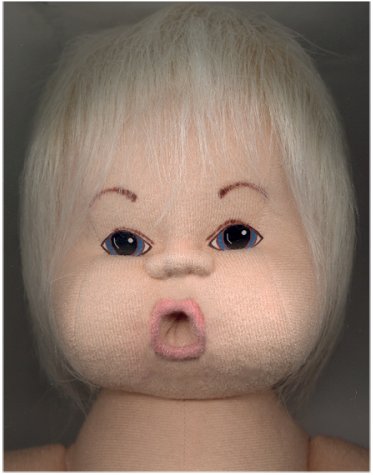
Draw the mouth on the right side of the Center Head.

Draw a mouth on each end.
Draw a mouth on each of the Inner Mouth pieces.
Right sides facing, match and sew one Inner Mouth piece to the Mouth on each end of the Center Head.
Clip inside the circle.
|
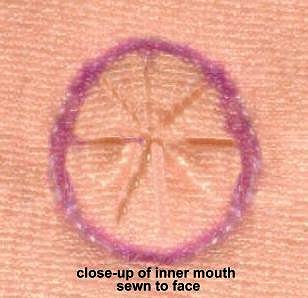
Step 3:
The picture shows the circle clipped after sewing.
|
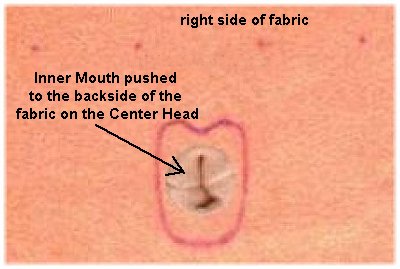
Step 4:
Push the Inner Mouth to the wrong side of the Center Head. Do this on both ends of the Center Head.
|
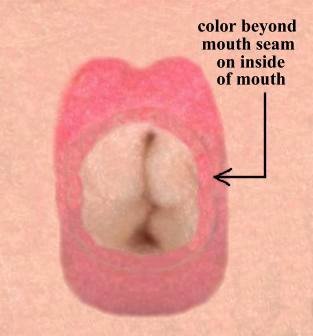
Step 5:
Flatten out the Inner Mouth on the back of the face so you have a smooth surface to work on.
Having a flat surface, you can now color in the lips with a light pink gel pen or other permanent ink pen.
Color the inside the mouth about 1/8". Look closely at the picture and you will see I colored about 1/8" beyond the seam line.
Color the lips on the other end of the Center Head the same way.
|
|
|
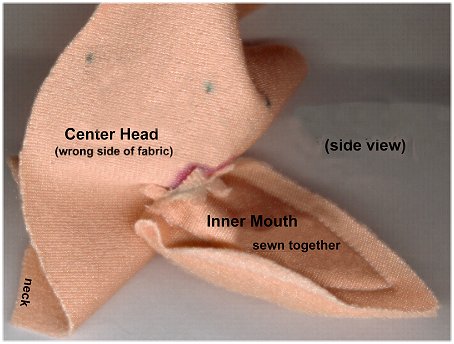
Step 6:
Match the pointed ends of the Inner Mouth and sew.
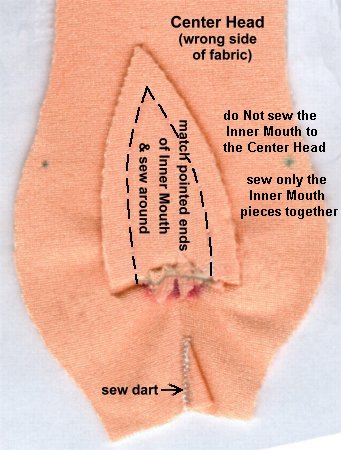
Sew the dart at the neck of the Center Head.
Repeat for the other end of the Center Head.
|
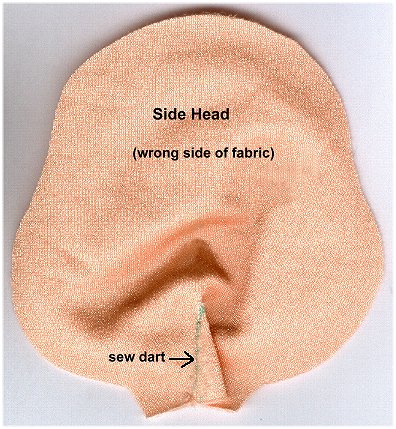
Step 7:
Sew the dart at the neck on each Side Head.
|
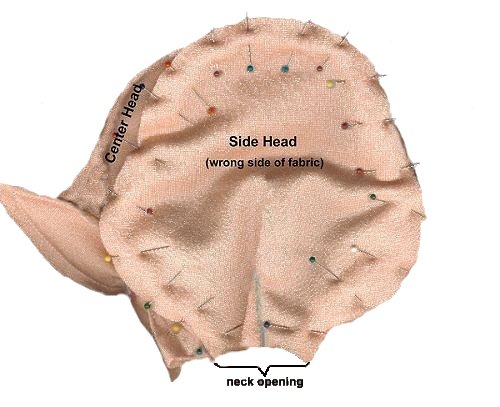
Step 8:
Right sides facing, pin the Center Head to one Side Head.
Ease to fit.
Leave the neck.open.
|
Step 9:
Sew the two pieces together.
Do not sew the neck opening. Start sewing on one side of the neck, sew up and around the head, and end at the lower edge on the other side of the neck.
Pin and sew the other Side Head to the other side of the
Center Head.
Turn the head right side out through the neck opening.
|

Step 10:
Stuff the head firmly above the Inner Mouth pieces.
Tack the pointed ends of the two Inner Mouth pieces together and continue to stuff the head until it's completely filled.
When the head is stuffed, put your "pinkie" finger (little finger) inside each mouth opening to open it up. Stuffing the head often times will press the inner mouth together. Once you open it with your finger, it will stay open. |
Step 11:
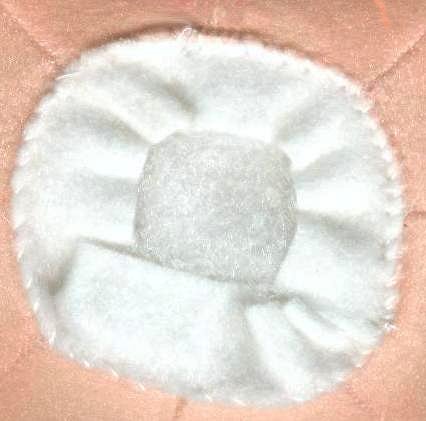
Using the cutting guide, cut a piece of felt.
Hand sew one long edge of the felt to the neck edge using a whipstitch.
The felt will be slightly longer than the distance around the neck. When you get to the end of the felt, just lap it over the beginning edge where you started.
|
|
|
Now that the head is stuffed, we'll make the lips around the open mouth.
We'll do that in the next chapter.
Go to Chapter 3
|