Step 1:
Belly Button
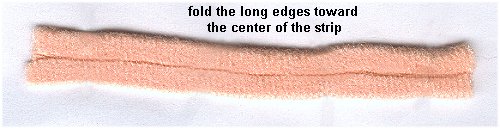
Using a scrap of the body fabric and the paper pattern, cut out one belly button strip
Fold the long edges on each side toward the center of the strip.
|
Step 2:
Place the two folded edges together and stitch.
|
Step 3:
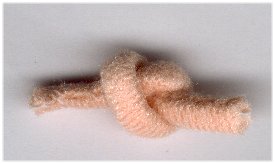
Make a knot in the strip. Pull the ends of the knot to tighten it. The tighter you pull it, the smaller the belly button will be.
|
Step 4:
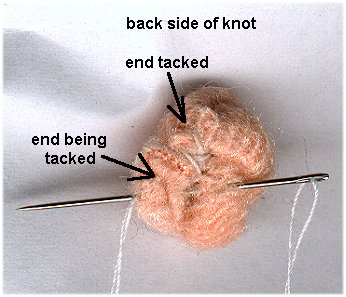
Pull the ends to the back of the knot. The ends will be too long, so trim off the
excess length. You only need ends long enough to reach to the back of the knot where
they will be tacked.
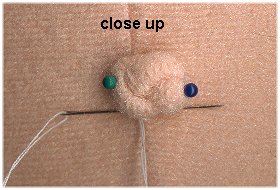
Tack the ends to the back of the knot as shown in the picture at the right.
|
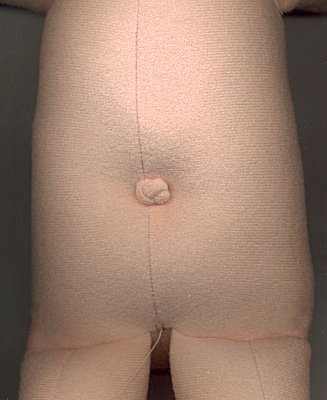
Step 5:
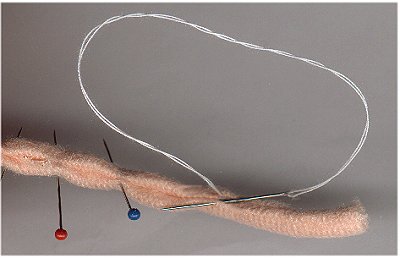
Sew the belly button to the front of the body at the place shown on the pattern.
Sew all the way around it twice.
I use a couple of straight pins to anchor it to the body while I'm sewing. When the belly button is sewn, remove the straight pins.
|
Step 6:
This is where you will need a needle longer than the 3" one.
Use either a 5" or 7" doll needle.
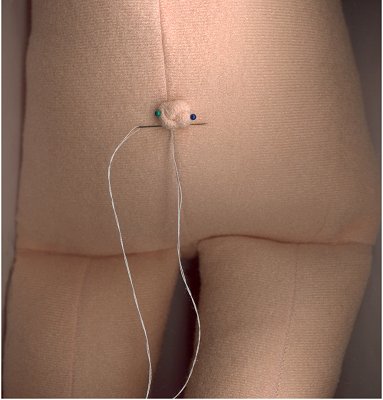
Thread the needle with approx. 30" of craft thread. Knot one end of the thread.
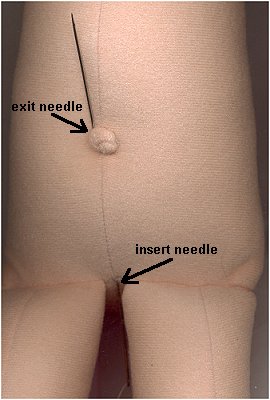
Insert the needle in the bottom of the doll between the legs. Exit on one side or the other of the
belly button.
|
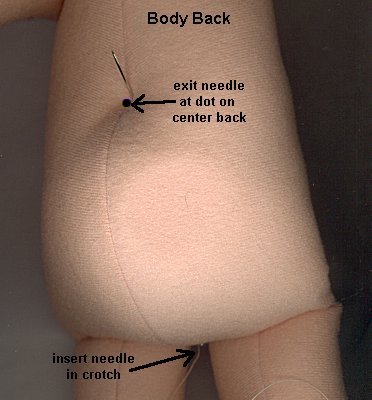
Step 7:
Make a small stitch and exit at the center back. There is a dot shown on the pattern. This is the point where the needle is to be exited.
Make a small stitch and exit at the front on the other side of the belly button. Pull the thread tight and hold it with one hand while you make a small stitch and exit out at the back near the same place you exited the first time. Pull the thread tight.
Make a small stitch, exit the needle in the crotch between the legs.
|
Step 8:
Make sure the threads to the belly button are tight and that the belly button is indented.
If they aren't, pull the threads again to indent the belly button and then tie off in the crotch.
Do not cut the thread. |
Step 9:
Her Little Bottom:
Insert the needle back into the crotch. Exit at the dot in the center back of the body.
Make a small stitch and exit back out at the crotch.
|
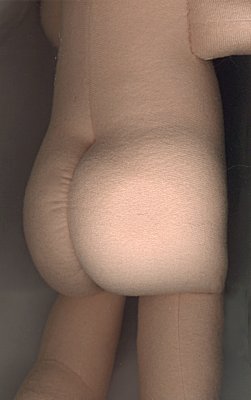
Step 10:
Pull the thread tight.
With the thread on the OUTSIDE of the fabric, insert the needle into the dot at the center back again.
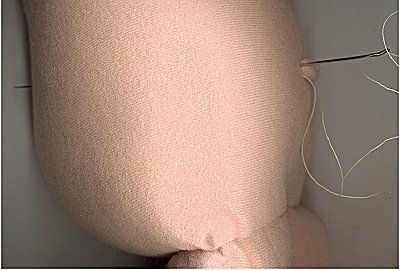
Exit the needle at the crotch. Pull the thread tight. See her little bottom take shape? Isn't that cute?
We must now lock the stitches so her bottom will keep it's shape. To do that, hold the thread tight and insert the needle back into the crotch, Exit at the top of her butt. Keep the thread tight, insert the needle back down into the fabric and exit at the crotch. If it still doesn't feel like everything will stay in place, repeat once again.
Okay, that's it. That will lock everything into place and make her bottom hold it's shape. Tie off and cut the thread.
|
We're ready to make toes on her feet.
That's what we'll do in the next chapter.
|