 Image 4-1.1 |
 Image 4-1.2 |
Taught by Judi Ward of Judi's Dolls
http://JudisDolls.com
Whatevers body is very shapely, with a tiny waist and high perky boobs. She has a long neck and a cute bottom and real looking belly button.
All the kids now wear their pants and skirts below their belly buttons, so hers is meant to show, and her skirt and panties are designed to ride below her belly button too.
Making a nice "inny" belly button is fun and easy and may be something you want to add to other patterns you make.
You will be given 2 neck options, and 2 options for where to stuff through.
Another option is stuffing the neck with clay!
I want to quickly touch on that option before you go any farther. First, it is an option only! You dont have to do it.
If you choose to try it, you need to make the neck that is curved at the top, which will have you stuffing through the openings at the hips. NOTE*** this is my favorite place to stuff through.
I have done some more testing of "Clay in the Neck" for those who are "neck stuffing challenged" or those who like the idea of being able to sculpt a little neck detail right through the fabric. Like neck bones (clavicles)
I have done necks in Sculpey, Sculpey III, Model Magic, Paper Clay and a product that you cook called Amazing Clay.
All but the Sculpeys are air dried clays.
I used my Sculpey III for one neck, and it was great but it comes in such small packages that it took over 2 packages. Sculpey III, Fimo, or Promat all come in such small packages it would get pretty costly for necks as large as a full sized Whatever! Whatever!
All of the clays I tested made great, firm necks.
The Sculpeys were the easiest to sculpt in the clavicles. The Paper Clay was next. I really had to work to make the neck bones in the Model Magic and Amazing Clay, but they did sculpt in, and looked great.
The oven baked clays are a tad heavy for the necks of a doll as large as Whatever!
The Paper Clay and Model Magic are, I think the best option. They are light weight. In fact, Model Magic actually feels like stuffing. It stays slightly "spongy" but very firm.
The Amazing Clay is too wet. It was hard to keep it from getting on the dolls skin. (it also had to be cooked to make it into clay)
But even when it got on the dolls skin, it wiped right off, so wasnt too much of a problem.
If you want to try this option I will talk about it later in the chapter, but you will need to have your clay. It must be the same color as your stuffing. In most cases White. Do Not match it to your dolls skin.
Large Craft stores carry the clays. Model Magic is usually near the Crayola products.
I also made a couple of "just shoulders and necks" (busts) and did the clay in them. With the head tied on, and the assembly fastened to a plaque, what a fun small project and an opportunity for embellishment!
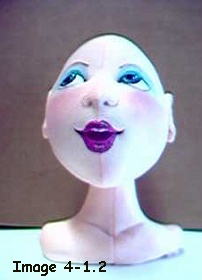
The heads are just sitting on the necks for the picture. These are the heads I made in chapter 3
Here is a picture of them just plain, not embellished, and not on a plaque. I will embellish them later and they will show up here and there during the class. I will give a few directions for embellishment, but mostly this is a project for you to "run with" and have fun with!
Notice the "neck bones".
Oh, by the way. I put the clay all the way
to the edge of the bottom for these.
|
Image 4-1.1 |
Image 4-1.2 |
***Now, lets get started on the body***
First, choose whether you are going to stuff through the neck or through openings in the hips.
If you are stuffing through the neck, make the straight across neck version.
If you are going to stuff through openings
in the hips
and/or
if you are going to try the clay neck, make the curved
neck version.
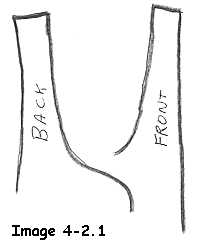 Image 4-2.1 Straight version. |
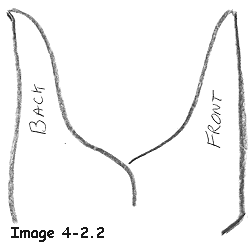 Image 4-2.2 Curved neck version. |
1. If you havent done so already, iron your Freezer Paper patterns to doubled fabric.
(You did add the seam allowances to the body parts, right??)2. Put a few pins in the parts just to hold them together, while you cut them out.
3. Cut the parts out right along the Freezer Paper patterns. You get much more accurate cutting this way.
4. On the pieces with the darts, draw through the darts on the side the Freezer Paper is ironed to, with a colored pencil a shade or two darker/or lighter than your dolls skin.
5. Remove the Freezer paper and put it on the other side of those parts and draw through the darts on that side.
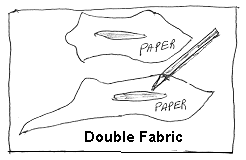
Image 4-3.1 Draw through the darts on one side. |
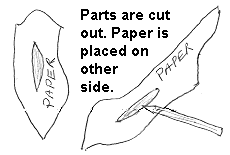
Image 4-3.2 Draw through the darts on the other side. |
6. Sew the center front seam of the UPPER FRONT.7. Sew the center front seam of the LOWER FRONT, taking care to sew around the belly button bump.
I am showing these steps on the curved neck version. For the straight across neck version, you will do the same, EXCEPT, you will leave the top of the neck open when we get to step # 10.
I will show pictures of both when we get there.
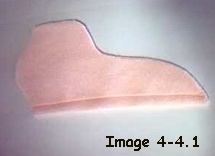
 Image 4-4.1 Sew center front seam of upper body. |

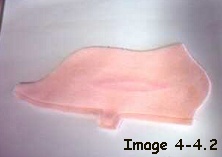
Image 4-4.2 Sew center front seam of lower body. Notice the darts drawn in. |
8. Sew the center back body seam.9. Fit, pin and sew the upper front to the lower front right along the curved bust seam line.
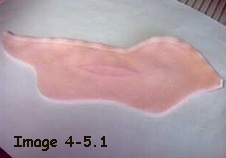
Image 4-5.1 Sew the center back body seam. |
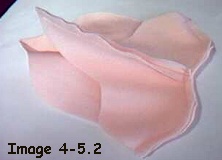 Image 4-5.2 Sew the curved bust seam. |
10. Fit, pin and sew the body front to the body back all around the sides, EXCEPT, leave the areas at the hips (I will mark them with pins for a picture) open for stuffing through there or leave the top of the neck open if you have chosen to stuff through the small neck opening.Did you notice that I didnt tell you to trim the seams yet. I personally like to trim them after all of the body assembly is done. It makes it easier to open the seams where parts are sewn together. I trim the seams to about 1/8" and taper them out to original width, where seams meet.

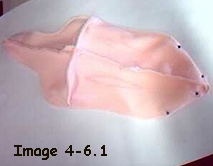
Image 4-6.1 Body sewn all around the sides. Open at hips. The point of the crotch is sewn from pin to center to pin. |
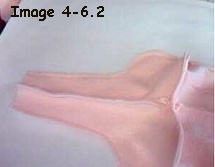
Image 4-6.2 Body sewn all around the sides. Open at neck. Notice the seam allowance tapering wide at the joining at the center of the bust. |
11. Clip the corners at the belly button bump, and if you have made your doll from woven fabric, clip the curves too.12. Now, pinch up the darts that you marked and stitch them just OUTSIDE (about 1/16" ) of the marked lines. This way the marks will be inside the doll, and never have a chance to show on the outside of your doll. Also, if you stitch them on the line or inside the lines, your doll will not have as slim a waist.
I know some of you marked with other things, not colored pencil. If you did it is VERY important to sew outside those lines. Pens and markers will often show up later to haunt you. So keep those marks INSIDE the doll.

12. Turn the body right side out. Be sure to poke the belly button bump out too.
Judi Ward
Judi's Dolls
http://JudisDolls.com

