Ó 2000 Judi Ward -Judis Dolls
Making the legs.
I will be making 2 dolls in class. At times you will see photos of the dark, golden brown one and at times you will see photos of the pale peach one.
I do this so no one gets stuck in the Exactly Alike mode. This mind set is the bane of dollmakers, and I try to discourage it all of the time.
First of all, it is impossible for 2 cloth dolls that have any detail at all to look exactly alike, and second, it isnt even desirable.
Each of you will make a Milli with her own personality, her own "look" and her own endearing qualities.
What I want each dollmaker to really strive for is clean, quality work, so your doll is an art piece you will be proud to display.
When stuffing, dont "worry" the surface of the fabric to death, so it looks old and dirty before your doll is even done. Remember to take lumps out by pressing them down from the inside, under the skin, with the flat blade of your screwdriver. Dont try to press them and move them from the outside. It doesnt work anyway, and just "worries" the "skin" to death, resulting in messy looking work.
When stuffing, the less time you mess with the fabric, the better. Slide the stuffing in smoothly and hold the whole unit like taught in the skills section, and you will be surprised at how fast and painless stuffing can be.
I will now get off my soap box and lets make Milli.
***Now lets do the legs***
A lot of the basics are the same for legs as for the arms. Small stitches, trimming the seams, fray stop for wovens. I wont repeat these things in detail.
1) Using the Freezer Paper method. Sew
the leg seams, leave open at the FRONT OF THE FOOT, and at the
TOPS OF THE LEGS where marked OPEN. Sew very carefully around that tiny
heel, and back stitch at each seam end.
2) Cut the legs out, leaving a very
small seam allowance. NOTE>>>If you make the seam
allowance a little wider at the foot, it is easier to open the seam
for sewing the toe front.
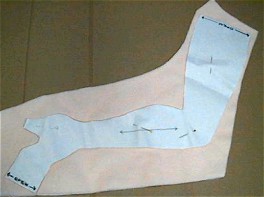
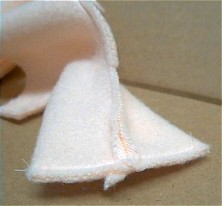
Front and back seams of one leg sewn Left open at the front of the foot and the top of the leg. |
Leg cut out, and the Freezer paper taken off. Note the seam allowance Taper at the foot. |
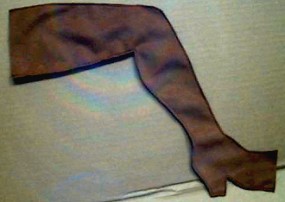
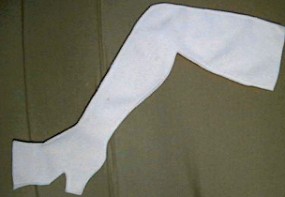
Another view.

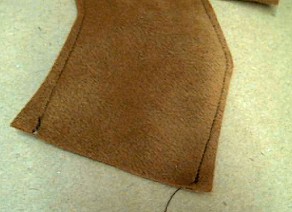
Close up of the wider seam allowance. This makes it much easier seam at the front of the foot. |
Still doing both colors, to keep your mind open. |
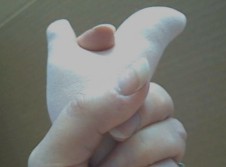
3) Now fold the toe area of the "shoe", "seam to seam", and then sew across the toe area right at the edge just to hold it together.
4) Iron the Freezer Paper, shoe templates in place on each "foot" front, about 3/8" to 1/2" back from the edge of the fabric. NOTE>>> For Milli there is no right and left foot. Note 2>>>You will want to taper the seam to the sides of the feet. Sometimes, depending on how you did the sewing of the foot and legs seams, the template may be a little wide as it gets to the edges. If that is the case simply taper it off the sides, where the edge of the paper leaves the fabric.
Sew across the Toe area to hold it together. Note the open seam. |
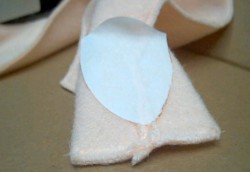
Freezer Paper ironed on. |
5. Sew around the Freezer Paper templates. Taper the seam off the edge at the sides. Repeat for other "shoe" front. NOTE>>>Dont sew at that top curved edge. That is just to hold onto for placing the Freezer Paper on the foot and to pull the paper off after sewing.
6. Trim away the excess fabric at the shoe fronts,
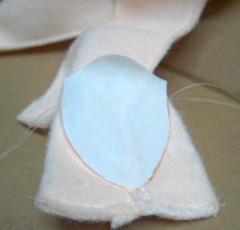
Sew around the Freezer paper at the front. |
Trim the excess fabric away. |
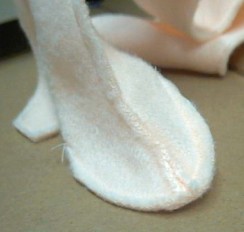
7. Turn. the "shoes"
and legs 1/2 way right side out, using your screwdriver, hemostat or stuffing
tool to help with the turning. Poke the heels and toes out nice and smooth.
8. To stuff the heel, put a piece of stuffing about the size of a walnut down in the heel and use your screwdriver to press and twist it down very firmly. Add stuffing to fill the heel fully before you stuff anything else. Be sure to hold around the heel as you press the stuffing down firmly. If you hold the ankle you will pop seams.
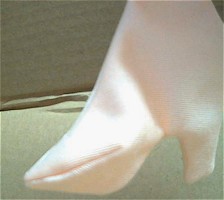
The "shoe turned right side out. |
Hold all the way around the heel to stuff it very firmly. |
9. Use your screwdriver to stuff the "shoes" very firmly, shaping as you stuff. Be sure
you have stuffing out into the
toe, and really firmly into the ball of the foot, the instep and heel.
NOTE>>>>It is easier to stuff the "shoe" all out
of shape than into shape. Look at what you are doing, and shape the "shoe"
into a nice form with the ball of the shoe and the instep nicely shaped.
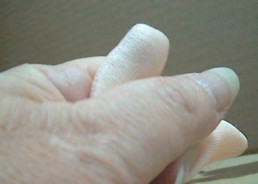
Note To get the leverage and "push" to really stuff the "shoes" VERY, VERY firmly, hold the whole "shoe" in your hand and push it against your hand as you press the stuffing down with that twisting back and forth motion. Keep the heel between your fingers, so you dont mash it.
The foot held completely in my hand To stuff the toe. Note the heel sticking Out between my fingers. |
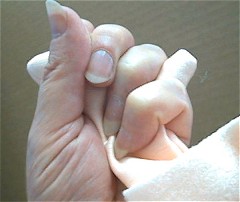
Holding the whole foot to stuff the instep, upper heel and ankle. |
I still need a manicure! And Wrinkle Remover!
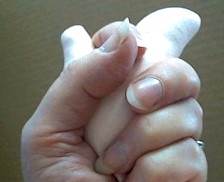
The "hold" for stuffing the ankle. |
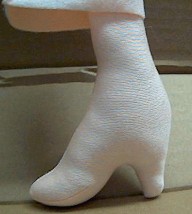
A nicely shaped shoe. NOTE>>>The Upper leg skin, is still down over the lower leg. |
10. Pack the stuffing down in layers, VERY, VERY firmly. Always hold around the leg as you stuff and dont hold the seams. If you hold onto the seams while stuffing, you will almost always pop the seams!
As you go up the leg, you will of course need to continue to turn the rest of the leg to the right side. It is just easier to stuff if you dont have the whole length of the leg to deal with while stuffing the shoes and lower legs.
11. Be sure to make nice rounded calves, thighs and the little kneecap.
12. When you get nearly to the top of the leg, put it down between your knees and stuff down into it. At this point you will just be using your fingers to push the stuffing down. You will have to hold the edges to do this, but dont hold right on the actual seams.
Millis legs are very well shaped, when sewn and stuffed properly. They are also bent, so you have to be sure the foot and lower leg is stuffed fully, then the knee, and then the upper leg. Be careful as you stuff, so that you dont straighten them out, by holding the upper leg, and stuffing down into the lower leg. If you do, the seams will pop behind the knees.
The lower leg and ankle will be stuffed harder than the upper leg. If you have a little cellulite in the lower legs, it will usually "puff" away over the night, as your stuffing puffs up and relaxes some.
Stop stuffing the legs when you get about 2" from the top.
13. After the stuffing is all done, pinch the top of the legs "seam to seam" and sew across them close to the edge.
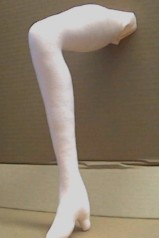
A nicely stuffed leg. |
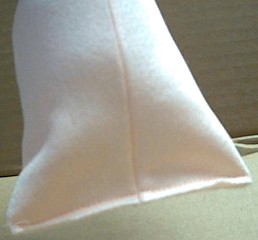
The top of the leg folded "seam to seam" and sewn across. |
Go to... ~ Classroom ~ Pattern ~
Copyright
Notice: All pages and graphics are copyrighted
by the Internet Visions Company and/or instructor.
You may print these out for the use of the class only. All
other uses or distributions are forbidden.
Crafty College and Doll Net are divisions of the Internet Visions Company.
© 1997-2003, Internet Visions Co. All rights reserved.