Ó 2000 Judi Ward -Judis Dolls
Making the long fingernails.
***Now, lets make long, elegant fingernails with the Crystal Lacquer***
This is rather time consuming, and requires careful work, mostly waiting and pressing the Crystal, but worth it, for the elegant look you achieve!
1) First, flatten the hands out. "Oh No! after all the work you did topose them daintily!" You can put them right back in a dainty position after all of the fingernail work is done, I promise.
Dont panic, the "fuzziness" will go away after the clear coating is dry.
Also, this doll is not a chew toy, so dont worry about the clear coat being toxic etc.
The coating helps keep the Crystal and the fingernail polish from bleeding into the fabric, if some gets off of the Gesso.
3) Paint a coat of Gesso where the fingernails go. Put the thumbnail over the outer seam, not on the flat part of the thumb. It poses more naturally when the thumbnail is over the seam, and makes the thumb look like it is opposing, without having to add the thumb on as an extra piece.
When you bend the thumbs towards the palm a little, they look so natural.
4) Now, twist the thumb so the thumbnail is facing up in the same up position as the fingers. You want them all flat for applying the fingernails.
The thumb will twist back in shape when you are all done, I promise.
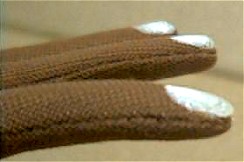
5) Then apply the Gesso as pictured in the following pictures.
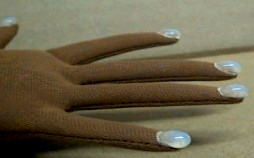
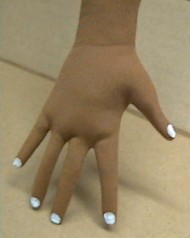 Gesso on the brown skin. |
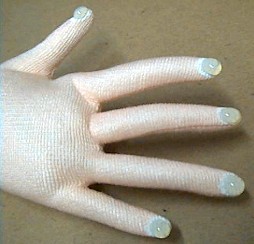
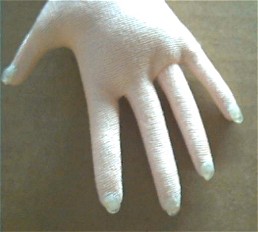
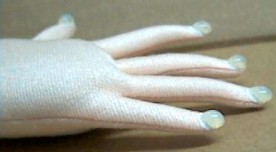
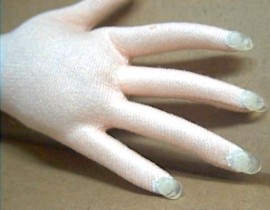
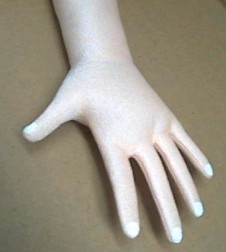 Gesso on the peach skin. |
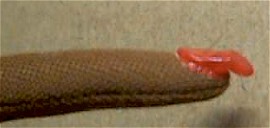
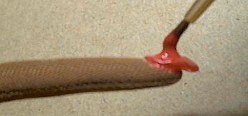
6) Now put a dot of the Crystal, the size of
a big round pin head, on each fingernail. Be sure that you keep it on
top of the Gesso. The Crystal can bleed into the fabric if it gets off
of the Gesso.
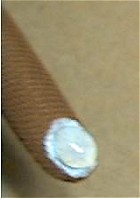 A dot of Crystal shown big so you can see how it sits. |
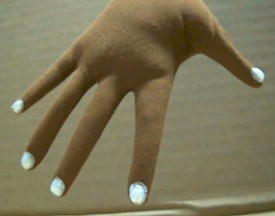 Dots of crystal on all of the fingers. |
You wont get much, or maybe even any coming forward, with this first dot, but with each coat of Crystal, the fingernails will pull forward more and can be shaped.
Remember The skin colors are going to change as we go along. I am making 2 dolls as I write this. This is intended to keep your mind away from the "exactly alike" syndrome.
 Close up of a flattened fingernail. |
 Second layer of dots on each finger. |
 Second layer pressed down, and pulled forward. |
 Second layer pressed down, and pulled forward. |
 Third layer dots. They are bigger at this point. |
 Third layer dots. They are bigger at this point. |
8. Wait
for at least 15 minutes and press and pull the nails flatter and out
over the ends of the fingers.
 Third layer dots pressed down, and drawn forward by pinching the ends. |
 Third layer dots pressed down. The view from below. The Crystal gets thick underneath. |
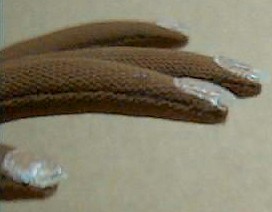
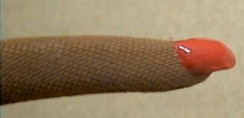
Notice how long the nails are at this point. This layer is the one you really have to shape so it curves down, rather than curving up and shovel shaped.
9) Keep after them, as they continue to dry. My fovorite time to do the nails is in the evening, when I sit down to relax and maybe watch TV for a while. I can really keep after the nails and keep them shaped. Try to press the crystal right to the edge of the Gesso at this point too.
If it wont stay to the edge, dont worry, the fingernail polish will cover the little bit of Gesso that is showing.
You can add another coat if desired, and the nails can be drawn out as long as you want.
Remember, you will have to "babysit" the nails for a couple of hours, after these last coats and check on them, press them, and shape them.
You can file these nails, carefully of course, so you dont skin up the skin but I try very hard to do all the shaping with my fingers so I dont have to file them.
10) After the nails have been shaped, and have dried for a few hours, paint the nails with fingernail polish. I dont use the little brush that comes in the bottle. It is too big.
Use a regular paintbrush and clean it really well between coats with finger nail polish remover. I usually put two to three coats of finger nail polish on.
BIG GIANT NOTE>>>Sometimes even when you have baby sat the fingernails diligently, and shaped them as they dried, you go to bed, and then get up to discover that they still turned up, or got a "dent" in the middle. Sometimes one will, sometimes the whole hand full will. Dont despair!
FINGER NAIL POLISH TO THE RESCUE!!!. Paint one coat on first, extending it CAREFULLY all the way to the edges and try to cover any Gesso that is still showing.
11) Use a tiny paintbrush for the touching up, and "dot" the polish on in tiny bits around the edges. Let dry.
12) For the next coat, set a big dot of polish where the dent is. It will fill the dent, and then flow out some. Help it taper to the edge with your paintbrush. You can really make the nails look curved and elegant this way, and any little flaws are covered with nail polish!
The pictures following are so close, that they show things that dont even show to the naked eye. No one will be that close!
 Up close and Personal to a nail with a "dent". Note the little edge where the polish is thin. That was where I covered a little Gesso. |
 Filling the dent with polish. |
The nail filled and finessed around
the edges.
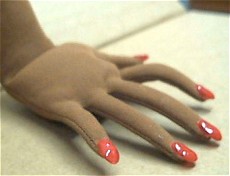 Lovely red nails. |
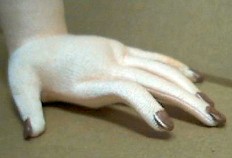 Mauve nails, not so long. |
Go to... ~ Classroom ~ Pattern ~
Copyright
Notice: All pages and graphics are copyrighted
by the Internet Visions Company and/or instructor.
You may print these out for the use of the class only. All
other uses or distributions are forbidden.
Crafty College and Doll Net are divisions of the Internet Visions Company.
© 1997-2003, Internet Visions Co. All rights reserved.