Ó 2000 Judi Ward -Judis Dolls
***Drawing and painting the shoes***
Now lets draw on the shoes. We will do it in 3 steps for each side to make it easy to draw on the curved surface.
I have found in "hands on" classes, that just drawing them on, starting at the back and trying to go all around, just doesnt work for many dollmakers.
NOTE>>>If you can just freehand the shoes, please do so. These next directions are so anyone can draw the shoes on, even if you feel that you cant even draw a straight line.
I am going to do one shoe with a high strap, and one without a strap, but with the clay tab.
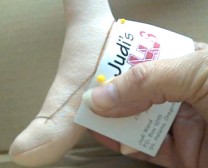
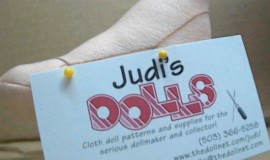
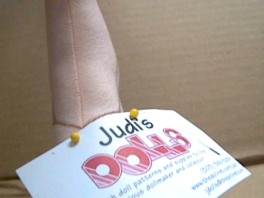
A business card makes a good "edge" to draw along, for the straight lines. You can actually bend it and pin it down. The 3 straight lines for each side are much easier than trying to draw curved lines. You can fill in the Vs with the Gesso coat if desired, or leave them Vd.
 The heel to instep line. |
 The instep to front line. |
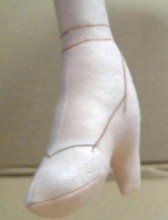
 The front line. I have already done the other side. |
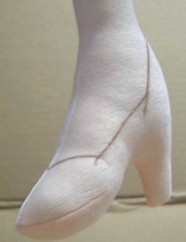 Straight lines drawn on. |
Now lets do the ankle strap. A ribbon pinned around makes a great templat
for drawing the strap.
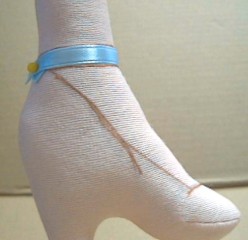 The ribbon pinned around. |
 The strap drawn on. |
When doing the second "shoe", keep the first in front of you and make the "shoes" match as well as possible.
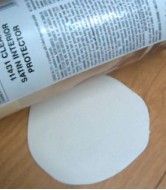
Now, coat the whole "shoe" with a good coat of Gesso. After the Gesso is dry, paint the whole "shoe" with a coat of Acrylic paint in the color desired. Let dry and coat it with another coat of paint.
If you wish to have the "shoe" glittery, sprinkle extra fine glitter over the wet paint. Set the legs aside and let dry. We wont put the final decorations on them until Milli is finished being assembled. It is so easy to knock off the decorations while setting the legs etc.
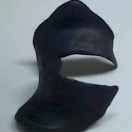
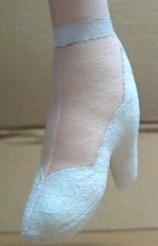 The Gesso coat. |
 The paint coat. |
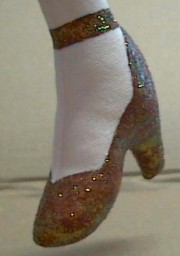 The second paint coat and the glitter. |
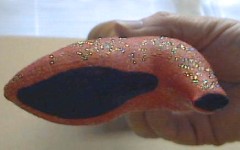 The optional shoe sole. |
Now, lets make a clay tab for another shoe style.
Draw the shoe shape on as before, Gesso it, and paint it the desired color. Leave the strap off this time.
Take a piece of Oven Baked clay, like Super Sculpey, Sculpey III, Fimo, or Promat. The piece needs to be about the size of a walnut to make 2 tabs.
Roll the clay out on a flat surface using a spray paint can for a roller .Why, a spray paint can you ask?? The little ridges at each end wont let you roll the clay out too thin or of uneven thickness.
I colored my shoe tab pattern blue so you can see it better.
Cut the tabs out using a needle. It works much better than a knife.
 Roll the clay. |
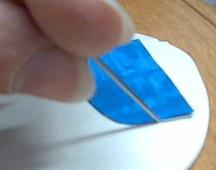 Cut the tabs out using a needle. It works better than an exacto knife and doesnt cut your table top either! Of course make 2 tabs. |
Peel the excess clay up from the table and then carefully peel one shoe tabs up.
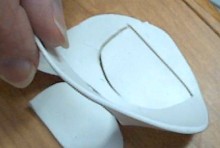 Peel the excess up. |
 Carefully peel the tabs up. |
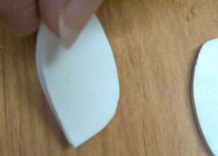
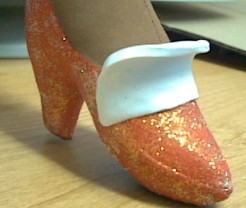
Fit one shoe tab across the front of a shoe, forming it to the shape of the front, and slightly roll the tab forward in a curve. This the edge just a little where it is against the shoe. Dont press real hard. It will stick and be hard to remove without de-forming it.
VERY carefully remove the shoe tab from the shoe and lay it on a dishcloth on a glass plate. Repeat for the other shoe tab and form it to the other shoe. Put it on the plate and go turn your oven to 225 degrees. Set the plate with the tabs in the oven for about 15 minutes. If it goes longer, that is O.K. I accidentally left some in for many hours! They were fine
DO NOT, I repeat DO NOT turn the oven up higher!!!!!! Longer time O.K. Higher temp. NOT!!!!!
 A shoe tab formed and curved. Thin the edge that touches the shoe just a little. |
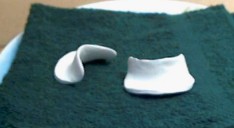 Shoe tabs ready to be baked. |
After baking the shoe tabs, remove them from the oven, let cool and paint them to match the shoes. You can do a Gesso coat first if desired, but 2 coats of paint will usually do the trick.
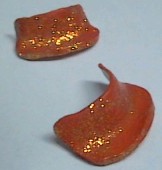 Paint the shoe tabs. Glitter them too, if you did the shoes. |
 Another set of tabs painted. I had done these and decided not to use them for a pair of shoes I did in a class. These are the curved shape template. |
Now you should have the shoes Gessoed, painted,
glittered (if desired) and tabs made and painted if you are making shoes
with tabs.
DO NOT glue the shoe tabs on yet.
Set everything aside, so we can make the body, and attach the legs and arms to the body. We will also make and attach the head and shoulder plate to the body before decorating the shoes.
To tide you over til then, here is the Bonus Project.
Go to... ~ Classroom ~ Pattern ~
Copyright
Notice: All pages and graphics are copyrighted
by the Internet Visions Company and/or instructor.
You may print these out for the use of the class only. All
other uses or distributions are forbidden.
Crafty College and Doll Net are divisions of the Internet Visions Company.
© 1997-2003, Internet Visions Co. All rights reserved.