Ó 2000 Judi Ward -Judis Dolls
Making the shoulder plate.
1) If you havent cut out the shoulder plate pieces yet, as instructed in chapter 1, please go back to chapter 1 and follow those directions.
You need 2 of the back pieces and one each of the front pieces Note how you can cut down on the cutting time and increase the accuracy by cutting the BIG Boob front from doubled fabric, and then cutting the smaller boob front from one of the BIG Boob front pieces.
The shoulder plate pieces have the seam allowances already on. They are not templates, but I still use ironed on Freezer Paper for the cutting out. It makes for more accurate cutting.
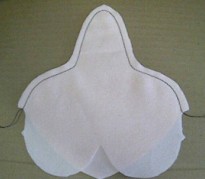
This is what you should have after cutting the parts out.
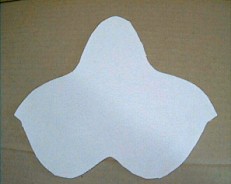 One front piece with the more gradual curve at the lower edge. This is the lining. (inner layer) |
 One front piece with more rounded curves at the lower edge.This is the outer layer. |
You need 2 of the back pieces
like this.
In the pictures that will follow, I sewed them in big black stitches so you can see where to sew. Sew yours in nice small stitches with thread to match your dolls skin!
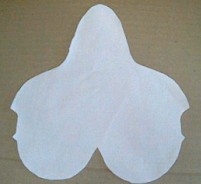
 The front with the smaller curves sewn to one back. |
 The front with the bigger curves sewn to one back. |
3) Now sew a gather stitch between the notches on the BIGGER curved part. Sew one row about 1/16" from the edge and another about 1/8" away. Use about 4 stitches per inch for this. Sew these in with the wrong side up towards you. This way, as you pull the gathers up and sew this assembly to the other assembly, you can see the gathers as you sew them, so as not to make pleats.
Also, back stitch a few stitches where you begin to sew, but not at the end. You need the end free so you can pull the BOTTOM (or bobbin) thread to gather the boobs.
Again, I have sewn in black thread so you can see what I have done.
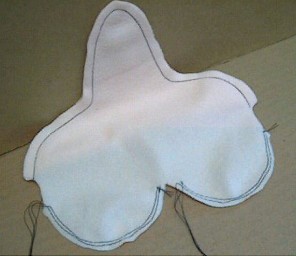
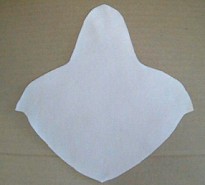
The gather stitches sewn.
Note the long threads where I stopped sewing. Also note,
I sewed "kinda" wiggly. It wont show, just dont to sew
over your previous stitches and stay within the 1/4" seam
allowance.
4) Trim the shoulder seams down to about 1/8". Dont trim clear to the stitching! The reason I am saying this, even though it seems obvious, is because in hands on classes I have had several ladies trim the seams way too close for some reason, and they can pull out if you do.
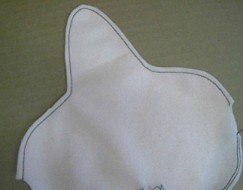
Shoulder seam trimmed. Repeat
for the other assembly.
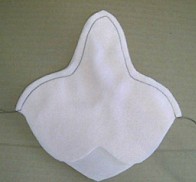
5) Now, make 2 slits in the part that does not have the gather stitches in it where shown on your pattern piece. It is just a small slit in the back of each curved area. Each slit is about 1" long and about 1" from the center of the curve. I have sorta opened the little slits so you can see them in the picture. Looks like eyes!
These little slits are where you turn the whole shoulder plate assembly right side out later, and it is also where you will stuff the "boobs" through.
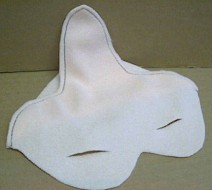
The little slits.
6) Now, turn the assembly that has the slits in it right side out.
7) Put the right side out assembly into the wrong side out one (the one with the gathers) lining up the seams at the shoulders and making sure you have the V backs together.
8) Pin the back edges together.
9) Pull the gathers up on the larger front edge and fit, pin and sew the whole outer edge together, adjusting the gathers evenly so the big curved edge fits the small curved edge.
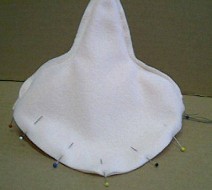 The back edges pinned together. |
 The front edges with the gathers pulled up and the edge pinned together. |
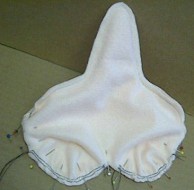
10) Sew all around the outer, pinned edge, opening the seams at the shoulders when you get to them.
 Sewn all around. This shows the side with the gathers. |
 I turned the assembly the other side out to show the side with the slits. |
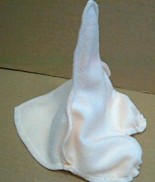
11) Now, reach into one of the slits and turn
the whole assembly right side out. A hemostat helps a lot here.
12) Work the inner part, which is the part with the slits in it, up into the outer part.
Poke your finger up into the neck and make the inner part nice and smooth in there. Work the shoulders out nice and smooth with your thumbs and fingers too.
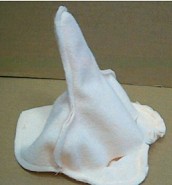
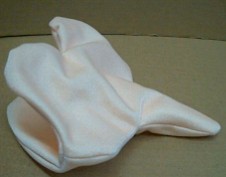 The shoulder plate assembly, right side out. |
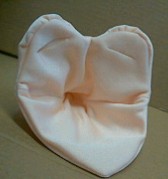 Looking inside of the shoulder plate assembly. Weird! Now it looks like eyes and a mouth! |
Go to... ~ Classroom ~ Pattern ~
Copyright
Notice: All pages and graphics are copyrighted
by the Internet Visions Company and/or instructor.
You may print these out for the use of the class only. All
other uses or distributions are forbidden.
Crafty College and Doll Net are divisions of the Internet Visions Company.
© 1997-2003, Internet Visions Co. All rights reserved.