Ó 2000 Judi Ward -Judis Dolls
Stuffing the neck with
clay and sculpting the clavicles under the cloth.
Attaching the shoulder plate to the body and stuffing the boobs.
Now we are going to put the MODEL MAGIC Clay in the neck. First though, lets talk about MODEL MAGIC clay for a minute .
First why have I chosen it to use in the neck, but not in the nose for this doll? The nose needs the harder baked clay so you can pinch the sides of the nose in and get a nice, dainty nose. The Sculpey or Fimo etc. holds the "sculpt" much better.
In testing the clays in the neck I decided that the baked clays were also too heavy for the neck.
Model Magic is very light weight. It holds enough "sculpt" for the neck and the clavicles. It never dries fully hard like a rock either. You can sew through it even after a day or so, to attach the head.
It is nice in some noses, big ones that scream character! You can even sew through it to needle sculpt it after it dries for a day. (Milli doesnt want a big character nose though.)
I checked online for availability and by simply putting the words Model Magic Clay into my search area, found many places to get it online if it isnt found near you.
Walmart, Michaels, Craft Warehouse, Toys R Us, and our little craft store a block away have it in this area. Get White, not the colors for your doll.
One package for about $3.98 is plenty. It also comes in buckets for about $20.00 and I found assortments for $9.99 online. If you get the bigger amounts, the kids will love the stuff!! Model Magic clay also has a 100% satisfaction rating from a consumer survey.
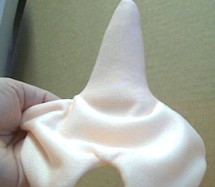
13) Get your clay out and pull off a piece about as big as large cotton ball. Roll it between your hands to make a long skinny thing.
14) The long skinny piece will be guided down into the neck and then MASHED to fill the top area of the neck. In the following picture it is in a curve. That is just so I could take the picture. When you start it into the cloth neck, it will go down straight.
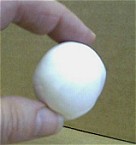 The ball of MODEL MAGIC clay. |
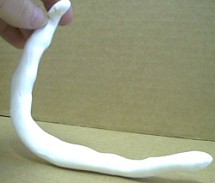 Rolled out long and skinny. |
The most common question asked at this point it "Why does it have to be rolled out skinny"? Why cant I just put a blob down in the neck .With much practice I have discovered it is almost impossible to get it down in the neck all the way when you start with a blob.! The long skinny piece goes right down to the point of the neck, and then when you start mashing it, it seems to stick to the clay already there and mash down easier.
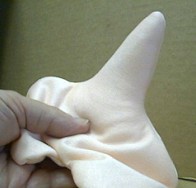
15) Now hold the shoulder plate so you can drop the long skinny clay piece down into the neck. Sorry, it looks gross at this point. Stay with me here, O.K.
16) Now, start pressing and folding the clay in on itself. Mashing it hard, down into the neck. I use my thumb and have even used the handle of my stuffing screwdriver. If you have long fingernails the handle of the screwdriver works best but you really have to hold the clay tightly as you pull the screwdriver out!
Another thing .Pull the inner fabric out smoothly as you press the clay into place. The fabric will want to pull to the inside as you press the clay down.
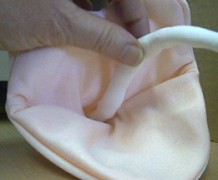 The clay going into the neck opening. |
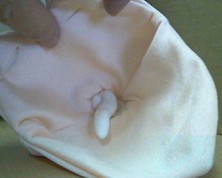 The clay being folded over on itself and pressed down into the neck. |
Looks weird again! Sorry. Kind of like a snake coming out.
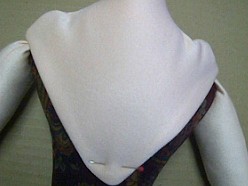
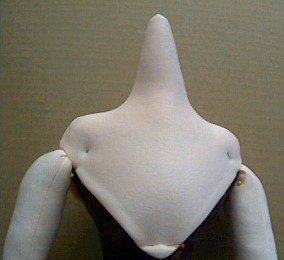
 What the neck should look like with the first clay insertion pressed down inside. |
 What the first clay insertion looks like from inside. |
17) Now take another cotton ball sized piece
of clay and press it down on the clay already in the neck. You wont need
to roll it out this time.
NOTE>>>> Be sure to pull on the lining fabric each time you press the clay down so you dont shove the lining up inside the neck, or have it all wrinkled up inside.
 The neck after the second ball of clay is pressed down. |
 The view from inside. |
18) Repeat once more, til the clay makes a
nice oval, reaching to just below where the clavicles are on a neck. NOTE>>>The
oval goes from side to side, not front to back.
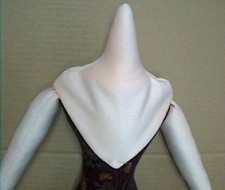
 This is about how far the clay comes down. |
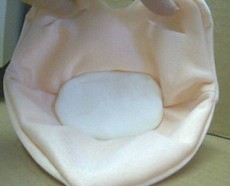 The view from inside. |
Now we are going to pull the shoulder plate down on the body and pin it firmly in place, press in the clavicles and let it dry overnight before sewing the shoulder plate to the body.
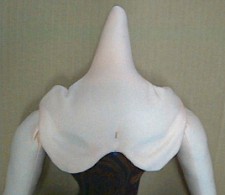
19) First, pin the back, pointed part of the shoulder plate down as pictured. It goes nearly to her waist, and the point of the shoulder plate is centered on the dart.
NOTE>>>>If you have used dark torso fabric, the fabric may show through the "skin" fabric. If that is the case, and it bothers you, cut a little triangle of white fleece or felt, and place it under the back before you pin it down.
Once the doll is dressed and the trims are around the shoulder plate, that "showing through" just fades away, but bothers some anyway, so do put the little piece of fleece or felt under the skin in back if it bothers you in the least.
I had one student who noticed it, and said it didnt bother her at all, but then sewed the shoulder plate all on and decided it did bother her after all, so she took all the sewing out in back and added the little triangle. Lots of extra work.
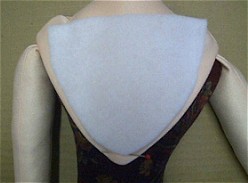 A fleece triangle cut to fit. |
 The back pinned down, with the fleece under it. |
The center back pulled
down and
pinned without the fleece.
20) Next pull the front down hard and pin it in place. NOTE>>>I havent worried about the shoulders yet. We pull them into place last. Sometimes they need a little stuffing under them.
The center front pulled down and pinned.
21) Now pull the shoulders down HARD, forming them over the tops of the arms. The arm tops should "puff out" under the edge of the shoulder. If you didnt stuff the arm tops enough, or hard enough to within 1 1/2" of the tops, the arms will be floppy, not firm. Milli is designed to sit back on her hands. The puff of the arm top is what holds her up.
If the shoulders are smooth at this first "pin down" Yea! pin them down in front and in back of the arms.
NOTE>>>If the shoulders dont pull down smoothly, you will need to add a little stuffing up in them. Sometimes they go down smooth as anything, and the next time they wont. It is all due to cutting, sewing and stuffing differences.
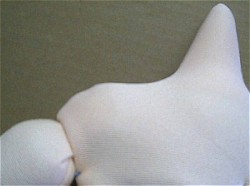 See the little "buckled" place? The shoulder needs a little stuffing to make it smooth. |
 Add a little stuffing underneath. |
Nice smooth shoulders. Note
where the shoulder plate is
pinned right at the back of the arm. It is also pinned
right at the front of the arm.
Note>>> The "pleats" in the upper arms where they meet the shoulder plate are normal. The trims will cover them completely.
NOTE 2>>>I know many of you are getting worried that there is no stuffing in the boobs yet! Some of you have already stuffed them right?! Never fear. They will be stuffed to perfection after the shoulder plate is sewn on from the front of one shoulder all around the back and back to the front of the other shoulder.
22) Now add a few more pins in the back, making sure to pull the edge of the shoulder plate out and be sure the seamed part isnt rolling to the inside. This happens more with Doesuede than with Velour.
23) Last but surely not least Press the clavicles in at the lower neck in front. I simply press with my thumbnails and make a slightly diagonal crease there.
You may want to check on the clavicles a time or 2 while the neck is drying to be sure they have stayed in. Let this dry now for at least 12 hours before you sew the shoulder plate down and then we will stuff the boobs, I promise!
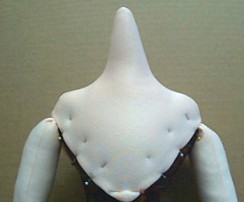 A few more pins added to the back. |
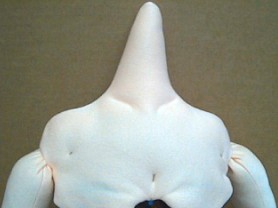 The Clavicles pressed in. |
***12 hours later***
Time to sew the shoulder plate on and then stuff those boobs!
Go to... ~ Classroom ~ Pattern ~
Copyright
Notice: All pages and graphics are copyrighted
by the Internet Visions Company and/or instructor.
You may print these out for the use of the class only. All
other uses or distributions are forbidden.
Crafty College and Doll Net are divisions of the Internet Visions Company.
© 1997-2003, Internet Visions Co. All rights reserved.