Ó 2000 Judi Ward -Judis Dolls
... Making the sleeves, skirt, and adding the lace
and trims to the bodice also the "panty" ruffle. ...
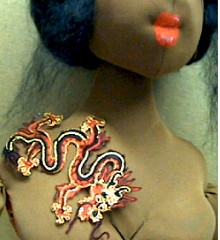
First, I have to show you the "cool" appliqué I found at Wal Mart. I am sure they are available at other fabric stores too. It is a dragon and he looks wonderful on my dark doll .Where it will go, I dont know yet, but you just have to see it.
 Here, on her shoulder? |
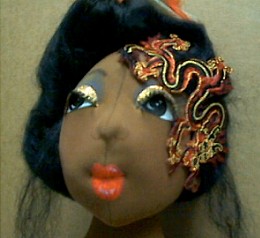 Here, on her face? |
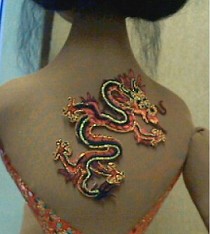 Here, on her back? |
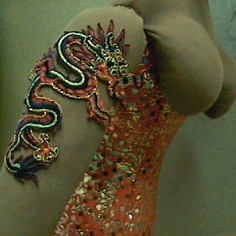 Here, on her upper arm? |
Decisions, decisions, decisions! I will wait til I get the dressing and trimming done before I make a decision. What do you all think?
I showed the doll in Red, just to show you the dragon, but will be working on the doll in the browns for writing this part of the class. I will finish the doll in red before the class is over though.
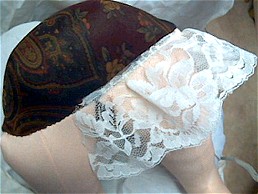
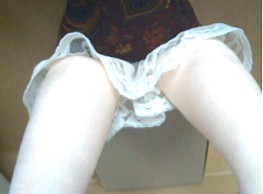
This little lace application makes a fake "panty" look.
 Starting the gluing (or sewing). |
 Applied all the way around. See the overlap? Sew it up and then sew the middle together. |

The middle sewn together,
this forms 2 leg openings.
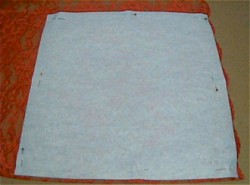
I like to make the pattern from Freezer paper and iron it to the lace folded so it is double. It makes it easier to cut along the Freezer Paper. Stick a few pins here and there to keep the 2 layers together.
If you are making sleeves from something other than lace with a scalloped edge, you will need to hem the wrist edge or apply narrow lace there or something.
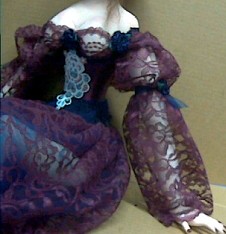
I am going to show the sleeve pattern and lace on my red lace The cream lace and white Freezer Paper didnt show up well in a photo. But I will continue the lesson on the cream and brown doll. I need her done for this weekend and company coming.
Cut the sleeves out and then sew the long seam from the scalloped edge to the raw edge. You will have made a couple of tubes. Turn them right side out.
NOTE*** You may not use both of them. Some students here at the castle classes and myself have made dolls with one sleeve.
NOTE 2*** If you have a lot of cellulite in the arms, the sleeves cover it so well!
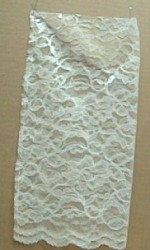
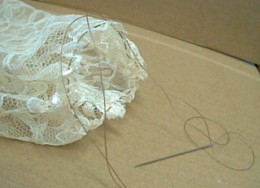
 The pattern ironed and pinned to my doubled red lace. Note the scallops sticking out a little on the right. |
 One cream sleeve sewn from the raw edge to the scalloped edge. The sewn edge is at the left. |
6) Run a gather stitch all around the raw edge of the sleeve, about 1/4" from the edge, starting at the center, not the seam, for ease of gathering and tying the sleeve to the arm at the top.
The sleeve will be too long. That is on purpose, so we can gather the sleeves up in 1-2-3 places up the arm to make them prettier.
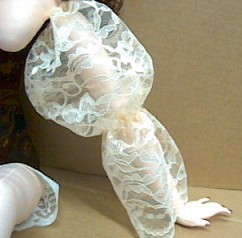
The sleeve top gathered. |
 The sleeve top gathered tightly to the arm top and being tied tightly. |
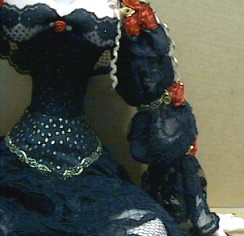
Ribbon, flowers, trim etc. will be put over the tied off areas.
Lets look at some other ways to tie the sleeves. You can have a ball decorating them.
A single tie at about elbow height. |
 Two ties; above and below the elbow. |
Two ties with the sleeve pushed up. |
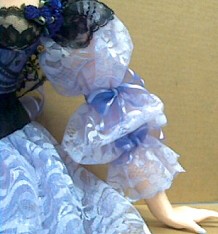
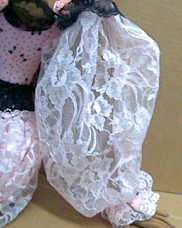 A single tie at the wrist. This sleeve has sewn on lace at the wrist. I didn't have enough of the border lace for both the skirt and the sleeves. |
A single tie up higher on the arm. |
 A single tie down lower on the arm. |
NOTE****
All of the sleeves are tied tightly with strong nylon cord, before adding
ribbons, flowers etc.
NOTE 2**** If you want to you can make the sleeves bigger than 14" X 14", for more puff, and more gathers.
You can decorate your sleeves now or wait till you do the bodice decorations.
Lets make the skirt now. This is the only piece of "real" clothing on Milli. A big departure for me, because I usually make dolls with removable clothing. If desired you can make this piece "unreal" too, by sewing the back shut and stitching the yoke to the body in a place or two so it doesnt turn.
A CAUTION***** The yoke is a "one size fits all" piece. With the use of so many torso fabrics, I have found in the hands on classes, that you need to try it on before you sew the lining into it.
For some dolls it is just right, for some it will be too big and a wider seam allowance will be needed at the sides, for some it will be really snug and you will need to take a narrower back seam allowance, and may have to squeeze your dolls waist to fit. Wow! Dont you wish we could just squeeze our waists to fit whatever size we want?!?!
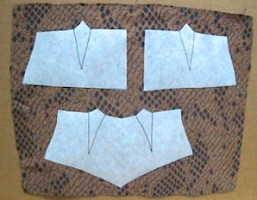
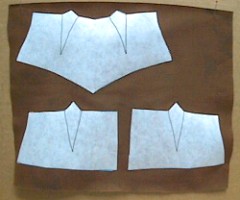
1) Make a right and left back yoke pattern. Make one whole front yoke pattern or make it on the fold.
2) Iron the Freezer Paper patterns to your yoke fabric. Cut out.
3) Iron the Freezer Paper patterns to your the lining fabric. Cut out.

This is what you should have for patterns for the yoke . |
 Patterns ironed to the outer fabric. This fabric is old, and has gold on the other side. 2 backs and a front. |
.
Patterns ironed to the lining
fabric.
2 backs and a front.
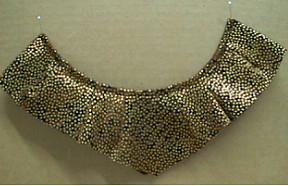
Mine fit just right this time. It needs to be a little loose at the lower edge, because the lace will be gathered into that edge, and the bulk of the lace takes up a little room.
The outer yoke sewn. |
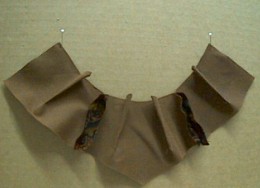 The lining sewn. |

Sewn at the backs and around the waist. |
 Turned right side out. The waist edge topstitched. |
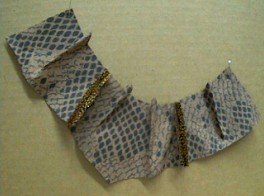
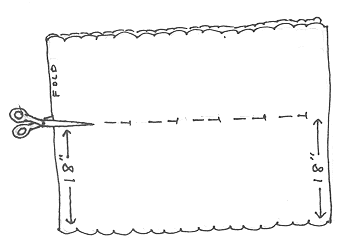
10) Now lets cut the lace skirt out. If your lace is lightweight, you can use the full 2-yard width for the skirt. If it is stiffer or heavier, 1 1/2 yards is plenty.
11) Fold the lace so the scalloped edge is together. Measure 18" up from the scalloped edge and place a pin. Do this the whole length of the lace.
12) Cut along the pins.
The reason you need that piece out of the center front of the skirt, is because the yoke is V shaped and you have to make the skirt V shaped too or it will pucker up at the middle of the front.
The following picture shows the long triangle placed on the center fold of the skirt lace, but I couldnt get the whole skirt in the picture. Ditto for the next picture showing the long triangle piece cut away from the skirt front.
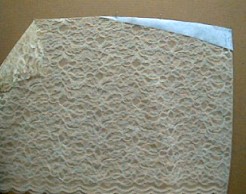
The long triangle piece in place on the fold of the lace. I make the piece from Freezer Paper and iron it on. |
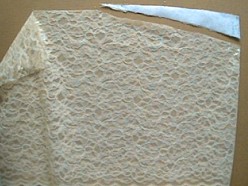
The long triangle cut away. Keep the pattern, throw the scrap of lace away. |
14) Gather the cut edge of the skirt to fit the open edge of the yoke you made. The center of the skirt fold goes at the point of the yoke.
I always gather by machine, using the long basting stitch (#4 on my Pfaff) I run two rows about 1/8" apart, starting at one end after the 1" for the fold over and going to the center ..I then go from the center to the other end, leaving that 1" again. Repeat for the second row of stitching.
Go to... ~ Classroom ~ Pattern ~
Copyright
Notice: All pages and graphics are copyrighted
by the Internet Visions Company and/or instructor.
You may print these out for the use of the class only. All
other uses or distributions are forbidden.
Crafty College and Doll Net are divisions of the Internet Visions Company.
© 1997-2003, Internet Visions Co. All rights reserved.