Lesson 3- A Hat For All Seasons
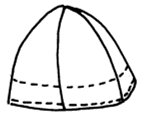
Now that you have learned all about millinery supplies and how to measure, you are ready to make your first hat. This simple cap has 5 variations and can be adapted to fit any doll. Begin by following the instructions to create a wedge shaped pattern piece. If you don't have a specific doll in mind, you can use the pattern we include at the end of this lesson. Directions are given for enlarging and reducing the pattern to fit any size head. But we strongly encourage you to try and draft a pattern FIRST before using the enclosed one. So get ready to have some fun!
This cap was originally worn by 18th century workmen in the printing industry to protect their hair while operating printing presses. It was made from scraps of inexpensive muslin. By altering the fabrics and trims you can make an exciting variety of hats suitable for both male and female dolls.
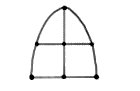
Goal - To devise a pattern piece for making a 4 sectioned soft hat
|
|
Supplies:
- Paper
- Pencil
- Ruler
- Tape measure
- Doll head
- Calculator
|
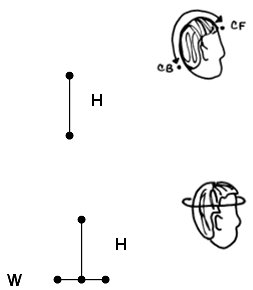
Procedure:
|
|
|

|
|
|
|
|
|

|
|
General Construction:
1. Cut 4 pieces of hat fabric and 4 pieces of lining clipping the seam allowance at the top of the wedge as shown.
2. Sew 2 sections RST to form half of hat, and press seam open clipping as needed. Then sew 2 halves together, pressing seams open. Repeat for lining.
3. Put hat and lining RST and sew around bottom edge leaving 1" opening for turning.
4. Turn hat RSO, press lower edge if necessary, hand sew opening closed, then top stitch 1/8" from edge for a nice finish.
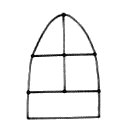
5. Turn lower edge up to form a brim.
|
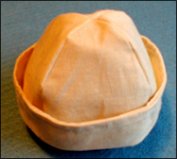
Workman's Cap Cut hat and lining out of muslin and follow directions above. On step 5 decide how wide turned up brim will be, and sew around hat (sample hat has line stitched at 1").
|
|
|
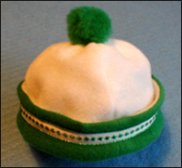
Ski Cap
Follow directions using one color velour for lining and one for cap. After step 4, apply narrow trim to lining side of cap covering stitching line. When brim is folded up this will be on the right side. Stitch pompom to top of cap. |
|
|
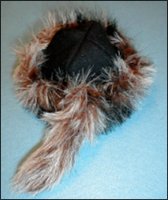
Canadian
Cap
This cap was very popular in the 1700's, and was usually made from wool for warmth. Benjamin Franklin wore one to France as a diplomat. The brim can be folded down to cover ears in cold weather. Often a raccoon tail was added.
Follow directions above. Cut a strip of fur about 1-1/2" wide and long enough to go around hat, with fur going down. Fold down top long edge of fur ¼" and glue in place to the back. Fold up brim, stitch fur to lining side, overlapping ends. |
|
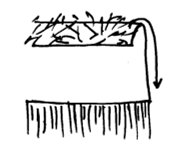
| Optional tail: Cut a piece of fur 2" x 4" for tail. Bring 4" sides together and whip stitch closed. Gather bottom edge and sew to top of fur band so it hangs down. | |
|
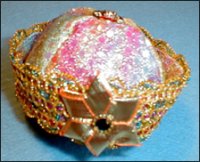
Party Hat
Follow basic directions. Sew trim to lining side of hat along edge, fold hat up and sew hat and trim together along bottom folded edge. |
|
|
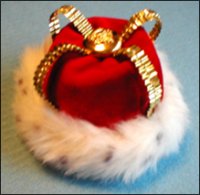
King's Crown
|
|
1. Sew hat and lining together. Add fur band as for Canadian Cap. Tack brim to hat. Use black marker to make flecks in the white fur to look like ermine.
2. Cut metallic trim in half to make two 6" pieces. (This trim needs to be longer than finished hat so it can curve up and away from crown.) Tuck ends into brim at opposite sides, criss-crossing them at top of hat. Secure pieces at top of hat by hand stitching in place.
3. Cut shank off button and glue in place over metallic trim at top of hat.
The Sky is the Limit!Dare to be different. Try cutting each wedge shape from a different color of fabric. Add a tiny propeller on top. Make hat from two contrasting cotton fabrics for a sunbonnet. This hat is as versatile as your imagination.
This course is the foundation for our next online hat class "From the Inside Out - Creating Hats With Structure", Click HERE for more information and to register.
This free introductory course is just that - an introduction. In "From the Inside Out" you will learn to create over 30 hats, along with trim techniques, variations, veils, etc. The class has 7 lessons, lots of patterns, projects, and step by step pictures to guide you. We'll look forward to having you join us on our hat making journey.
Bonnie
and Mary Ann