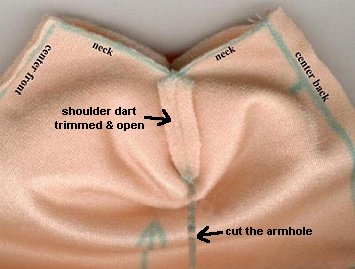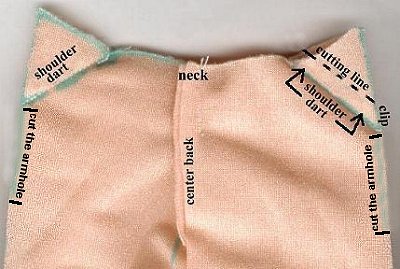
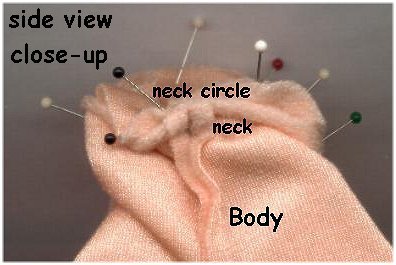
Step 1:
Make the darts at the neck of the body.
There is one on each
side of the neck.
These darts will form the shoulders of the doll.
Sew each dart, trim, and finger press each one as shown in the pictures..
Slit the fabric to open the armhole on each side.
|
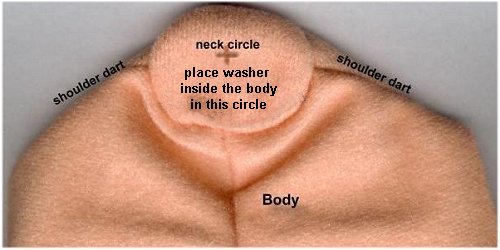
Step 2:
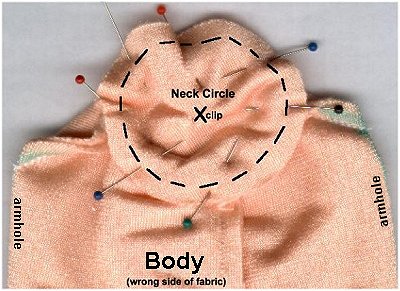
Clip an "X" in the center of the Body Neck Circle.
Right sides facing, pin the Circle to the neck opening in the Body. Ease to fit.
Sew in place.
Machine stitching is best, but it's easier to stitch by hand. Either way is fine, but if you sew it by hand, use craft thread and small stitches.
Stitch around twice to hold the pieces together securely.
Turn the body right side out.
|
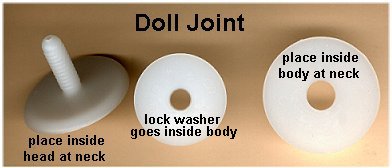
Step 3:
Your Doll Joint will look similar to the one in the picture. I've labeled it as to which piece goes where for you.
|
Step 4:
Place the large washer part of the doll joint (the one with a hole in it ) up inside the body in the neck circle.
|
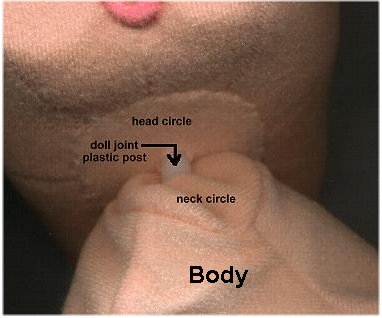
Step 5:
Place the head (with the part of the joint that has the post on it) down on the neck of the body - putting the post through the plastic washer under the neck circle of the body. |
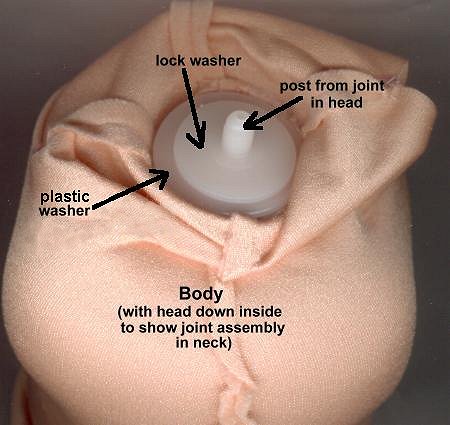
Step 6:
Snap the lock washer onto the post.
|
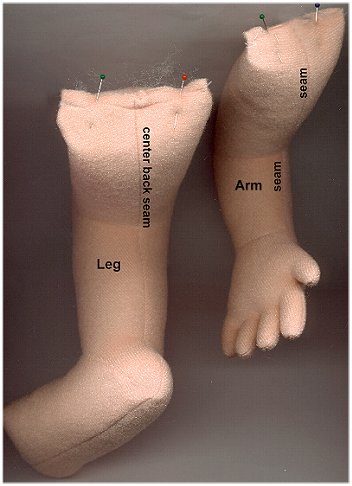
Step 7:
Stuff the arms and legs. Pack them firmly to within 1/2" of the top opening.
For the legs:
Push fiberfill into the toe area of each foot to fill it and continue to stuff the rest of the foot and on up the leg.
Match center front and back seam on each leg and stitch across tops of legs.
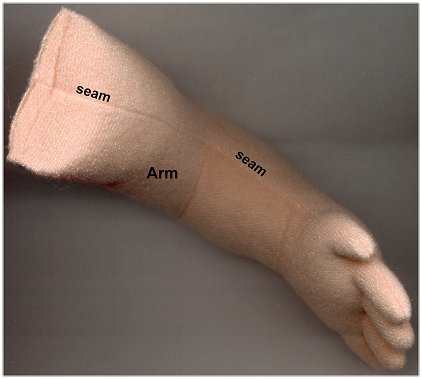
For the arms:
To stuff the fingers, use a hemostat and put small amounts of fiberfill into each one until they are completely filled.
Continue on to stuff the hand and the arm.
Match seams at top of arms. Sew across.
|
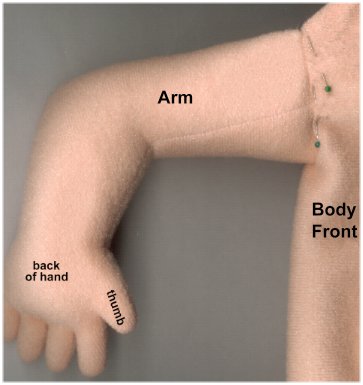
Step 8:
Turn under the armhole 1/4" on both sides. Insert one arm into the opening. Pin the opening to the end of the arm.
Blind stitch the arm in place. Repeat for other arm.

|
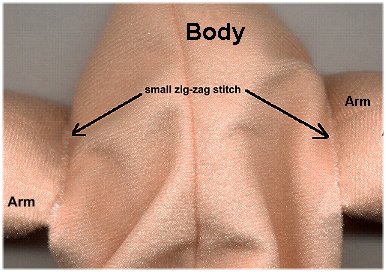
Step 9:
Stitch across the arms with a zig-zag sewing machine stitch. The zig-zag stitch is optional, but it will help keep the arms from being pulled off. If the doll is to be played with, it's better to have the arms on securely.
|
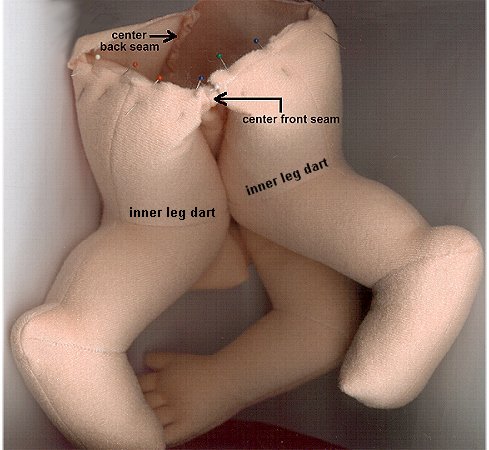
Step 10:
Pin the legs to lower edge of the body front. Pin one leg on each side of the center front seam. Make sure the legs are pinned on correctly. The toes need to be facing the front of the doll and the inner leg darts need to be facing each other toward the center of the doll.
Sew the legs to the body using a small machine stitch.
The legs can be sewn on by hand, but for a doll that is to be played with, machine stitching is best.
Stuff the body firmly. Be sure to stuff the butt area very firmly. It needs to be stuffed firmly for sculpting.
|
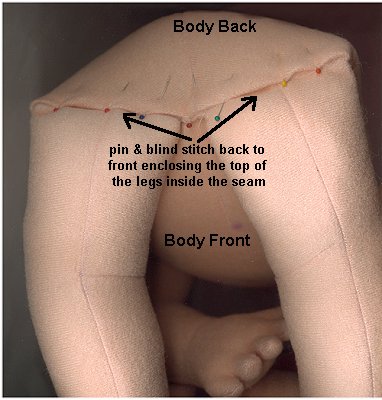
Step 11:
Turn under the lower edge of the lower Body back and pin it to the lower edge of the Body front, enclosing the tops of the legs.
Stitch the lower edge of the body back to the lower front edge of the body front. Stitch by hand using a blind stitch and craft thread. Stitch the area twice to hold it securely.
To make sure the butt area is stuffed firmly, you may have to put extra stuffing in before you have the seam completely closed.
|
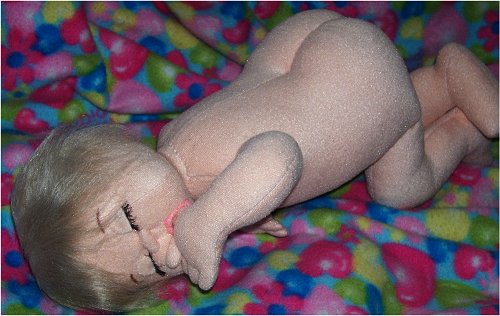
The doll is now ready to have some sculpting done to the body.
In the next chapter, we'll sculpt her little bottom and
make her a cute little belly button.
Go to Chapter 6
|