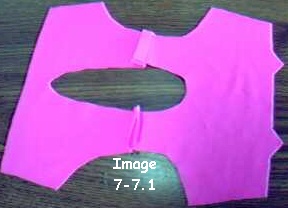
 Image 7-7.1 Sew the shoulder seams. |
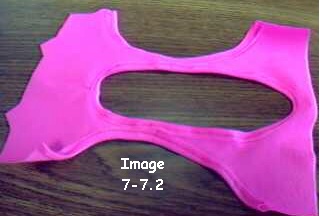 Image 7-7.2 Hem the neck and arm openings. |
Taught by Judi Ward of Judi's Dolls
http://JudisDolls.com
The Sport Bra***
It needs to be cut with the most stretch going side to side. You can make it as a "pull up" bra***or*** if you wish, you can add a seam allowance of ½" at the center back and cut that fold apart. Turn the ends to the inside and stitch them as you stitch around the neck area. You can then put a hook and eye closure at the back.
I make it as a pull up though.
1. Sew the shoulder seams of the front to the back, with a very small zig-zag stitch. (you can of course use a stretch stitch if you have one) I tend to make about 3/8" seam allowances here for the slimmer dolls.
2. Narrowly hem the neckline and the arm openings. Stretch the fabric slightly as you sew, to fit the hem to the curves. The hem will almost disappear at the V in the center back. Just stretch it a bit and sew it in anyway.
3. Sew the side seams. I tend to use a 3/8" seam here too. Try it on before continuing.
4. Sew the front darts in.
|
Image 7-7.1 Sew the shoulder seams. |
Image 7-7.2 Hem the neck and arm openings. |
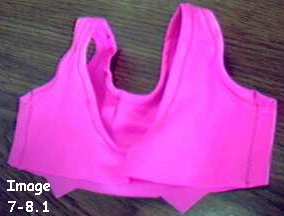 Image 7-8.1 Sew the side seams. |
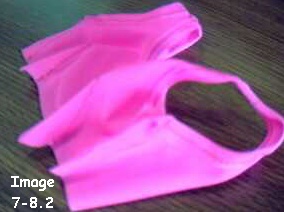 Image 7-8.2 Sew in the front darts. |
5. Now, sew elastic around the lower edge just the way you did for the panties waist. First on the inside, barely stretching it as you go around. Then turn the edge in and stretch it to the Max! as you sew around. This way you will be sure to be able to get the bra over Whatevers hips.
6. Pull the bra on, breath deeply and eat
more chocolate!
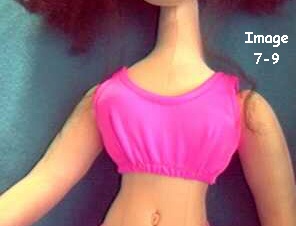 Image 7-9 The sports bra on. It doesnt fit like skin. Too uncomfortable! |
The Shirt***
I am switching dolls for the shirt and skirt outfit. The doll in the hot pink undies will be wearing the outfit in the 8th chapter.
It is easiest to make the shirt from something with some "give" rather than from woven fabric. I am using the leopard print velour that I made "Miss Leopard Legs" legs from. I got it near Halloween time. A great time to find print knits, like velour and Suede cloth.
I have also made the shirts from Spandex, both nylon and cotton. I have used t-shirt knits and interlock knit too. Sweatshirt knits will work, as will many other knit fabrics.
You can use wovens though. Just be sure to fit the pattern around your doll first to be sure something with no give at all will fit. You may need to add a little to the side seams and to the sleeves.
1. Place, pin and sew the chosen label to the shirt front.
2. Sew the shoulder seams of the backs to
the front.
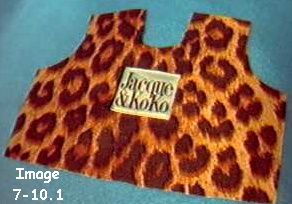 Image 7-10.1 Sew the label in place. |
 Image 7-10.2 Sew the shoulder seams. |
3. Fit, pin and sew the sleeves to the arm openings. The sleeves will be too big for the openings. If you are using a knit, just work from the center to the edges, both directions and fit, pin and sew them in. Cut off the excess at each end.
If you are using a woven for the shirt, the extra allows you to gather the top curve and ease it in place. The wovens wont simply bend around like the knits do.
You may still have a little extra to cut off but you can always cut some off, you cant add more on, that is why I made the sleeves a little too big.
4. Trim the seams very narrow. With a knit, you dont have to do anything else. With a woven you will need to go back over the sleeve seam with a zig-zag stitch to keep them from fraying.
5. Narrowly hem the sleeves. One turn or two.
I like to cut a little off of the length
of the sleeves for the knit shirts, and turn only one turn. For the wovens
it is best to do two turns, since they fray.
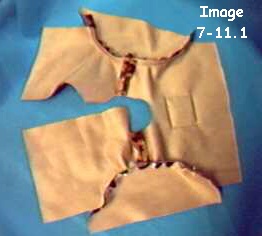 Image 7-11.1 Fit, pin and sew the sleeves in. |
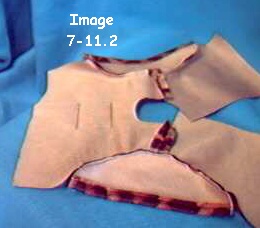 Image 7-11.2 Narrowly hem the sleeves. |
6. Narrowly hem the neck edge. For wovens you will need to clip the edge a little before you sew, to get it to turn easily to the inside.
For some knits, like the velour I am working with, you will want to clip the free edge after you turn and sew it. That lets the curve of the neckline lay nicer.
7. Sew the side seams.
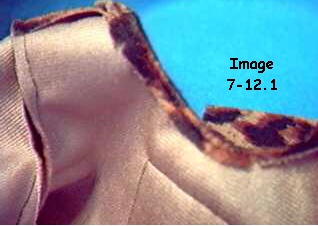 Image 7-12.1 Narrowly hem the neck edge. Notice the tiny clips. |
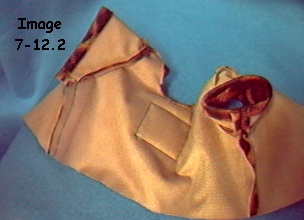 Image 7-12.2 Sew the side seams. Notice where I opened the seam and flat stitched it so the seam Allowances at the sleeves arent loose and un-sightly. |
8. Turn the back edges to the inside about ½" and sew.
9. Narrowly hem the bottom edge.
10. Sew snaps (called press studs in some
countries) to the back opening or sew Velcro to the back openings. I usually
cheat and use Velcro. I hate hand stitching!
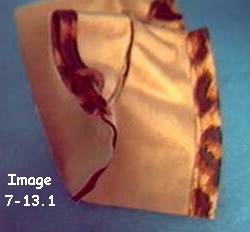 Image 7-13.1 Back edge hemmed. Do both of course. |
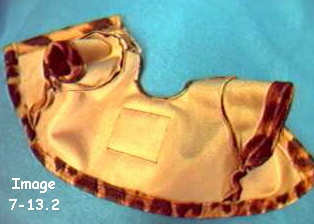 Image 7-13.2 Bottom hemmed. |
A fun edge finish if you are making the shirt from something very stretchy is the "lettuce leaf" finish.
Simply stretch the edge to the max, as you sew a tight zig-zag stitch over the edge. The edge will curl up and down and is really cute. Go over it twice if desired.
If you have a serger, you can do a rolled hem and lettuce leaf it that way.
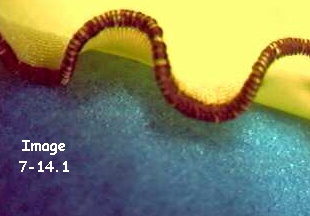 Image 7-14.1 A "lettuce leaf" edge with a zig-zag stitch. I only went over it once. |
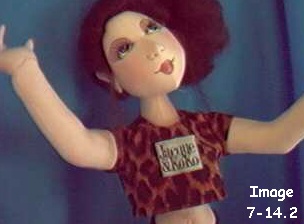 Image 7-14.2 My shirt is done. |
Judi Ward
Judi's Dolls
http://JudisDolls.com

