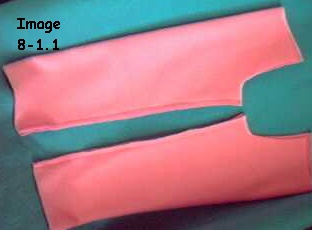
 Image 8-1.1 The inner leg seams sewn. |
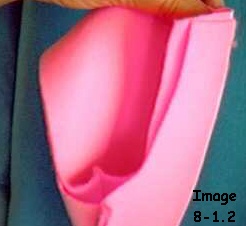 Image 8-1.2 Fit the right side out assembly into the wrong side out assembly. Match inner leg seam. |
Taught by Judi Ward of Judi's Dolls
http://TheDollNet.com/judi/
Judi@CraftyCollege.com
Whatever! Whatever! couldnt be without at least one extra "stylish" outfit. I asked my 13 and 15 year old Grand Daughters what would be a really comfortable outfit for home, that would also look good to wear out and about.
Their answer was A sweats outfit with a hooded jacket, drawstring pants and short sleeved shirt. Had the shirt already!
Worn with tennis shoes of course. Theirs have soles about 2" to 3" thick, but I couldnt find any like that in a baby shoe, so my Whatever! has to be content with a regular looking tennis shoe style. Fisher PriceÒ brand.
Color***One Grand Daughter loves pink and blue, one loves black and olive green. I chose pink for the sample. A bright pink that I liked. I was told it should be a lighter pink but Whatever!
Also in this chapter we will discuss the chubbier version, but no complete directions are needed.
They are all the same as for the thinner version. I will give needle sculptured inner arm directions though. You can use them on either version.
Your patterns for the outfit should print out full sized. Seam allowances still need to be added. Again, this is so you can down size or up-size your patterns if desired and not worry about the seam allowances changing too.
Another thing will be a look at, and a brief description of the finish for the 2 busts that have been appearing as we go along.
The "bust" project is a fun, fairly quick one that can be done with many doll patterns, by using the upper body and head only.
You can use store bought hats and flowers, or make hats and ribbon flowers . (There is a great Hat Class at Crafty College)
The bust project is an embellishing dream, but not too expensive, nor too time consuming, because it is just the head and shoulders to make and embellish.
Materials needed for the Sweats Outfit.
1. ½ yard of sweats fabric or you could use that shiny acetate "warm up" fabric or even cotton knit, like French Terry.NOTE***The clothing directions will be way too much for the dollmakers who have made a lot of clothes. Just go ahead and "do your own thing". They may be needed for a beginner though, so they are here.2. A small piece of coordinating fabric for another shirt or make the sweat suit outfit match the shirt you have already made.
3. A label for the new shirt if desired.
4. A separating zipper at least 6 ½" long but the smallest you will find will probably be 12" long. We will cut it down to fit. I have the 12" one.
5. 2 round shoestrings about 18" long for drawstrings or rat tail cord or other round cord.
6. About ½ yard, of ½" wide elastic for the jacket sleeves and pants ankles. NOTE the waist of the pants and the bottom of the jacket will be drawn up with the drawstrings.
7. If you want a drawstring in the hood of the jacket, you will need another 18" piece of cord. A bit of trivia .Drawstrings in childrens hoods were outlawed a few years ago.
8. Thread to match the fabric, and the proper needle for the type and weight of fabric you are using.
I dont know what has happened to the color in the following pictures! We have everything from pale pink to bright; and the background from turquoise to gray! It is not the light today.
Gremlins in my computer I think!
The Shirt***
The shirt is made the same way as the shirt
for the first outfit. Refer back if needed.
The Pants***
All sewing is right sides together unless otherwise stated, or for hems. This is a great "serger" project.
Most of the sewing can be done on one. If you have one, use it.
I have written the directions for a regular sewing machine though.
1. Sew the inner leg seams of each piece.
2. Turn one assembly right side out and put it down inside of the other, matching the inner leg seams.
3. Fit, pin and sew the crotch seam.
4. Turn the whole pants assembly right side
out.
|
Image 8-1.1 The inner leg seams sewn. |
Image 8-1.2 Fit the right side out assembly into the wrong side out assembly. Match inner leg seam. |
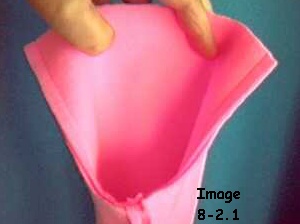 Image 8-2.1 Sew the curved crotch seam. |
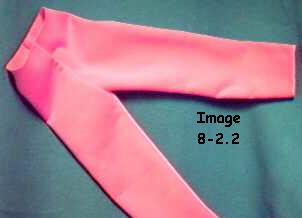 Image 8-2.2 Turn pants right side out. |
5. Now, right in the front of the waist edge (the front is the lowest edge) measure down 1" from the edge and about 3/8" from the center seam, and make a dot with a colored pencil. Repeat on the other side of the center seam.
6. Snip a TINY hole at each dot. This is where your cord will thread through. You can actually just leave the little hole as is. The knit fabric wont run or tear more, but if you want to you can whip stitch all around each hole for a nicer finish. I go around twice.
7. Turn the waist top in about ½" all the way around. (It will fold to the inside just above the top edge of the holes) and sew the waist edge down all around.
8. Run your chosen cord through the top waist
edge. I put a small safety pin on the end of the cord and run it through
using the safety pin as a pusher. Cut the cord ends to about 6" to 8" long.
 Image 8-3.1 Measure and mark the dots. |
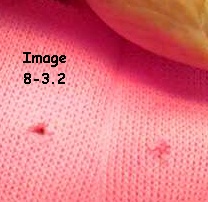 Image 8-3.2 Snip a tiny hole at each dot. |
 Image 8-4.1 Whip stitch around the holes. |
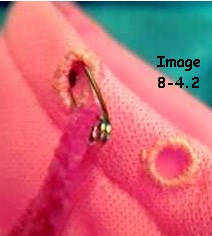 Image 8-4.2 Hem the top edge and then thread your cord through the holes. |
9. Wrap tape around the ends so they look
like a shoelace end, and dip the taped end in clear fingernail polish for
more permanence.
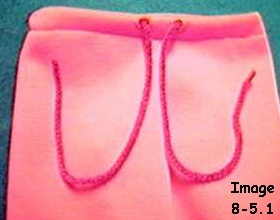 Image 8-5.1 Cut the cords to about 6" to 8" long. |
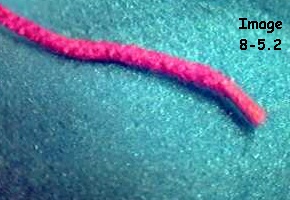 Image 8-5.2 Wrap the ends with tape and dip into Clear fingernail polish. |
10. Hem the legs up about 3/4" leaving a small spot un-sewn. Run ½" wide elastic through the opening.
11. Pull the elastic so it gathers the leg bottoms a little. Not too much. Whatevers feet are big!
12. Sew the ends of the elastic together and then sew the little spot closed.
The pants are done.
(NOTE*** of course if you can "stretch and sew" the elastic around the leg bottoms do that, but dont stretch it too much as you sew it on. Whatever! has big feet, and it is hard to get the pants ankles over them if the elastic is too tight.)
The Hooded jacket***
NOTE***The hood doesnt really fit the dolls head. If it was made that big it would be huge! Whatever! Whatever! is a caricature of a teen and her head, feet and hands are oversized.
One of my grand daughters is 5 5" tall, weighs 90 pounds and has size 9 feet! See where I got the idea!
She eats more than my hubby and I put together! She has the metabolism of a shrew!
Oh for those days again!!! My nickname used to be Twiggy! Now every bite goes right to the belly!
Anyway>>>>
1. Sew the shoulder seams of the fronts to the back.
2. Finger press the seam allowances of the
shoulder seams towards the back and top stitch them down.
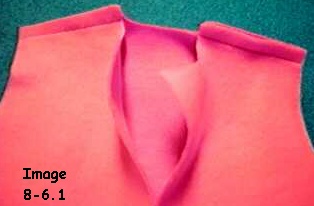 Image 8-6.1 Sew the shoulder seams. |
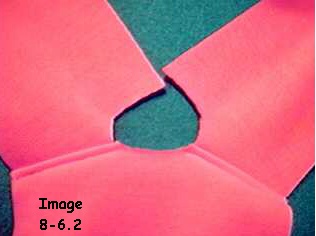 Image 8-6.2 Top stitch the seams towards the back. |
3. Sew the curved hood seam and then trim the seam to 1/8" and zig zag over the raw edge.
4. Turn a ½" hem along the straight,
front edge of the hood and sew it down.
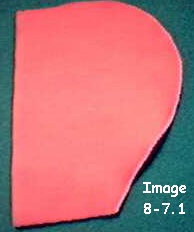
Image 8-7.1 Sew the back seam of the hood. Trim and Zig Zag over the raw edge. |
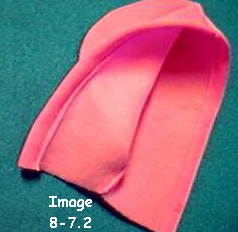 Image 8-7.2 Hem the front edge of the hood. |
5. Fit, pin and sew the sleeves in place. These sleeves will fit just right as this outfit is not intended to be made from anything but knit fabrics.
6. Trim the seams to 1/8" and zig zag over the raw edges.
7. Now, fit and pin the neck edge of the
hood to the neck edge of the jacket. Start at the center back and work
the hood onto the jacket towards the fronts. There will about 1" of jacket
front left at both ends.
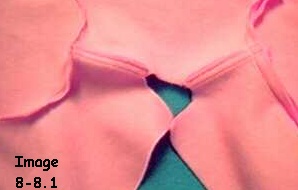 Image 8-8.1 One sleeve trimmed and zig-zagged. The other just sewn. |
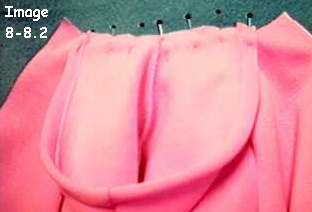 Image 8-8.2 The hood pinned in place. Note the 1" extensions at the fronts. |
8. Now, fold the extensions back over the ends of the hood edges ½", and pin those. Sew the hood on.
9. Trim the neck seam to about 1/8" and zig-zag
stitch over the raw edge.
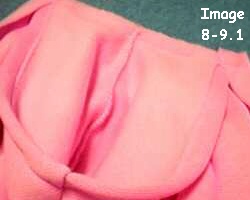
Image 8-9.1 Extensions folded back over the ends. Neck edge sewn. |
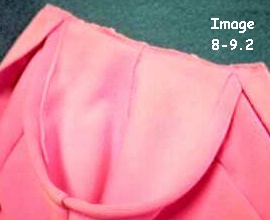 Image 8-9.2 Trimmed and zig-zagged. |
10. Hem the sleeve ends up ¾" and run 1/2'" wide elastic through the casing. Anchor it at each end. NOTE***Dont pull it up too much. Remember Big Hands!
11. Sew the side seams. I dont always trim and zig-zag this seam, but you sure can if you want to.
I do like to open the wrist edge seam and
sew it flat, so it isnt bulky.
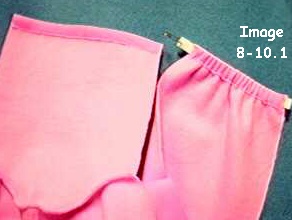 Image 8-10.1 One wrist edge hemmed. One hemmed and the elastic run through. |
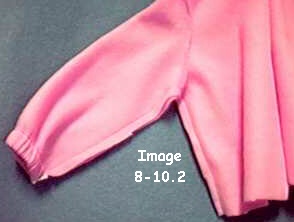 Image 8-10.2 Sew the side and underarm seams. |
12. Turn the jacket all right side out. Poke the front corners at the neck edge out nice and square.
Now lets put the zipper in. This is easy, but you do have to cut it down. It is pinned in place on one side and then sewn. Cut down, taken apart and then sewn to the other side.
I keep the teeth of the zipper back far enough from where I am sewing that I dont even need a zipper foot on the machine to do this. The zipper tape is decorative.
The bottom of the zipper should be placed 1" from the bottom of the jacket. The front edges of the jacket fold to the inside.
13. Pin the zipper in place and then sew
it in place. Note how much too long it is in the following picture. 12"
was the smallest I could find anywhere.
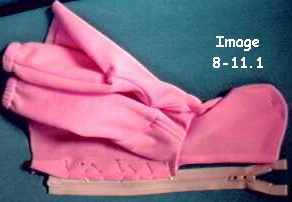 Image 8-11.1 Zipper pinned in on one side. |
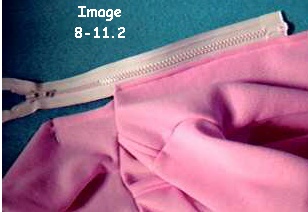 Image 8-11.2 Zipper sewn in on one side. |
14. Now, zip the zipper down below the top edge of the jacket and cut it off at lease 1" longer than the jacket front.
15. Open the zipper all the way and take
it apart. Pin and sew the freed side to the other jacket front.
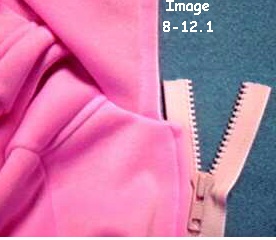 Image 8-12.1 Cut the zipper off. |
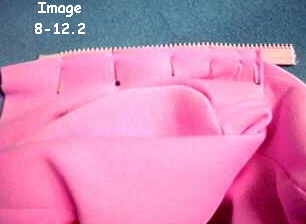 Image 8-12.2 Pin the freed piece of zipper to the other side of the jacket front. |
16. Hem the bottom of the jacket, and run the cord through the hem. It will be on the inside.
Of course fix the ends of the cord if you arent using shoelaces.
17. Turn the extra zipper extensions to the inside of the jacket and hand stitch them down.
If this was a real jacket those teeth would be scratchy turned to the inside, but Whatever! wont care at all. Honest. Her reaction was Oh! Whatever!!
I know there are "Zipper Fixers" and if you
have some, you can of course use them to fix the top of the zipper, so
you dont have the teeth turned to the inside, just fabric
but most folks
dont have Zipper Fixers, so I chose to do the jacket by just turning the
extra to the inside and sewing it down.
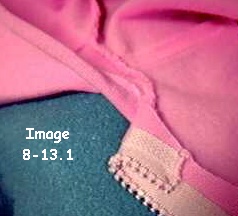
Image 8-13.1 The excess zipper turned to the inside and hand stitched down. |
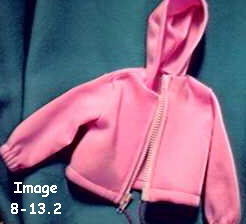 Image 8-13.2 The finished jacket. |
Judi Ward
Judi's Dolls
http://JudisDolls.com

