Image 8-20
Overlap and sew ribbons
onto fabric like this.
Taught by Judi Ward of Judi's Dolls
http://JudisDolls.com
Chapter 8 Part 3
An extra outfit, some
chubbier version tips,
and a final look at
the "busts" with some basic
instructions on one
hat and trimming.
~ Part 1 ~ Part
2 ~ Part 3 ~
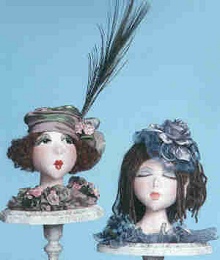
***The Busts***
I dont have inch by inch directions for these, I just decorate them with hats, gathered laces and ribbons, flowers and jewels.
You can use store bough hats or make hats for them. I will give directions for a simple cloche hat. You will need to put the hair on your doll head first, and then measure around the head for the size the ribbons and fabric need to be for the cloche hat.
I hope you have made one or two to "play" with. They are lots of fun!
My Vamps hair is sewn down the middle Dizzy Frizzy bumpy mohair. It is simply sewn down the middle, the loops cut and then glued to the head with the sewing as a center part. The "hair" was arranged all around and then cut into a bob. I didnt even put ears on her.
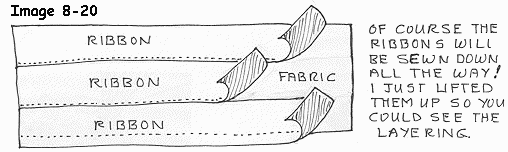
Her hat is made by sewing 3 strips of 2" wide ribbon together overlaid on a piece of fabric.
The length for the fabric and ribbon is the length that will go around the head plus a seam allowance.
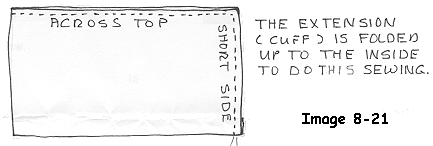
To make the cloche hat by sewing ribbons onto fabric, simply lay one ribbon down on the fabric with about 3/4" extending past the long edge of the fabric. (This extension will be turned back into a little "cuff" at the edge of the hat)
Sew that ribbon down on both edges. Don't worry about the raw edge of the fabric underneath. It won't show when the hat is done. I used some Doesuede underneath.
Lay another ribbon over it, overlapping the edges about 1/4". Sew it down. Repeat for the other. (this is for 2" wide ribbons.) it will easily cover a piece of fabric 4 1/2" wide by the length needed to go around the dolls head.
Image 8-20
Overlap and sew ribbons
onto fabric like this.
I folded the assembly right sides together and sewed a seam up the short side and across the top. I folded the little cuff up at the same time.
Sew up the short side and across the top.
I gathered the short side along the seam and pulled the gathers fairly tight.
When I put the hat on I "squished" it down and worked folds into the fabric. I even glued a couple of the folds in place.
I decorated it with a big rose made by simply gathering more of the ribbon. I added more flowers by the ribbon flower and some in the top too. I also added a small peacock feather.
The decoration around her bust is gathered ribbon and flowers all glued on.
She is on a stand made from a wood plaque and a wood candlestick. I painted them off white and sprayed it with a product called webbing spray that makes great tendrils all over.
I then sprayed a few coats of clear acrylic spray over all and glued the candlestick to the plaque.
The doll was glued to the stand before I decorated her of course.
I found the best glue for gluing the busts
to the stands, and the candlesticks to the plaques, is E 6000. It is a
glue that advertises itself as extra strong and with the ability to glue
almost anything to anything. I am sure there are others. I did find that
Hot glue lets go of the painted surface.
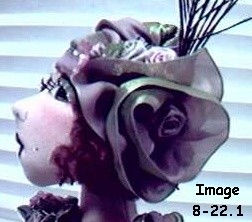 Image 8-22.1 My Vamp, side view. |
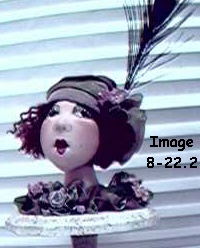 Image 8-22.2 My vamp front view. |
The 1890s Southern Belle or Lady from the Old West is on the same kind of stand. Her "hat" is a big decorated barrette, simply clipped into her hair.
We made her hair in the Hair chapter and it is the sparkly yarn, in one pony tail.
The ruffle around her bust is gathered lace
and is decorated with a silk ribbon glued all around and of course flowers.
She really looks like she just stepped out of Bonanza.
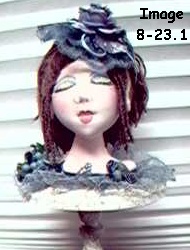
Image 8-23.1 My 1890s lady, front view. |
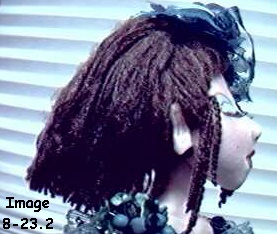 Image 8-23.2 My 1890s lady, side view. |
Well ladies and gentlemen, if we have any gentlemen here, that about does it for the Whatever! Whatever! class****except**** A parting shot. Whatever! Whatever! will pose on her tummy too!
Lay her down. Keep her hands bent back. Squeeze her arms at the elbows to make them bend more. Hook her thumbs into her neck opening, and Wah Lah! She poses on her tummy.
Sometimes she argues with you about it, and doesnt want to keep her arms bent, but just bend them a few times and press hard. They will take the bent position after a few tight squeezes from you. You can also add more chenille stems in the arms if you are planning a doll to pose on her tummy.
Hope you had fun, learned some new things, and stretched your skills some, or a lot.
I also hope you have realized the true versatility of a good basic cloth doll pattern and realize that it doesnt have to be just one thing. The options and possibilities are limitless!
Hmmmmm How about a Whatever! Whatever! Mermaid?! Laying on her tummy?
Keep thinking, expanding and trying new things!
Stay out of that "exactly like" rut and let your dollmaking GROW!!!!
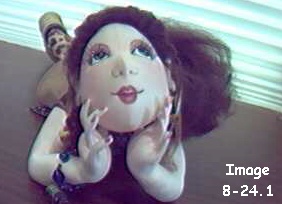 Image 8-24.1 |
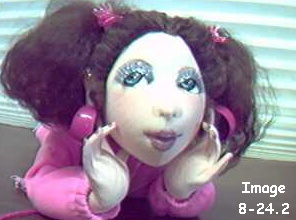 Image 8-24.2 |
Go to ~ Part 1 ~ Part 2 ~ Classroom ~
Judi Ward
Judi's Dolls
http://JudisDolls.com