 Image 8-14.1 Needle through inner arm area. |
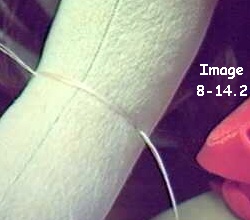
Image 8-14.2 Thread looped across and sewn through again. Not pulled tight. |
Taught by Judi Ward of Judi's Dolls
http://JudisDolls.com
Chapter 8 Part 2
An extra outfit, some
chubbier version tips,
and a final look at
the "busts" with some basic
instructions on one
hat and trimming.
~ Part 1 ~ Part 2 ~
Part 3 ~
Now lets
talk about the
Chubby
version of Whatever! Whatever!
.I have made her 2 ways .
First, simply by turning the pattern pieces on the Velour or the Doesuede so the stretch was side to side rather than up and down. This makes a chubbier and shorter version automatically.
You can do this with many doll patterns and have 2 different looking dolls in one pattern.
The second way is of course to use the chubbier pattern. The doll will be about the same height as the thin version, but chubbier. NOTE AGAIN***Every doll will be slightly different in size. Cloth dolls can not be said to be "exactly" a certain size. The variances in stuffing, cutting, sewing and fabrics simply wont allow that exact designation.
My Zaftig doll, who is the dark doll at the beginning of the class was done by turning the pattern pieces sideways on the fabric, so the stretch was side to side. I also sewed a fraction of an inch from the edge of the pattern pieces for the template pieces, and cut a fraction of an inch from the edge of the pattern pieces for the non-template pieces.. She was a one of a kind, and I took creative license with her.
I wanted her to be not quite "chubby" just a little bigger. She is actually about "normal" sized, which for the girls in the Anorexia and Bulimia hospitals is about as much "fat" as they could tolerate, and still think a doll was attractive.
Sadly, the Zaftig traveling show didnt materialize, but was a fun challenge to do. To make a doll who shows some body fat, or is a little overweight, but is still self aware, self confidant and beautiful!
The doll you will see in the orange bikini was made with the chubbier version pattern.
Something I do for the inner arms of the chubbier version dolls is to needle sculpt at the inner elbow. This makes a crease there. You can also do this for the slimmer version doll.
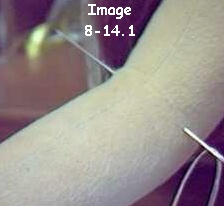
1. Thread your needle sculpture needle with 2 strands of thread about 1 yard long.
2. Pull up half way so you will be sewing with 4 strands. Dont tie a knot in the thread.
3. Go through the inner elbow area from side to side about 1" from the seam on each side. Leave a thread tail about 5" long hanging out.
4. Loop the thread that is on the needle
around and re-enter the same spot where the thread tail is hanging out.
Pull tight to make an indentation with the thread. The picture shows the
thread across the inner arm, but not pulled tight yet.
|
Image 8-14.1 Needle through inner arm area. |
Image 8-14.2 Thread looped across and sewn through again. Not pulled tight. |
5. Repeat twice more, pulling the thread tight to indent the inner arm.
6. Tie the thread ends in a small knot and
lose the ends. The small knot will bury itself in the dent.
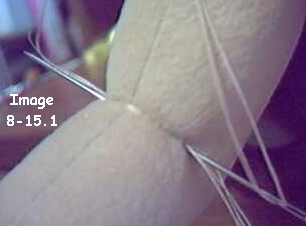
Image 8-15.1 Repeat twice more, pulling the thread tight. |
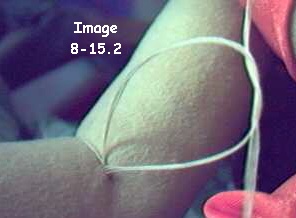 Image 8-15.2 Tie ends together in a knot. |
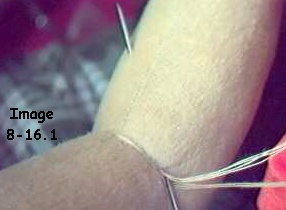 Image 8-16.1 Lose the ends. |
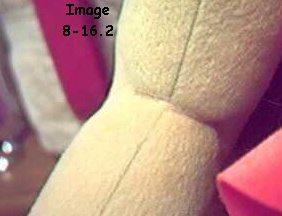 Image 8-16.2 Finished crease. |
NOTE*** I used the Doesuede "fuzzy" side out for this doll.
She also has on a real doll wig. Size 12". If you put a real doll wig on your Whatever! dolls, you will need to stuff some stuffing up under the wig at the crown area.
When you glue or sew a wig on, be sure to leave the neck free from glue or sewing so your dolls head will still turn.
A professional photo follows taken with the very tall thin dark skinned doll.
She turned out taller and thinner than any
I have made to date. I must have been in a really strong stuffing mode
and stuffed her to max length wise!
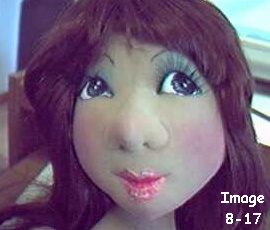 Image 8-17 The chubby dolls face. This doll has an exotic look. |
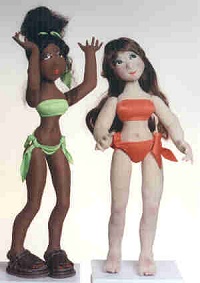 Image 8-17a |
The skirt will fit either size doll. Thin or chubby, since it is a wrap skirt.
The other clothing will need to have about ¼" added to everywhere you have already added ¼" except at the hems.
Be sure to make the chubby doll fully before cutting the clothes. The best thing to do, if clothing isnt your thing, is to cut your re-sized pieces from paper towel and pin them here and there and then fit them to your doll before cutting your fabrics.
If clothing is your thing Whatever! Whatever! is fun to dress in all sorts of outfits.
Following are photos of the 3 dolls we worked
on in class. Did anyone make a Giants Fairy? Did anyone do the simple button
eye face? Did anyone make the dolls in a smaller size?
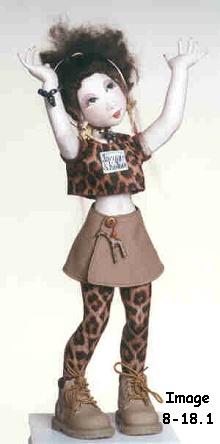
Image 8-18.1 Class doll in brown with the Leopard legs. |
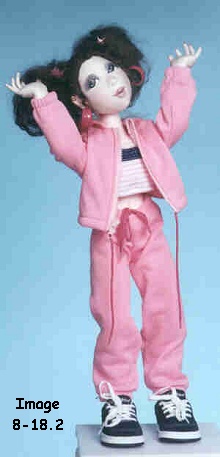 Image 8-18.2 Class doll in sweats. |
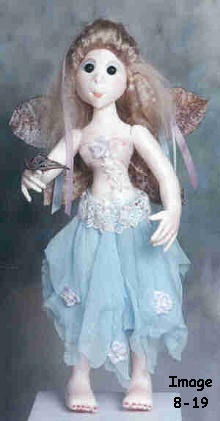 Image 8-19 The Giants Fairy |
Judi Ward
Judi's Dolls
http://JudisDolls.com

