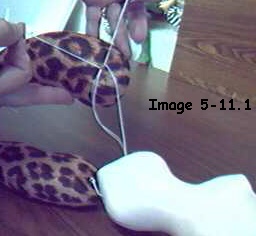
 Image 5-11.1 Cords are OPPOSING. |
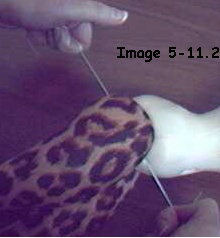 Image 5-11.2 Wrap cords around hands and pull tight! |
Taught by Judi Ward of Judi's Dolls
http://JudisDolls.com
18. Grip the cords coming from the shank in the leg, and actually wrap them around your hands. Notice they come from OPPOSITE sides of the shank. I didn't picture them wrapped around my hands, but they really need to be, to get the grip for pulling.19. Now, pull as hard as you can and then some. Here is where most dollmakers say to themselves HOW AM I SUPPOSED TO TIE THESE NOW!!! IF I LET GO TO TIE, THE LEGS COME LOOSE! THIS IS WORSE THAN PACKAGE BOWS! Then the call goes out to the hubby, or friend to come and hold this "gol darned" thing, which usually results in loose limbs anyway.
Really, you don't need help, if you can keep thinking about keeping the cords taut, and pressing down on the body with one thumb.
|
Image 5-11.1 Cords are OPPOSING. |
Image 5-11.2 Wrap cords around hands and pull tight! |
20. Keeping the cords TAUT, press down on the body with one thumb.21. Still keeping the cords TAUT, quickly wrap the cords in your free hand around between the body and limb twice. As soon as you have wrapped the cords you can let go of the cords and they will stay tight!
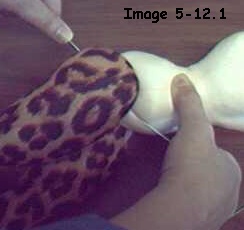 Image 5-12.1 Press on the body with one thumb. |
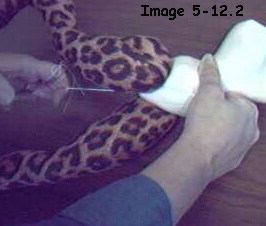
Image 5-12.2 Quickly, wrap the cords between the body and the limb. |
22. Now tie the cords. (Remember the nurse's knot, which makes an automatic square knot)I always tie one square knot in the front, and then take the cords to the back and repeat.
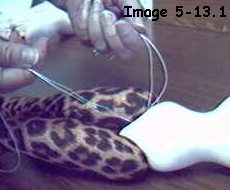
Image 5-13.1 The cords are wrapped, and I have let up on the pulling. The legs stay tight. |
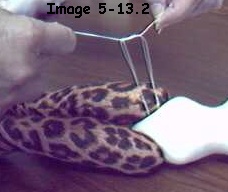 Image 5-13.2 Tie a square knot in front. |
23. Tie a square knot in back.24. Cut the cords close to the fabric. Don't cut way down next to the knot. Leave a little cord. You can tuck it between the limb and body.
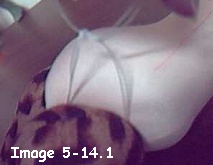 Image 5-14.1 Tie a square knot in back. |
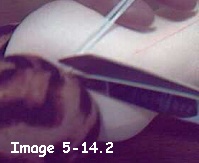
Image 5-14.2 Cut the cords close to the fabric. |
25. Press the hips in at the sides to align the upper legs with the body, and to help narrow the hip area.26. She's all jointed, and very pigeon toed and knock kneed.
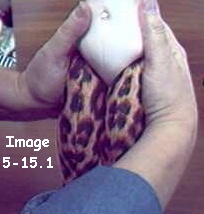 Image 5-15.1 Press in at the sides. |
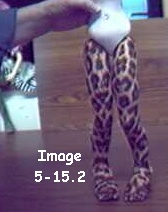
Image 5-15.2 Very pigeon toed and knock kneed. |
With the legs so far forward and low, Whatever! Whatever! actually sits on the backs of her upper thighs. Her crotch doesn't touch the table.
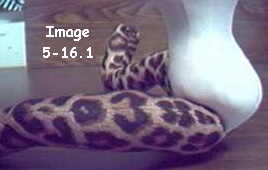 Image 5-16.1 Side view sitting. |
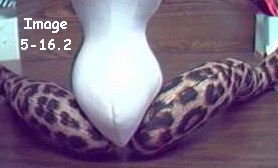 Image 5-16.2 Back view sitting. |
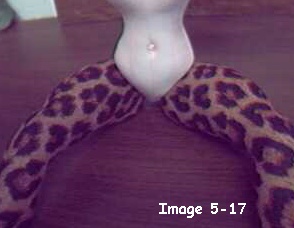
Image 5-17
Front sitting.
If you joint the legs back farther, she will still be pigeon toed and knock kneed as long as you placed the joint buttons forward in the legs.
Following is a picture of where the cords
will go through for the farther back position. About 1/2" from the side
seam.
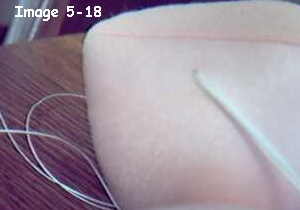
Image 5-18 Cords going in about 1/2" back from side seam. |
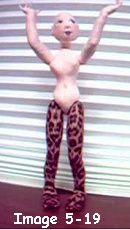
Image 5-19 Full view, jointed farther back. |
Whatever! Whatever! already stands alone, even without shoes!
A note about having your dolls stand alone There is a tendency that I have observed in classes for the dollmaker to push down on the doll to get her to stand. This only results in bending her legs and never works!
The only thing you do is GENTLY set her on a flat surface, press on her FEET if she doesn't have shoes on yet. This flattens the feet some.
Tip the body forward or back, whichever is needed, to set the center of gravity and your doll will stand. Remember, pressing down on the whole doll will only bend her legs.
Sometimes a doll is stuffed with such rounded foot bottoms that she just won't stand til she has shoes on. Don't feel bad if that happens. Happens to the best of us!
I told you I would show you how to use the double pointed needle to make one step a little quicker.
1. What you do is When you are getting ready to put the SECOND limb on, put the point that is near the eye through the shank of the button in that second limb.2. Put it only half way through. Leave the needle in place!
 Image 5-20.1 Put the eye end of needle through shank. |
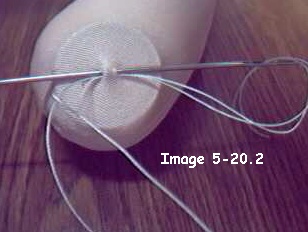
Image 5-20.2 Push it only 1/2 way. Leave the needle in place! |
3. Take the cords out of the eye.4. Now, put the other 2 cords through the eye.
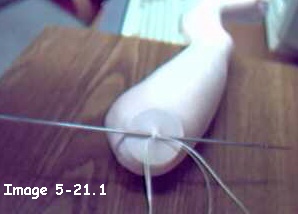 Image 5-21.1 The needle is still in place. The cords are out of the eye. |
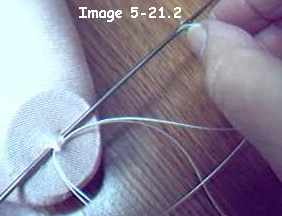 Image 5-21.2 Now put the other 2 cords through the eye. |
5. PULL BACK on the needle. It will bring the other cords out the opposite side, and you will have OPPOSING cords.6. Tighten and tie just like for the other way.
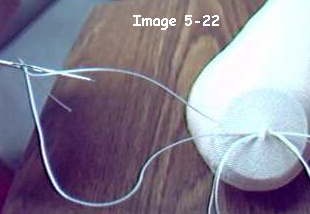
The benefit of this method is first it eliminates the chance of having your needle go through the "twists" of the cord when you take the second set of cords through. When that happens it sometimes breaks a strand of the cord or makes it impossible to even get the cords to pull through.
If you don't want your doll to be at all pigeon toed and knock kneed, simply place the joint buttons in the center of the hip area and joint the legs the 3/4" back from the seam. She will stand with the slight bend to the knees, but will not be pigeon toed and knock-kneed.
For jointing the arms, you use exactly the same methods as for the legs, except of course the placement!
I am not going to repeat all of the directions, but will show you some No! No! and Yes! placement pictures.
Try to go through the fabric just to the side of the actual seam. When you go through the seam itself, you may break threads in the seam.
You will again have to twist back and forth
as you push the needle through. For the wider shoulder area, it takes a
little longer.
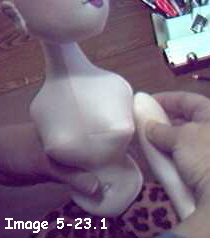 Image 5-23.1 NO! |
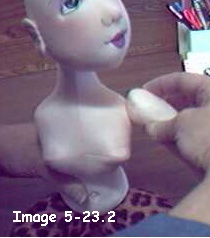 Image 5-23.2 NO! |
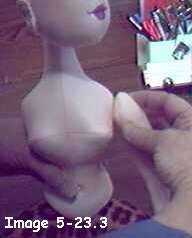
Image 5-23.3
YES!
Whatevers head is already on the previous pictures. Guess I got ahead of myself.
What a mess of pens, colored pencils and
"stuff" behind her!
Judi Ward
Judi's Dolls
http://JudisDolls.com

