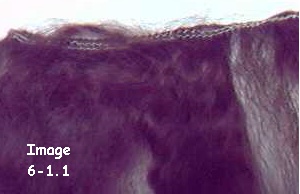
 Image 6-1.1 The thin area is on the right. |
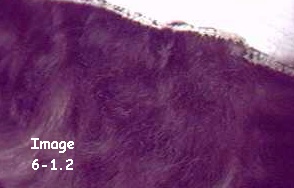 Image 6-1.2 The thin area is cut and then overlapped. |
Taught by Judi Ward of Judi's Dolls
http://JudisDolls.com
Whatever! Whatever! was designed to have wonderfully soft and fluffy wefted mohair for hair. For smaller dolls wefted mohair is usually too bulky, and sometimes for hairdos that are left loose and hanging down it is hard to cover the wefting, but for the ponytail styles on Whatever! Whatever! it works great! With styling care it can also be left down.
You can also make her hair from soft, fluffy yarn. The yarn I will demonstrate with is an acrylic and nylon yarn called Sparkle Spun. It is fuzzy and has glittery fibers in it. I have lots of other fuzzy yarns, some mohair, some synthetic, but I liked the sparkle in this one.
What you want to look for is a fuzzy yarn. The fiber content doesnt matter.
Regular sport yarn looks to "yarny" for this doll. The fuzzy yarns look more like hair.
Machine knitting yarns are wonderful too. They are much finer and really look like hair.
They come in big cones and are available at yarn shops that cater to machine knitting. I have also found many cones at thrift shops. I dont have any fluffy machine yarn right now though.
A web site that has the machine knitting yarn is http://www.brightmeadowfarm.com I am not associated with them, but they have been a good source for the other classes.
Lets talk about Wefted Mohair .If you buy the seconds, (sometimes even in the firsts) there may be little places where the wefting is not even and the "hair" may be thin. For the way we are using it, that doesnt matter. You can just cut it in those spots, and overlap the wefting a little to keep the thickness of the hair regular as you glue the hair onto the head.
In the picture below, the wefting is thin on the right side. I overlapped it in the next picture.
You can "fix" all of the strip before you begin applying the hair if you want to, but I usually do it as I go along, just cutting, overlapping and gluing as I go.
To fix it before applying the hair, simply
glue or stitch the overlapped areas.
|
Image 6-1.1 The thin area is on the right. |
Image 6-1.2 The thin area is cut and then overlapped. |
Now look really closely at your strip of mohair. One side will have little short hairs near the wefting. While we are putting the hair on, the side with the short hairs will always be facing you. This is really important, because if you face that side down, against the dolls head, when you flip the hair into place, those short hairs will be showing and will create a very messy look around the hairline.
The side with the short hairs will actually look a little matted near the wefting.
In the picture below, I have lifted some of the matted short hair up so you can see about how long it is. It is about 1 ½" long and very uneven on my piece of mohair.
Just be aware of it and find it before you begin gluing your dolls hair on.
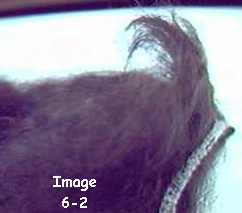
Image 6-2
Some of the short hair lifted up for you
to see
what to look for.
For Whatevers hair you will probably use all of the approximately 1 yard strip of hair.
If you overlapped places it is fine. You will still have plenty. Dont worry if you dont use it all though. You didnt do anything wrong if you have a piece 6" to 10" long left. For the one pony tail style, you usually do have some left. For the 2 pony tail style you usually dont.
I use a LOW TEMP glue gun for applying the wefted mohair. If you are adamantly "anti hot glue" you can use Tacky glue. If you are adamantly "anti glue" you can sew the hair on.
With the Tacky glue you will have to do a small area, and then let it dry before proceeding. If you try to do the whole hairdo at once the Tacky glue will let go in places and you will have a mess.
If you choose to sew the hair on, use thread to match the hair, and sew it on with very short back stitches. The placement will be the same for sewn on hair as for glued on hair.
I use the LOW TEMP hot glue because I can move right along and finish the hairdo. It looks like rooted hair when it is done, and this is a set up doll, not a toy, so it isnt going to be left in the hot sun or put in the washer and dryer.
The LOW TEMP glue holds just as well as the very hot glue, and you dont burn yourself. You can press your finger right onto a glued place and mash the hair into the glue with only a very warm feeling to your fingers.
Now, lets get started .First, you need to establish the hairline all around the head. The hairline will go across the forehead, down in front of the ears a little, over the ears, and then down behind them. (un-pin the ears if you havent already) It will go low on the side-backs of the head and go up to just above the neck in the center back.
NOTE***Whatevers head is WEIRD SHAPED from
the side and back. The first Whatever! had a great shaped head back, but
with the addition of the hair, her head was WAY TOO BIG
so I changed it,
so now it is WEIRD! Until you put the hair on.
 Image 6-3.1 WEIRD head back from the side. |
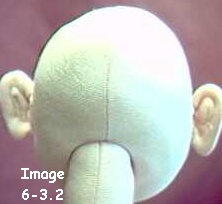 Image 6-3.2 Weird head back from the back. Lookin like a monkey again! |
Following are some pictures of the hairline drawn on freehand. It isnt hard at all. Just be sure that you dont go too far down on the forehead or the side-back.
The front hairline is ABOUT ¾" from
the seam. (picture # 1) I marked with a brown colored pencil. All marks
will be covered with glue and hair.
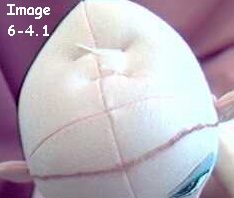 Image 6-4.1 The top hairline is about ¾" from the seam. |
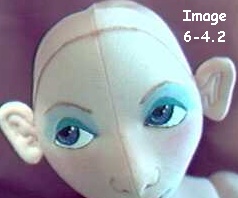 Image 6-4.2 Across the front. Wow! Strange angle for this picture! |
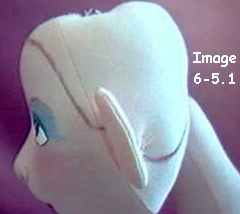 Image 6-5.1 Down the sides and side-back. I glue right over the ear stitching. |
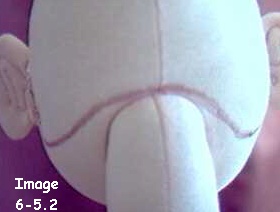 Image 6-5.2 Across the back. Note that the hairline goes only about ½" below the ears and ABOVE the neck. |
2. If you dont feel confidant just freehand marking the hairline, you can use a narrow ribbon to plan the hairline, and then mark ABOVE the ribbon.
Simply start the ribbon in the center front
and pin it down as you go. After you pin it down, draw ABOVE the ribbon.
Pictures follow.
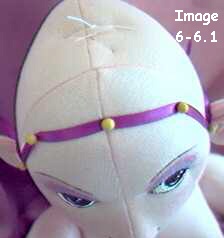 Image 6-6.1 The ribbon pinned in center and side-front. |
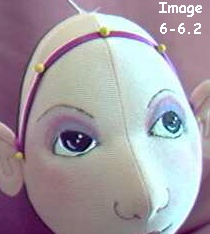 Image 6-6.2 Going down in front of ears. |
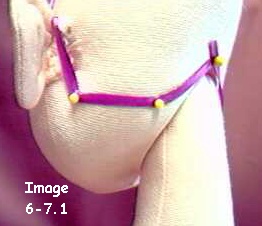 Image 6-7.1 Going down behind ears. |
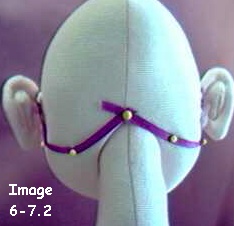 Image 6-7.2 Going down in front of ears. |
|
down to the jaw seam. In hands on classes a number of students wanted to put it way down there. |
3. Draw ABOVE the ribbon. The reason you draw ABOVE the ribbon is so that when you start gluing you will be sure to cover the drawn line with glue, and the hair will still be in the correct place. If you draw below the ribbon, there is a huge chance for the hair to be too far down on the forehead.
4. Remove the ribbon, and you are ready to
start applying the hair just as if you did the hairline freehand.
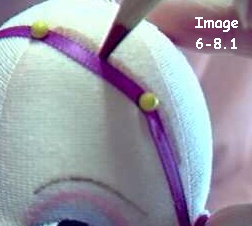 Image 6-8.1 Draw all around with a colored pencil ABOVE the ribbon. |
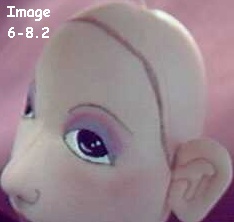 Image 6-8.2 Remove the ribbon. |
Judi Ward
Judi's Dolls
http://JudisDolls.com

