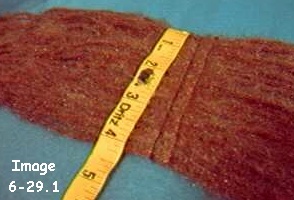
 Image 6-29.1 The yarn is sewn twice. The section is about 4" wide. |
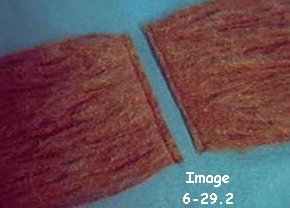 Image 6-29.2 Cut right down the center, making 2 Sewn sections. |
Taught by Judi Ward of Judi's Dolls
http://JudisDolls.com
***Now for yarn hair***
The yarn hair will be applied the same way as the mohair, but you have to prepare it first.
I prefer a soft fuzzy yarn. The pictured yarn is not quite as thick as sport yarn and has fuzzy fibers and sparkly fibers in it. I found it at a thrift store for 50 cents a skien!
1. Measure 1 strand about 22" long off, and then just fold yarn loosely back and forth 50 times. NOTE***If you want a really long ponytail, make the strands longer.
2. Repeat this at least 2 more times to start. You may decide to add extra as you go along, or, you may not use it all. If you have it ready though, you wont have to go back to the sewing machine to make more.
The reason I work in bunches of 50 strands is because it is easier to handle on the sewing machine.
NOTE***If you like to wrap yarn on a cardboard, or if you have a hair loom, use that, but I just go back and forth and catch the yarn in each hand as I go.
It doesnt have to be exact, because you are going to trim it later.
If you tip from side to side as you do this, it is great waist exercise too!
3. Now, cut the loops, lay the yarn out neatly and sew down the center with a very small, tight zig-zag stitch. The sewn section will be about 4" wide. Move over ½" and sew again. Sew over the first rows of stitching a second time to make sure the yarn is sewn tightly.
The yarn has to be "fed" into the machine so it is very close together. If you lay it on the "bed" of the machine, and then put your hands on both sides and "sorta" pull away as you push the yarn under the presser foot, it flattens the yarn so it goes under the presser foot of your machine very easily.
I dont like to put paper or anything down to sew the yarn to, but you can if you wish.
4. After sewing the 2 rows of stitching, cut right down the center between the rows.
What you are making are easily handled sections
of sewn yarn to apply to your dolls head just the way you applied the
wefted mohair.
|
Image 6-29.1 The yarn is sewn twice. The section is about 4" wide. |
Image 6-29.2 Cut right down the center, making 2 Sewn sections. |
5. If you want curled tendrils to sew to the side or anywhere for that matter. Tightly wrap yarn on knitting needles, your finger stuffing fork, chopsticks, etc. and then wet it. Put it in the oven at 200 degrees til the yarn is dry. Take it off and you will have tight curls that stay curled.
NOTE*** These tight curls are great for the
whole hairdo for little dolls.
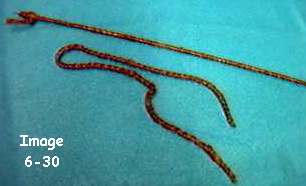
Image 6-30
Some yarn wrapped on a big needle and some
taken off.
6. Now simply mark and apply the yarn just like you did the mohair. I am not going to re-do all of those directions, but here is a head with a yarn ponytail. She is on one of the shoulders, and has no face yet. I think a Southern Belle "look" is appearing.
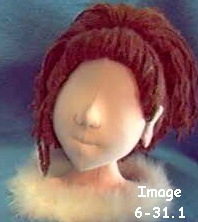 Image 6-31.1 Yarn hair, front view. |
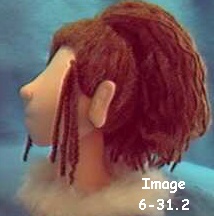 Image 6-31.2 Yarn hair, side view. |
Now, lets finish your dolls face up, with the final touches like perhaps darkening colored pencil eye shadow. The Mod Podge coating on the eyes. The eyelashes. The coating and glitter on the eyelids if desired, and perhaps a little more blush. Perhaps a beauty mark? Freckles?
1. First, paint a coat of Mod Podge over the entire eye ball. You can also use the before mentioned Crystal Lacquer if you have some, or other brands of Clear Gloss coating. I have tried clear finger nail polish, but it tends to yellow after a while.
2. Let the first coat dry and apply a second coat. The Mod Podge will be milky looking until it is dry.
You can hurry the drying with a blow dryer.
For the class I will switch from one doll to another so I dont have to wait for the drying.
I am also doing this so you can see several ideas and finishes. I cant teach just one doll.
Each doll flows into another and then yet another! The flow is the creative energy needed to really make cloth dolls that are yours! I could go on and on! This doll could be a Mermaid..A Flapper A 40s swing dancer A debutante A 60s hippy Oh No! it is driving me nuts!
I have a Bikini Gal here too. She really
turned out tall and thin from Doesuede, and I love her in just her Bikini!
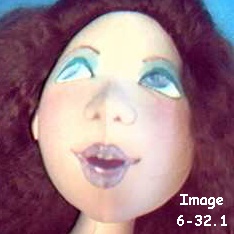 Image 6-32.1 Milky eyes and mouth. |
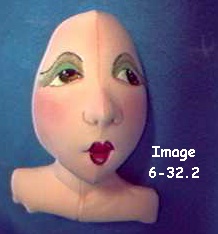 Image 6-32.2 A different head with dry coatings. You cant really see the shine though. Sorry. This bust is going to be a Vamp. |
If my doll has an open mouth, I like to put one coat on the inner mouth and 2 coats on the lips.
3. Once the 2 coats of Mod Podge are dry, you are ready to apply the eyelashes. Now is when your doll will really start to take on a personality!
4. Simply remove one eyelash strip from the package. They are on the plastic with a right and a left. Carefully press the adhesive strip along the thick edge of the upper eye. The paint and Clear Coating make the edge thick, so you have something to press the strip against.
If the strip is too long simply cut the extra
off. I always apply the eyelashes from the inner edge to the outer edge,
and cut the excess off at the outer edge.
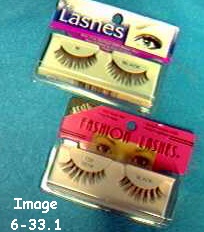 Image 6-33.1 Two brands of eyelashes. Good eyes to Look at on the packages too. |
 Image 6-33.2 Eyelashes on, but not trimmed. |
5. Once in a while a strip wont hold long
enough to get the glue on. In that case, you will need to really press
the glue down and press the eyelashes down too. They will go over the eye
and make your doll look "droopy eyed" Wait for about 5 minutes to let the
glue set a little and then carefully push the eyelashes up off of the eye.
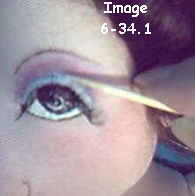 Image 6-34.1 Applying the glue. This set stuck O.K. |
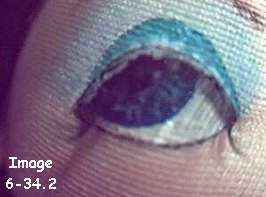 Image 6-34.2 This set had to be pressed down. I will lift it after it dries for a few minutes. Wow! This picture is close! |
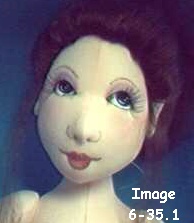 Image 6-35.1 Eyelashes on and glued. This doll looks cream in the picture. She is actually pale peach. My weird lighting! |
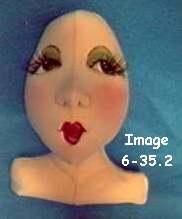 Image 6-35.2 The Vamps eyelashes are on and glued. |
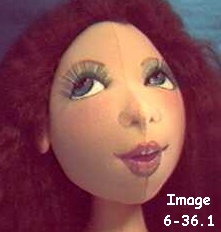 Image 6-36.1 The doll with the teeth. Eyelashes on and glued. |
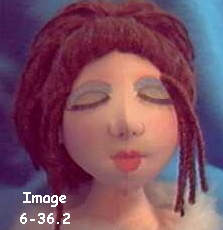 Image 6-36.2 Hmmmm? An idea is forming for this bust. The eyelashes make closed eyes. The whole face is colored pencil. |
6. Now look at your doll and see if you think she needs more blush on her cheeks. Darker colored pencil eyeshadow? Do these little touch ups and then we will glitter the eyelids if you wish.
7. I am going to do it on the Vamp bust first. You will need some very fine glitter. I have Ultra Fine Gold here at my desk right now, so that is what I am going to use.
Apply Mod Podge on the part of the eyelid where you want the glitter.
8. Simply brush Mod Podge on the eyelids and sprinkle the glitter over the wet Mod Podge.
Let it dry and then brush the excess off.
Easy!
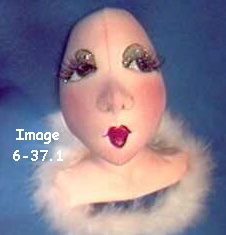 Image 6-37.1 The Vamp with glitter. |
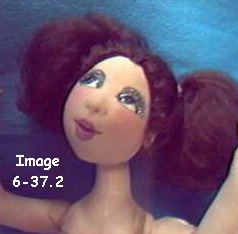 Image 6-37.2 I went back to 2 ponys when I found out I was going to get a real casual outfit in chapter 8. |
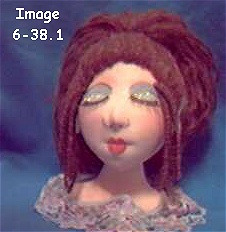 Image 6-38.1 The Southern Belle with glitter. |
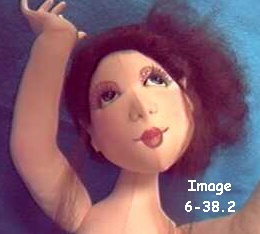 Image 6-38.2 Ive got my glitter too! |
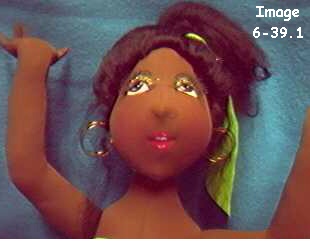 Image 6-39.1 |
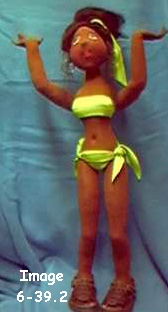 Image 6-39.2 |
And Who is this? Its the Bikini Babe. Gold glitter eyelids, dark golden tan Doesuede. She may never get any other clothes!
This Bikini doesnt have a stitch in it. It is just cut from spandex and tied on.
Ill put the quickie pattern in chapter 8 too.
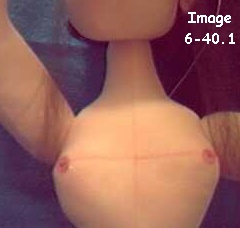 Image 6-40.1 Color in nipples with colored pencil. |
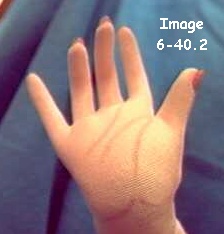 Image 6-40.2 Draw in the hand lines with colored pencil. Notice the fingernails? That is Crystal Lacquer. |
The WHATEVER! WHATEVER! look, stance and personality should be coming out now!
OR>>>>Did your Whatever! Whatever! take a turn and become someone else?!
Thats all for this chapter. Lots to do here! There are more ideas bubbling in your head too Ill bet!
NOTE***With some experimenting with the different Spandex fabrics, I have found that some just dont stretch enough to make the tights in the length that the stocking pattern is in your pattern. In the next chapter I will show you how to adjust the pattern before cutting the spandex.
If you are making the stockings, rather than the tights, the pattern works fine. Some stockings just dont pull up as far.
My old spandex, from the days when I was skating competitively was all really stretchy! A lot of the new spandex is O.K. one way but barely gives the other way. Especially the great metallics and glittery ones.
Dolly Hugs, Judi
Judi Ward
Judi's Dolls
http://JudisDolls.com

