Whatever!
Whatever!
Ó 1999
Taught by Judi Ward of Judi's Dolls
http://JudisDolls.com
Chapter 6 Part 3
THE HAIR, both mohair
and yarn.
We
will also be doing the eyelashes and the clear coatings in this chapter.
~ Part 1 ~ Part
2 ~ Part 3 ~ Part 4 ~
Now
lets do the 2 pony tail hairdo.
1. First, glue or sew the hair all around
the FIRST time exactly like for the 1 pony tail hairdo. Just the first
time around though.
2. Now you have to do the center part. This
takes a change in thinking. Everything will be done in reverse, just like
for the first time around, but it will also be on the opposite side of
the center of the head from what your brain will try to tell you.
Again, I am going to mark it, so you can
see it. This isnt at all hard, just confusing for a minute. You dont
have to mark it, but it helps for this center area.
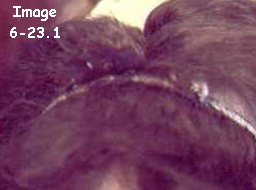
The brown band starts at the center seam.
(part) The black is where the wefting goes.
You can see the center seam (part) in the
photo.
The hair will hang over the LEFT side of
the head, while you are gluing the RIGHT side hair. After it is glued,
you will flip it over the right side.
4. When the strip reaches just past the wefting
of the strip that goes around the head, cut it off.
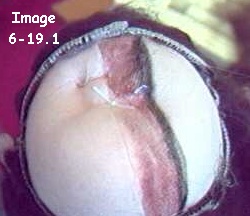
Image 6-19.1
The brown band and black line for glue
location.
|
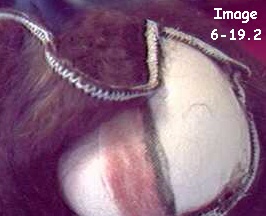
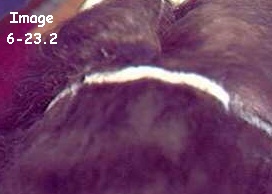
Image 6-19.2
How to press the entire section down.
Spread the glue and press the hair into
it.
NOTE the location of the hair
and the seam.
Glue the hair down all the
way from the front to the back.
|
5. The hair is glued from the front to the
back, leaving a bald spot on the right side of the head.
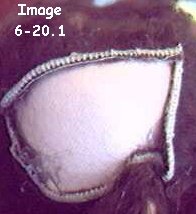
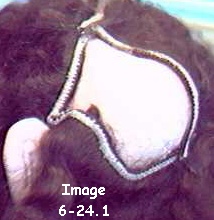
Image 6-20.1
The hair is glued to the RIGHT side, and
still
hanging over the left side. It leaves a
bald
spot on the right side.
|
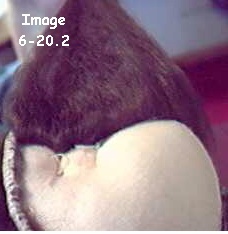
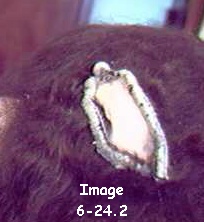
Image 6-20.2
Lift the hair to be sure you have
covered all the marks and the hair is tight
against the seam. When you pull the hair
down
over the right side the bald spot is on
the left.
|
4. Now, mark the other side if you feel the
marking keeps you on track. Pull the hair that is already glued in place
down hard and pin it down on the right side so it doesnt get up in the
glue for the left side.
5. Apply the glue as you have been doing
all along, In the picture I started at the back.
Be careful not the get glue all over the
hair that is already glued down. That hair is ½ of the center part
hair, and will be showing on the finished hairdo.
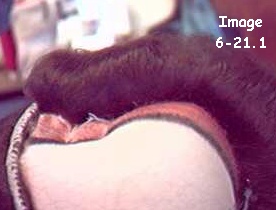
Image 6-21.1
Pull the right side hair down and mark the
glue location on the left side.
|
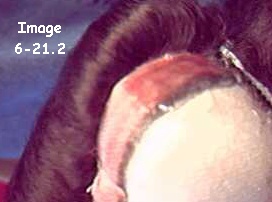
Image 6-21.2
Apply the glue carefully.
Note the already glued hair
folded back from the part.
|
5. Press the next strip of hair into the
glue from back to front as in the picture (or Vice versa) When you reach
just past the wefting, cut the strip off.
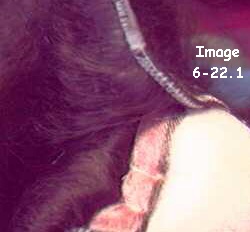
Image 6-22.1
Glue this side down all the way from the
wefting at the front to the wefting at
the back.
|
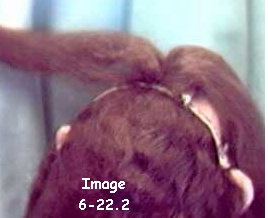
Image 6-22.2
Now, both sides are glued and pulled
down
to their correct position, forming the part
for the picture I have lifted them up
a little so you can see the hair on each
side, and the wefting all around.
All that hair in front is hanging over
the face.
|
6. Right in the front, for about ¾"
on each side of the part, the hair is almost always a little thin. I add
an extra strip right over the wefting, with the hair hanging over the face.
This way, when you pull the hair back and
divide it in the very front for the center part there is plenty of hair
to cover all of the wefting. With dark hair, that has been wefted with
light thread, I will use a permanent marker and color the wefting there
too.
7. Now you need to fill in the bald areas
on the right and the left sides, under the hair that goes down the center.
8. You simply glue hair all around in those
areas again, just like you did for the 1 pony tail hairdo. One more time
around is usually enough, but if you desire, you can fill in the little
spot left too. Of course, do both the right and the left sides.
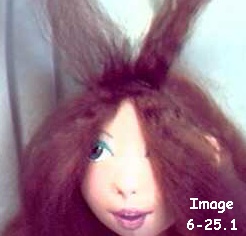
9. Now "finger comb" and "needle comb" the
hair up and to each side, to make a pony tail on each side. You will lose
some hair while doing this and you will feel like this mess of hair will
never be arranged
but
keep at it and you will soon have it under control.
I promise!
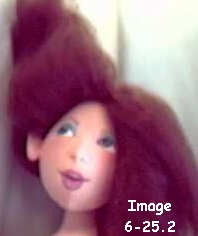
10. You may need some help to tie the ponytails
in place. One person to hold them and one to tie. Dont tie them real tight
to the head. Leave the hair all around kind of "poufy". It makes a much
nicer "look".
Sometimes your doll wont want ponytails
at all! Not one and not 2. In that case, you can arrange either the 1 ponytail
or the 2 ponytail hairdos into a long loose down style. The front has to
be pulled back though.
10. Simply needle comb some more and re-arrange
the hair. Pull the front hair towards the crown and tie it there. At first,
due to all the fussing and combing the hair will be fluffy and bushy.
11. Carefully wet your hands with warm water
and keep scrunching it with your fingers to put some of the curl back.
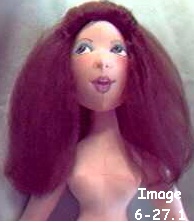
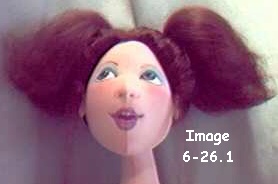
Image 6-27.1
The hair down with just the very front
tied back. The hair is quite bushy.
|
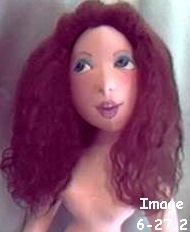
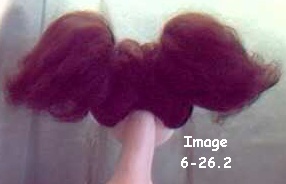
Image 6-27.2
The hair has been wet and crimped.
|
I havent decided yet if the hair will be
left down, or be put up after dressing. It will be a surprise!
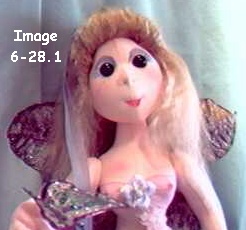
Remember Me? I wanted my hair down too.
Mine is pulled up from just in front of the
ears, with little strands left down.
Judi made me into a "Giants Fairy", since
I am 24" tall. Giants need to have a fairys too!
My wings are real dried leaves. They are
sprayed with several coats of clear acrylic spray and sprinkled with glitter.
They are very fragile.
I have a ribbon tied around my bust, (the
nipples are drawn with colored pencil) and silk flowers glued up my tummy
from my silk "handkerchief" skirt to the center of my bust.
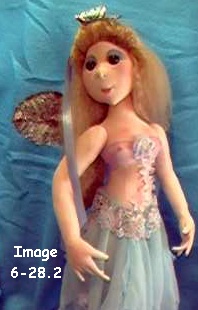
The handkerchief skirt is made by cutting
6 to 8, ten inch squares of soft washed fabric like sheer silk. Pick each
piece up by the center and then pin it to the dolls body. Now take a piece
of lace and wrap it around the body over the pins. Pin each piece of silk
to the lace band. Take it all off and sew the tips of the silk to the band.
Put the "skirt" on and sew it together in the back. Sew or glue some silk
flowers here and there around the skirt too.
Fairys dont wear panties, so you get off
easy here!
Go
to Chapter 6 - Part 4
Judi Ward
Judi's Dolls
http://JudisDolls.com


| Back to Classroom |
Copyright Notice: All pages and graphics are copyrighted by
the Internet Visions Company and/or instructor. You may print these out for
the use of the class only. All other uses or distributions are forbidden.
Crafty College and The
Doll Net are divisions of the Internet
Visions Company.
© 1997-2003, Internet Visions Co. All rights reserved.
All trademarks are owned by Internet Visions Company.